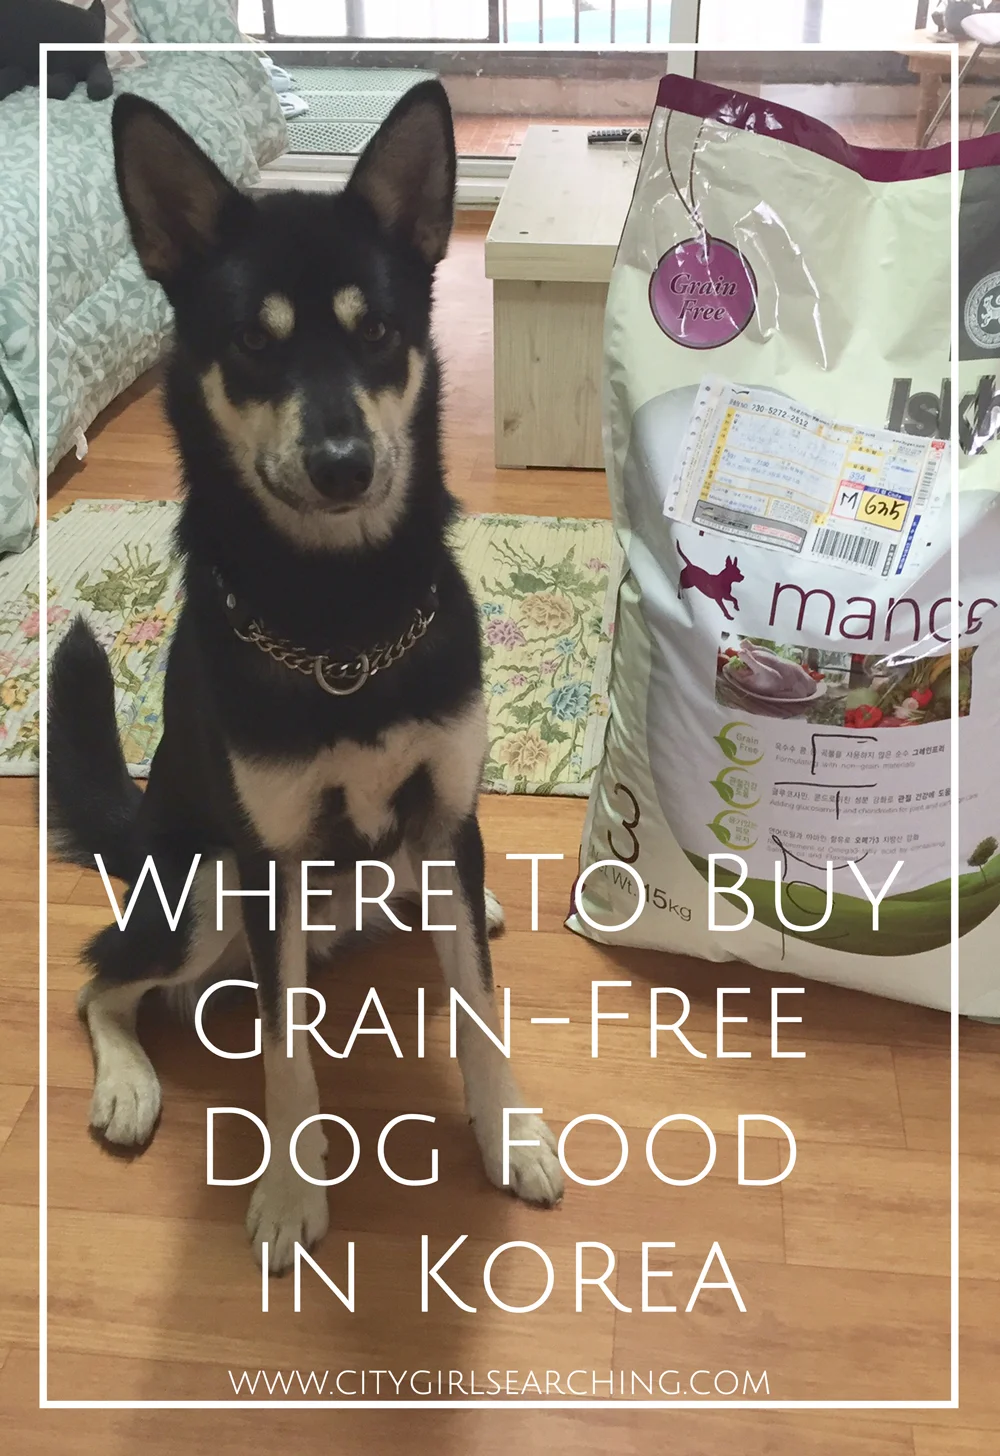
iskhan dog food: Where to buy Grain Free Dog Food in Korea

Were to buy grain free dog food in Korea Iskhan

Owning a dog in Korea has had it's challenges, one of them being trying to find a good quality, grain-free dog food that doesn't cost the earth. I am so happy to say that I have found a local Korean brand of dog food that is great quality at a fantastic price.

If you're looking for a really good site that reviews god food, head over to Dog Food Advisor. They rank dog foods from 1 to 5 star, and recommend feeding your dog food that is over 4 stars and above. Dog Food Advisor do thorough testing and have all the info you need to know more about the different brands of dog food.

Why Grain Free dog food? 

Grain-free dog food has become a trend in the dog food industry (just like the term 'Organic' is for human food). Even though a lot of companies are jumping on the bandwagon to market their food as grain free (and charge a fortune!) I do choose to feed my dog a grain free food. Most of the popular (ie cheap) supermarket brands of dog food contain a lot of nasty fillers in their formulations. This means that you think you are buying a good quality food with lots of natural ingredients, when instead the proteins are last on the ingredient list, with a filler like corn being at the top of the list. Not only are a lot of dogs allergic to wheat (just like a lot of people) but there are lots of other nasty things inside those cheap foods. That's why I choose to feed Shadow a grain free formula. Another plus to grain free, high quality food is that your dogs waste is a lot smaller, 'tidier' and less smelly. If your dog is eating a poor quality food with lots of fillers, they tend to have those huge, smelly poo's as their bodies aren't absorbing the good stuff from the food (because there isn't much goodness actually in the food).  The smaller and more 'compact' your pups poo, the more nutrients he is absorbing. That's a good way to see if the food you are feeding your dog is good for him/her.

Grain free dog food in korea

Where to buy dog food in Korea

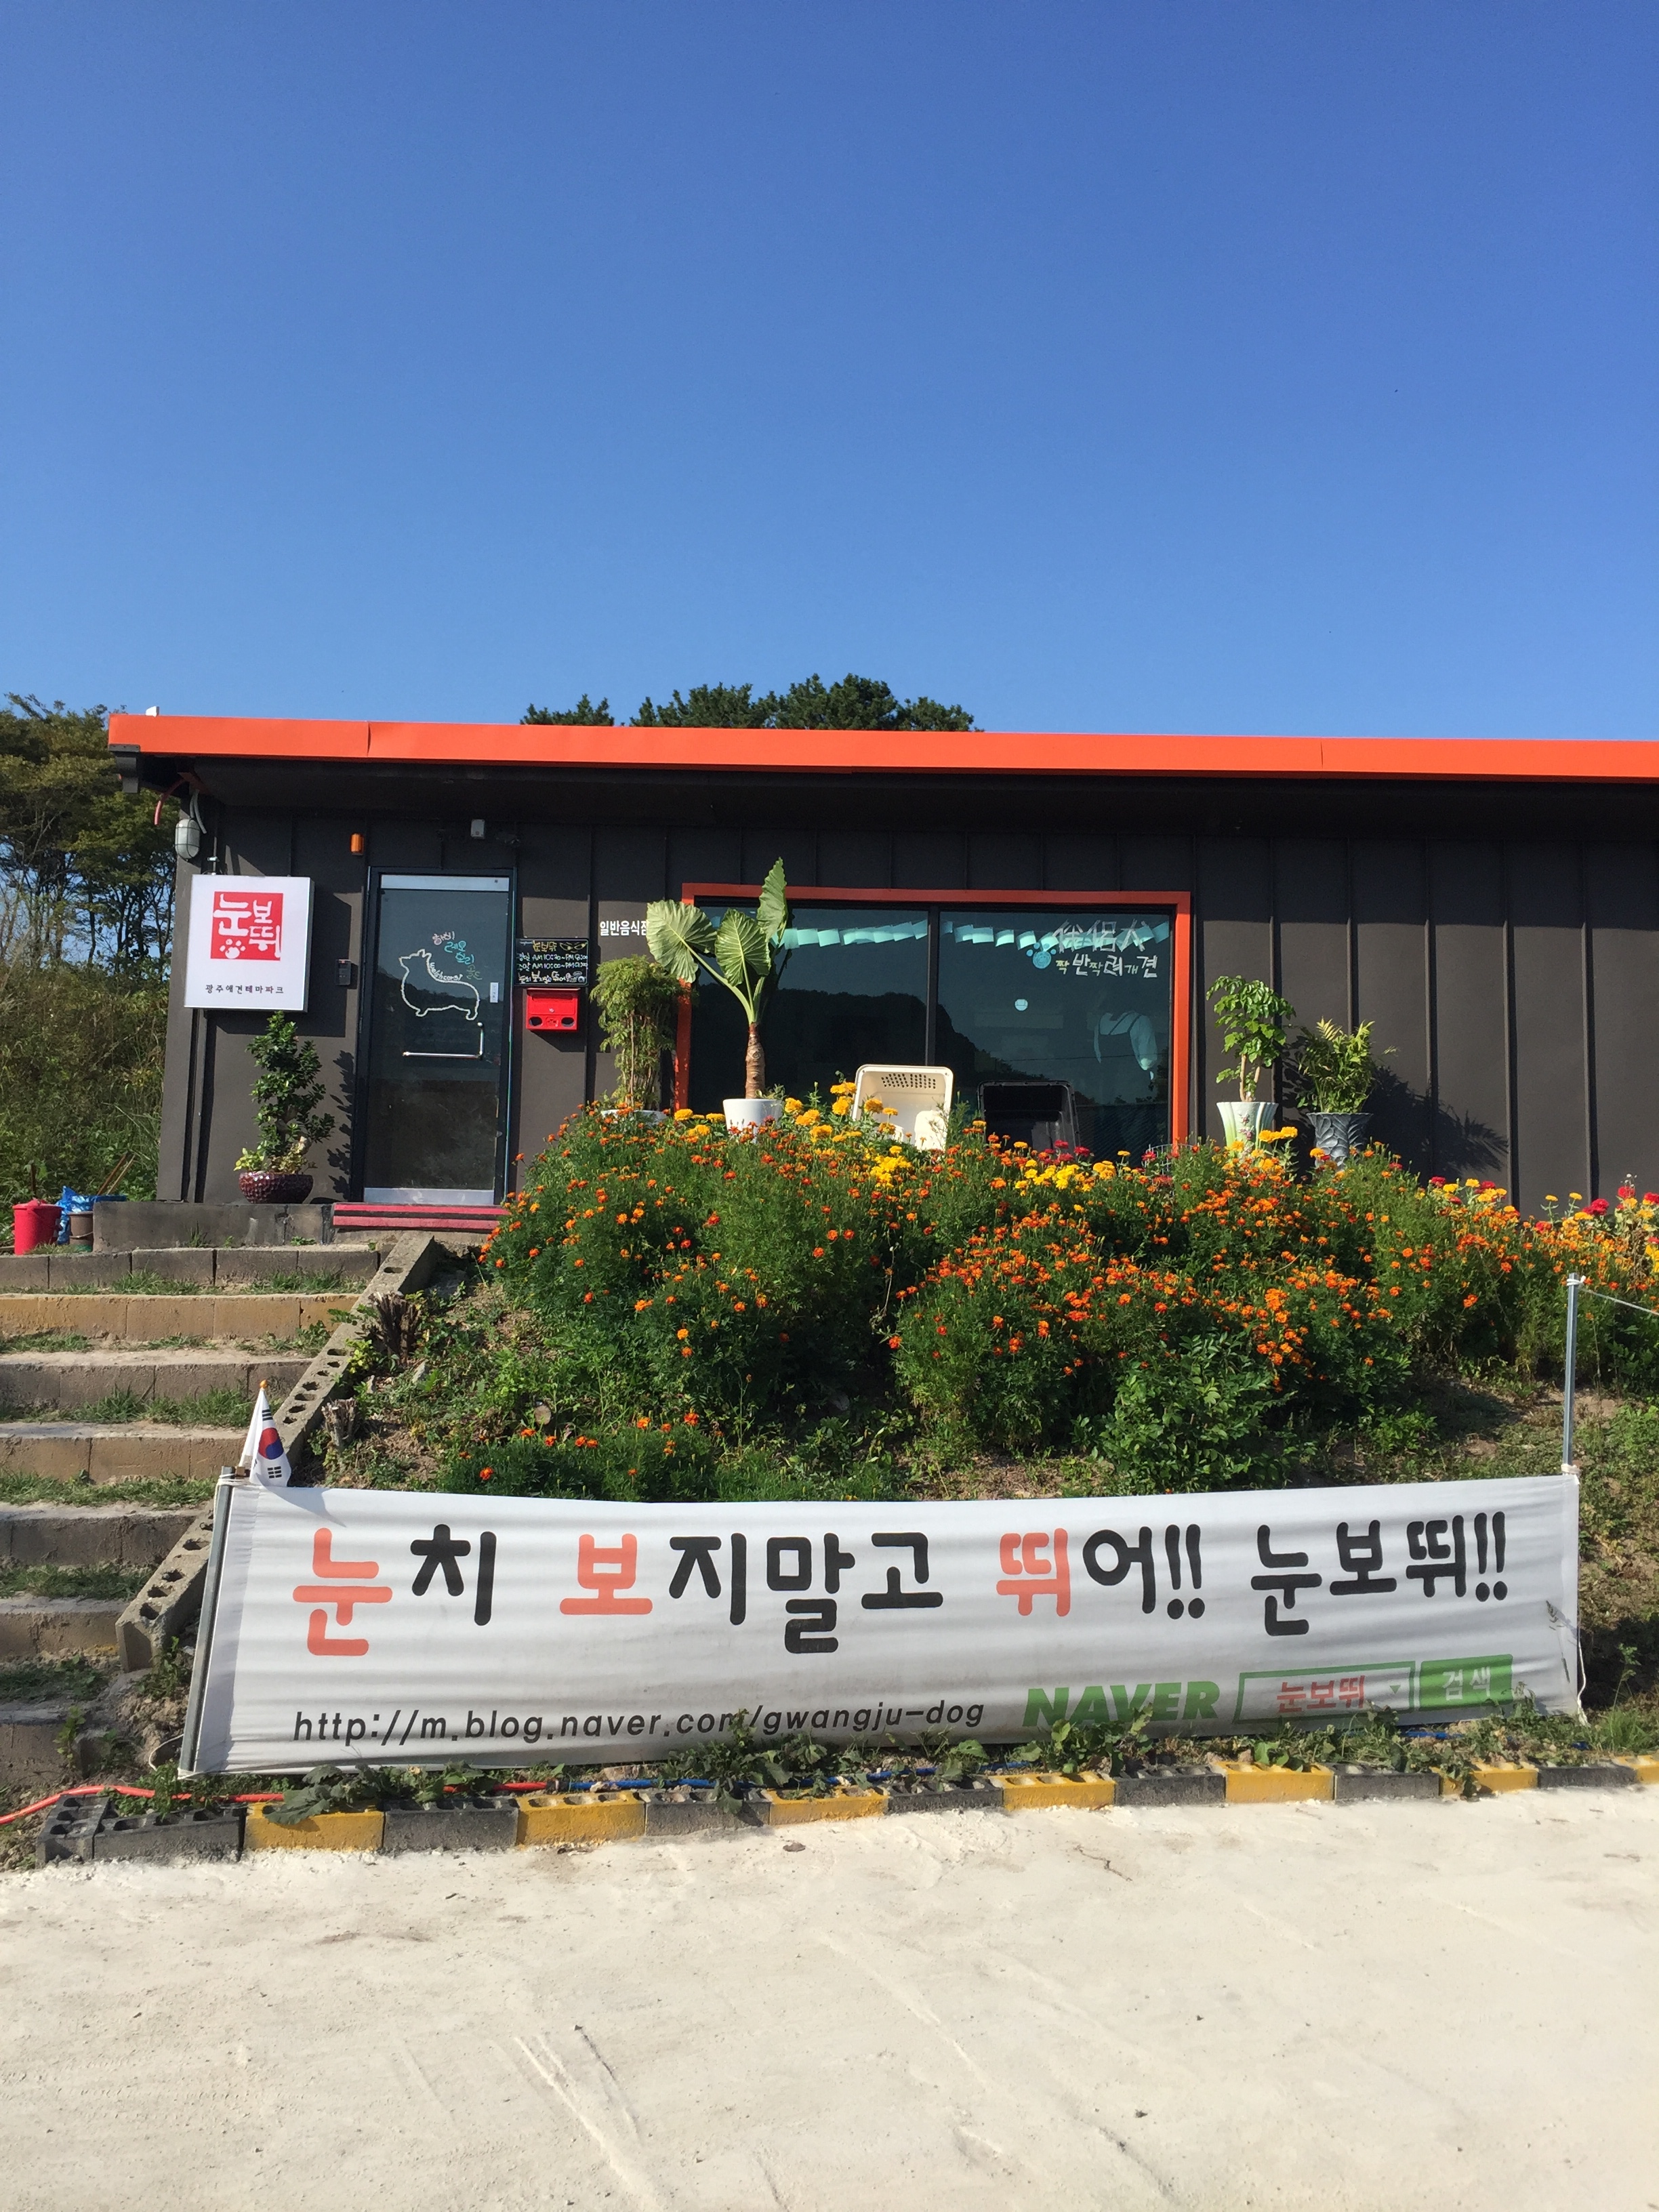
So the next biggest challenge, after finding a dog food you think will be suitable for you dog, is to find out if it's available in Korea. A lot of brands ARE available in Korea but you WILL pay a fortune for them, due to the high cost of companies importing and shipping them into Korea. A lot of vets and big pet stores stock the higher quality brands, and the big marts like Emart & Lotte Mart sometimes stock certain brands too. But as I don't stay anywhere near any one of those kind of stores I have had to buy online. 

Iskhan grain free dog food in korea black tan jindi

Before I found out about Iskhan, I was buying Taste Of the Wild online. Taste of The Wild is one of the brands of grain-free, high quality food that is recommended by a lot of dog owners. TOW (Taste of the Wild) is an American brand, and so the prices here in Korea are sky high. I fed Shadow the Salmon & Sweet Potato puppy formula for the first year which cost me W90 000 for a 13.5kg bag which lasted about 2 - 3 months. I just accepted that if I wanted to feed him a good quality food, it was going to cost more. I did also try the Kirkland Signature Nature's Domain brand from Costco (which I had read is actually made by the same company as Taste Of the Wild and supposedly has a very similar formulation) but I wasn't a big fan of it. It was just about half the price (about W40 000 for a 15kg bag) but we don't stay anywhere near a Costco, and the one trip we did to Costco to track down the food, they didn't have any in stock. So I reverted to paying the exorbitant cost of TOW. 

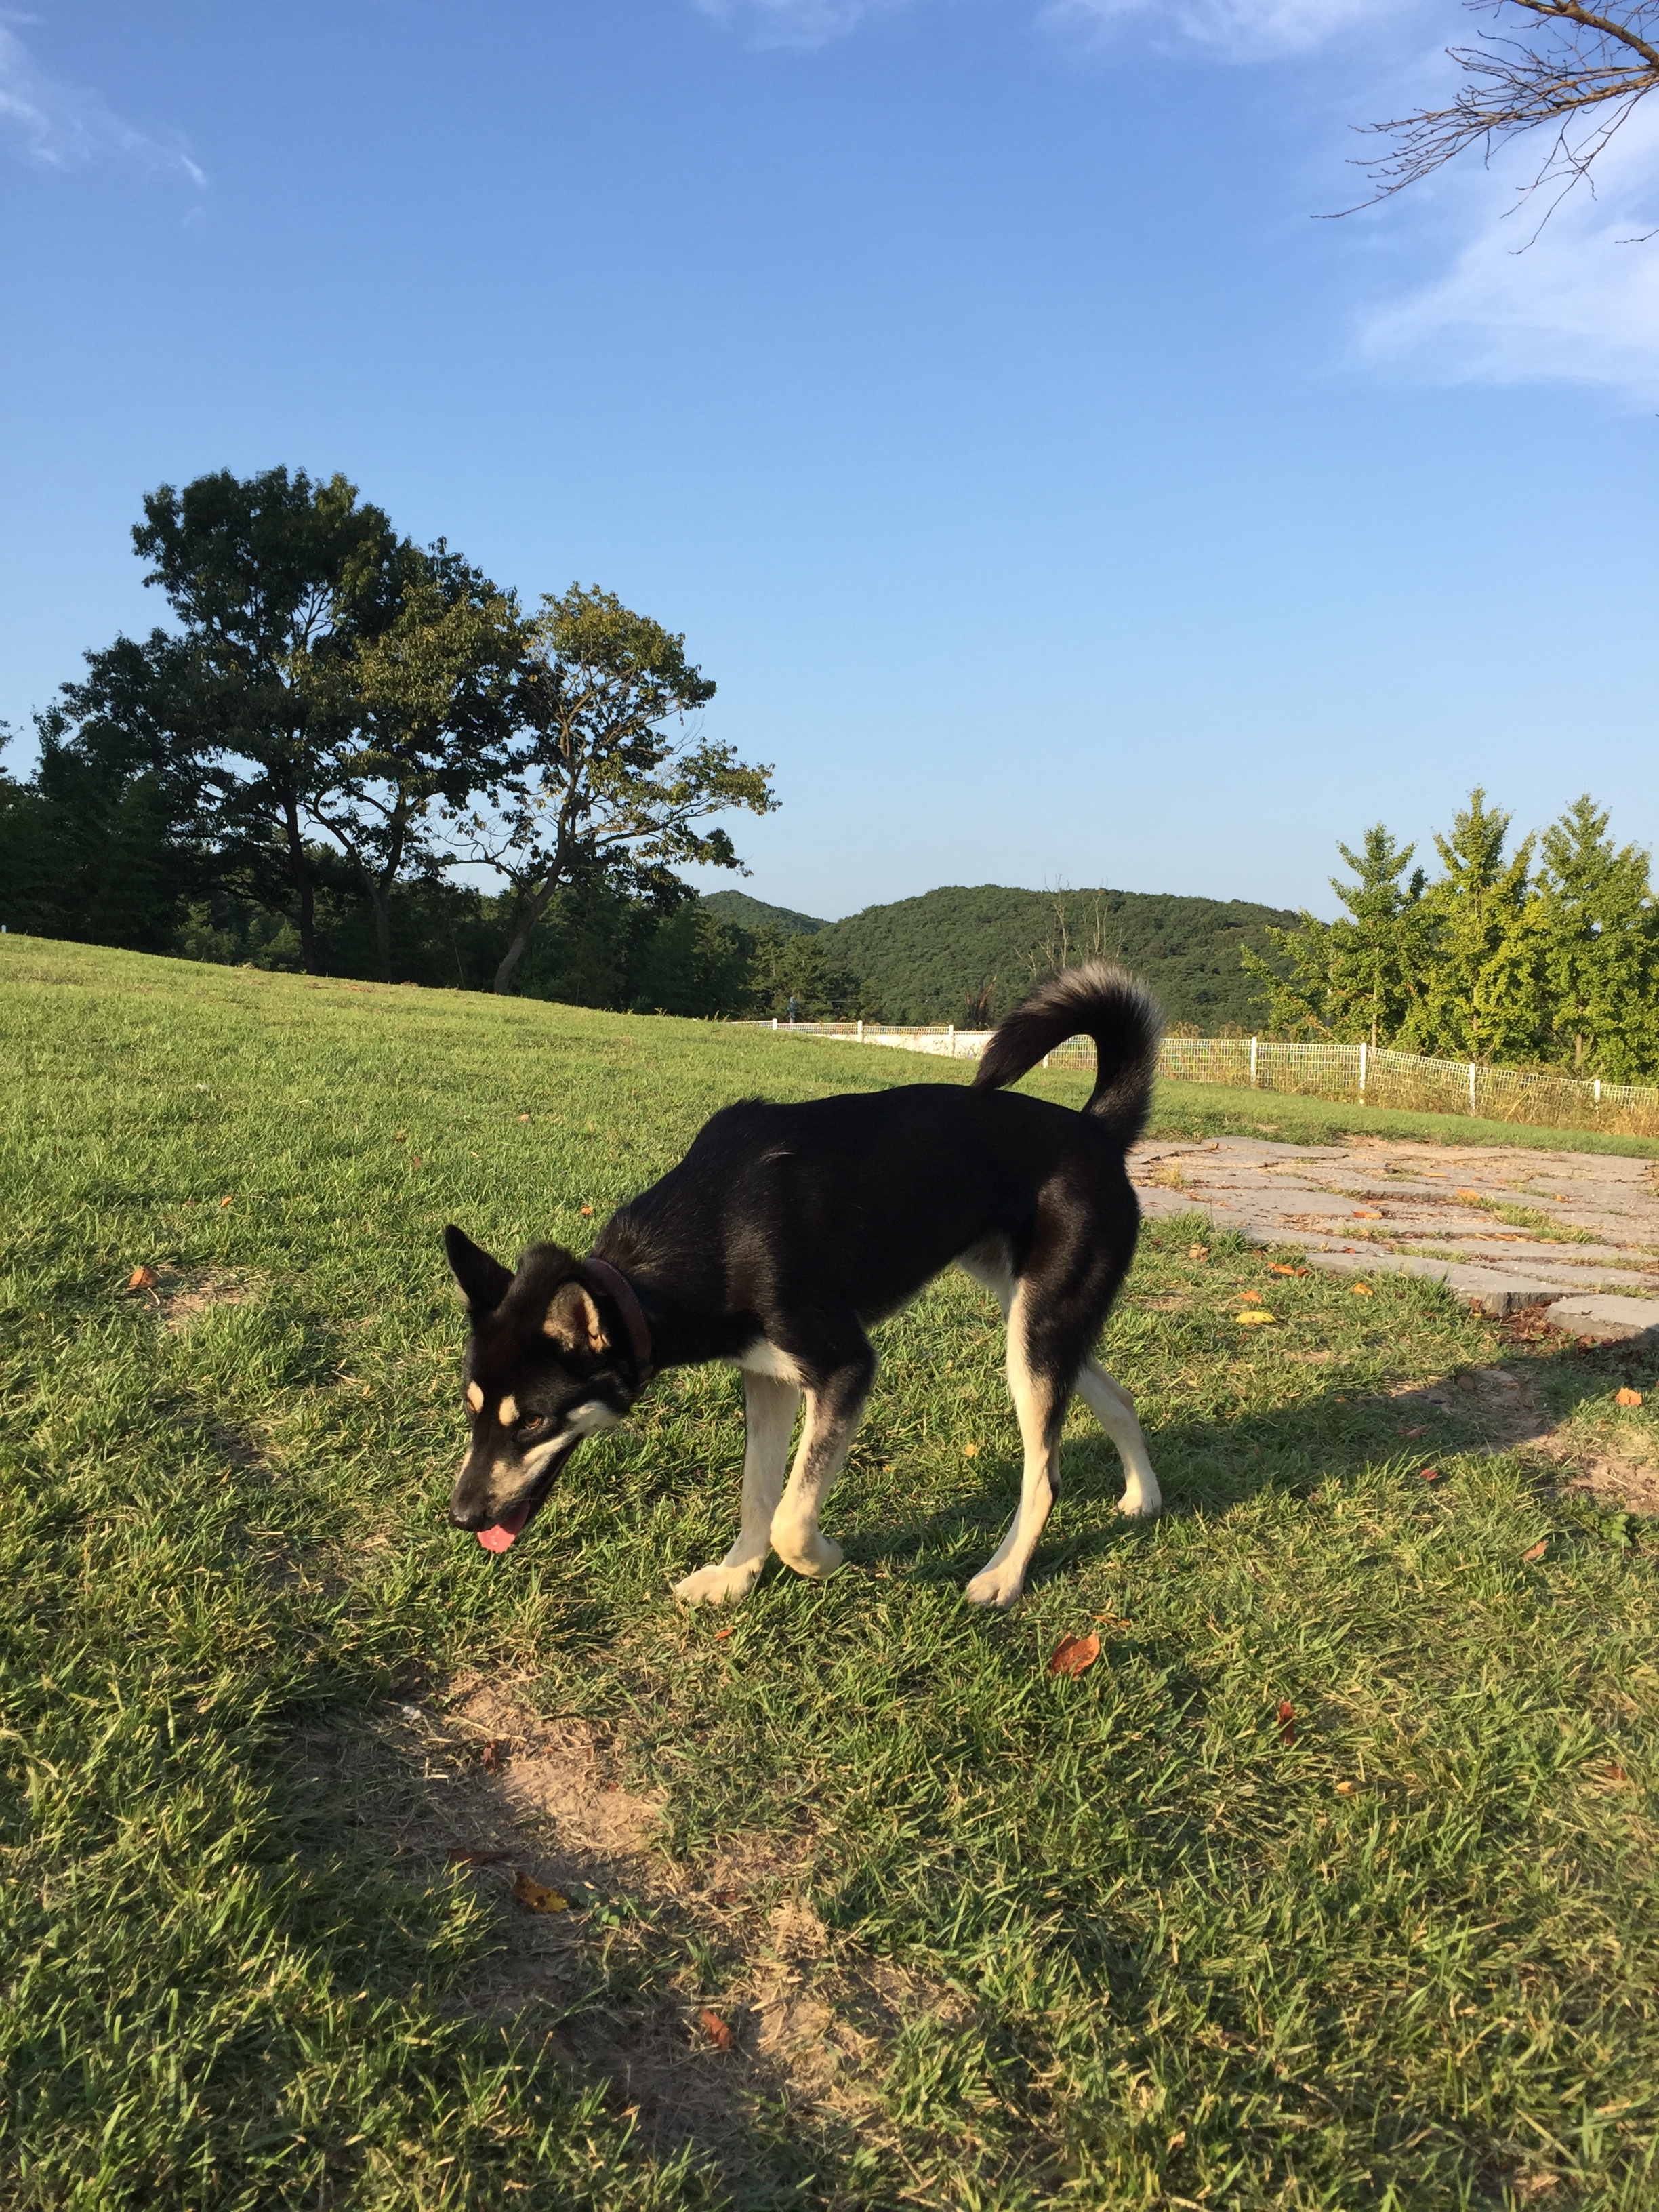
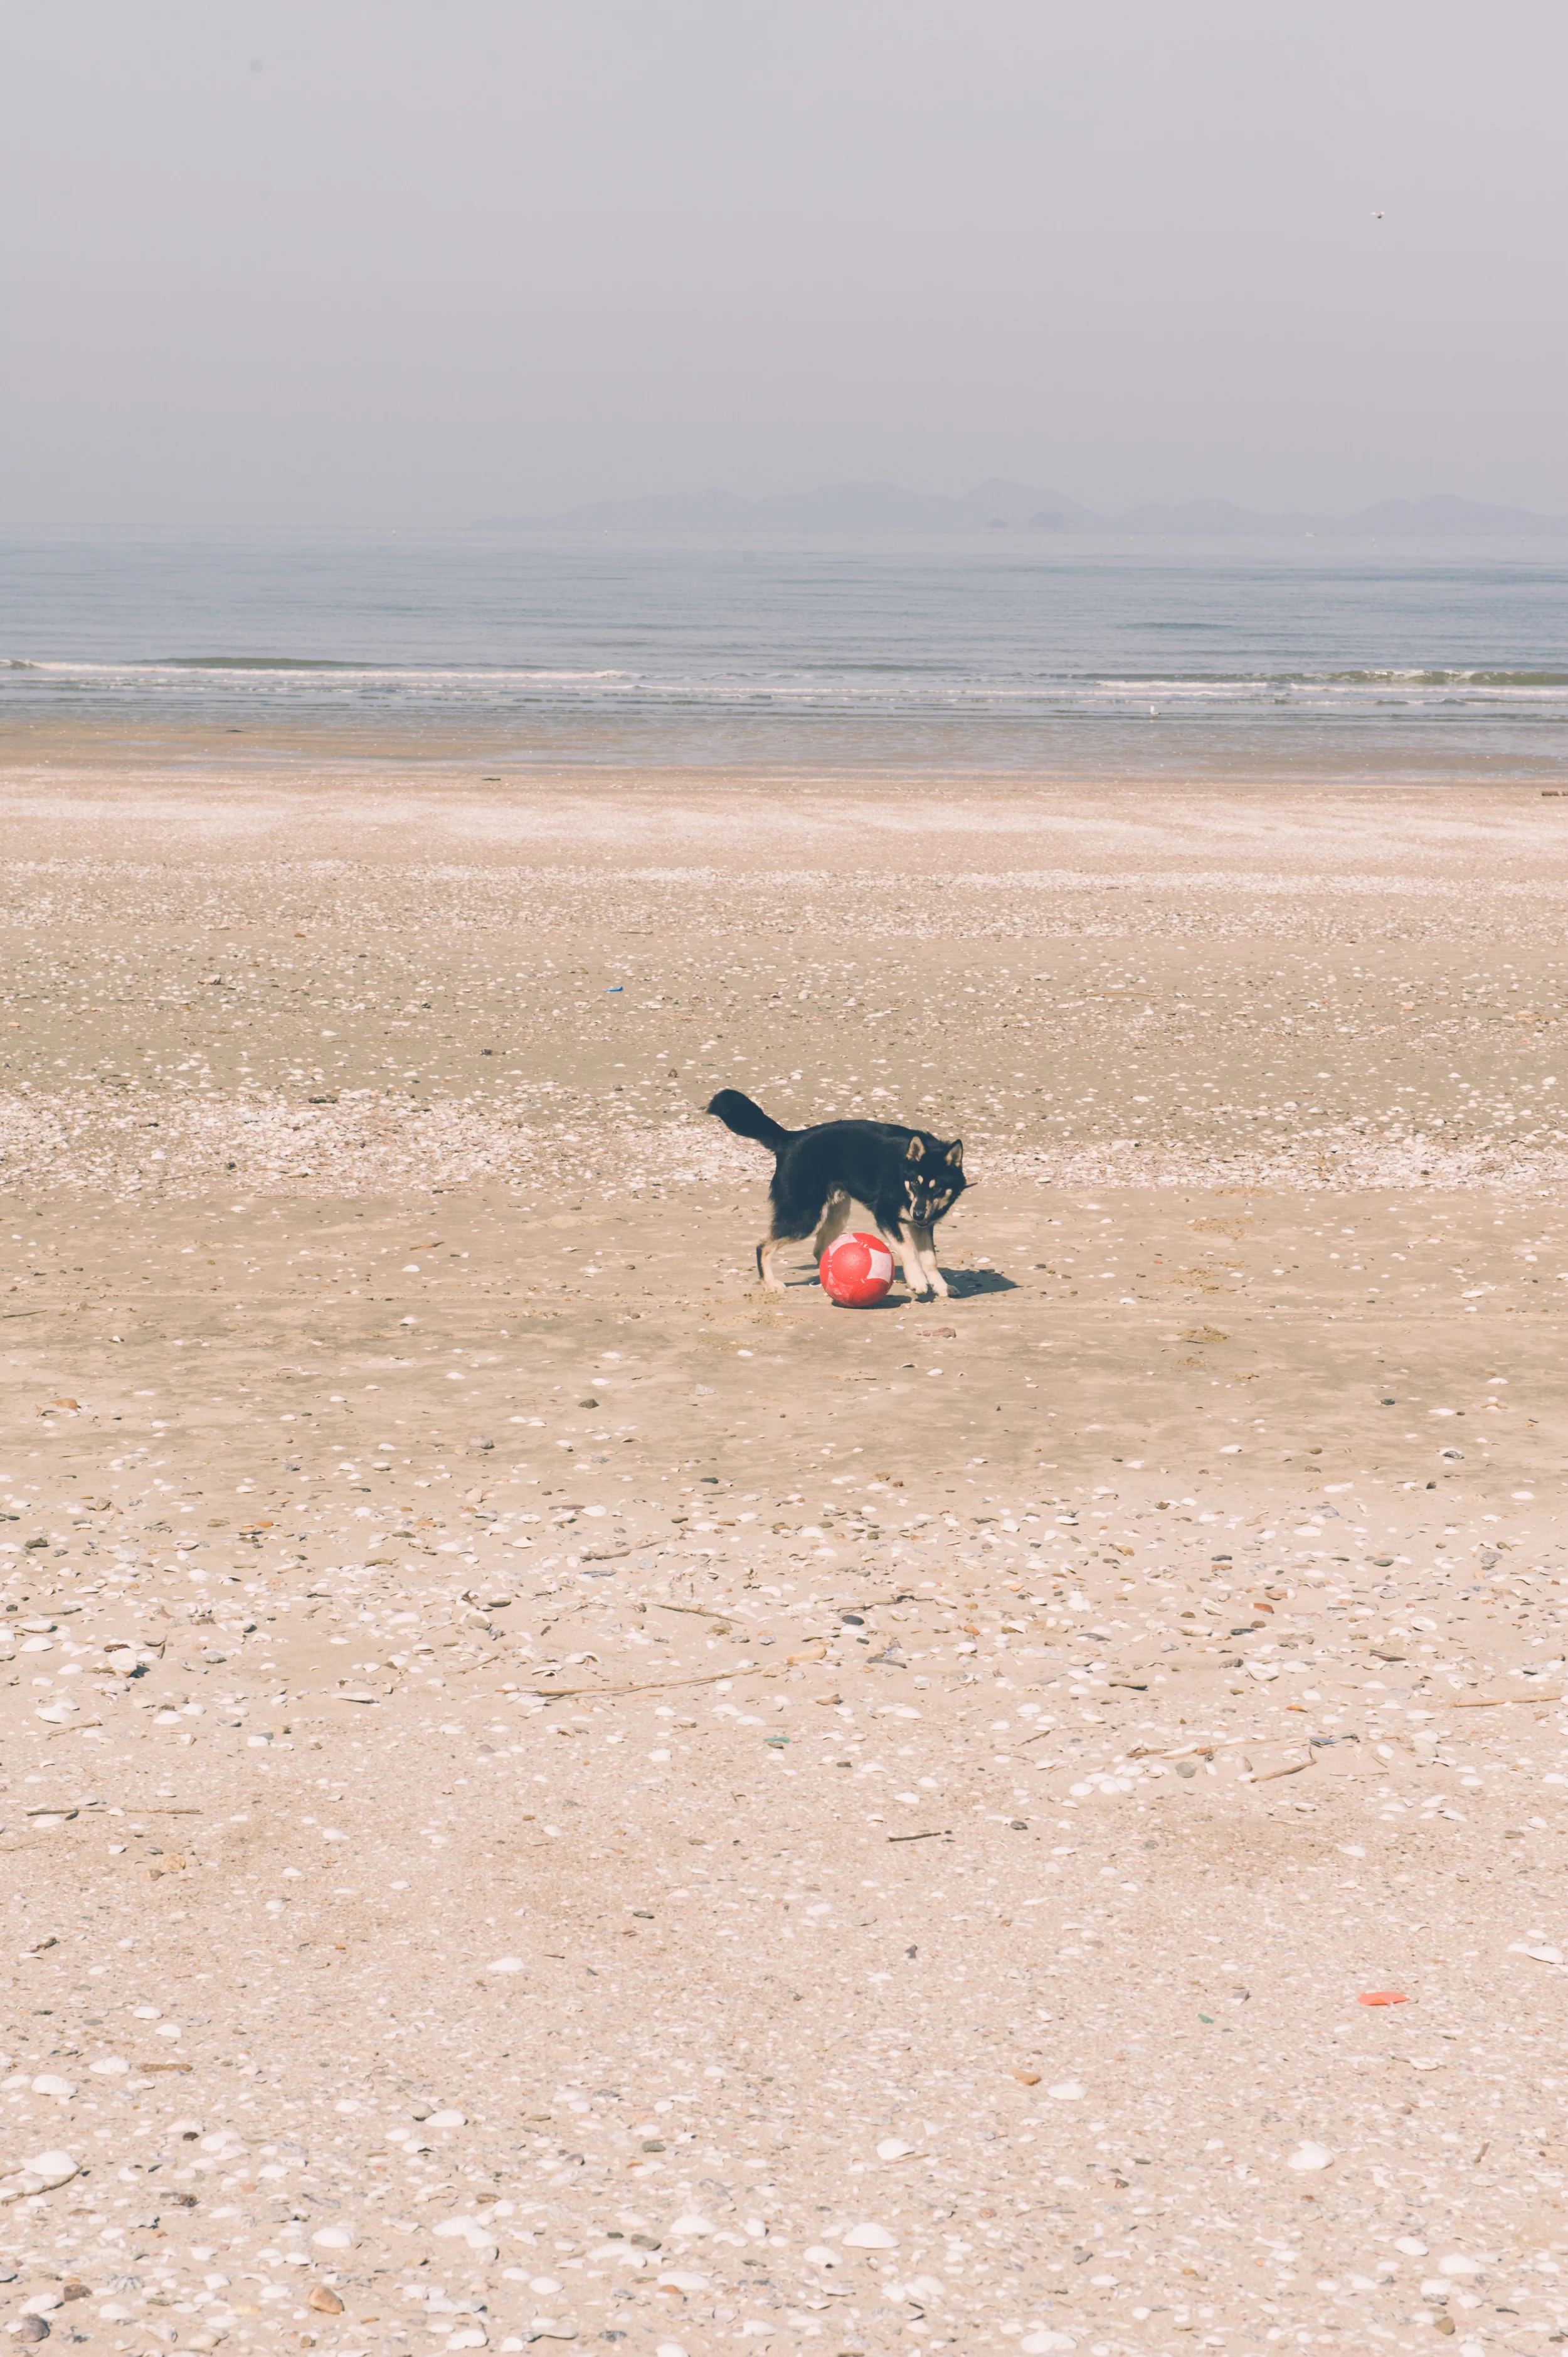
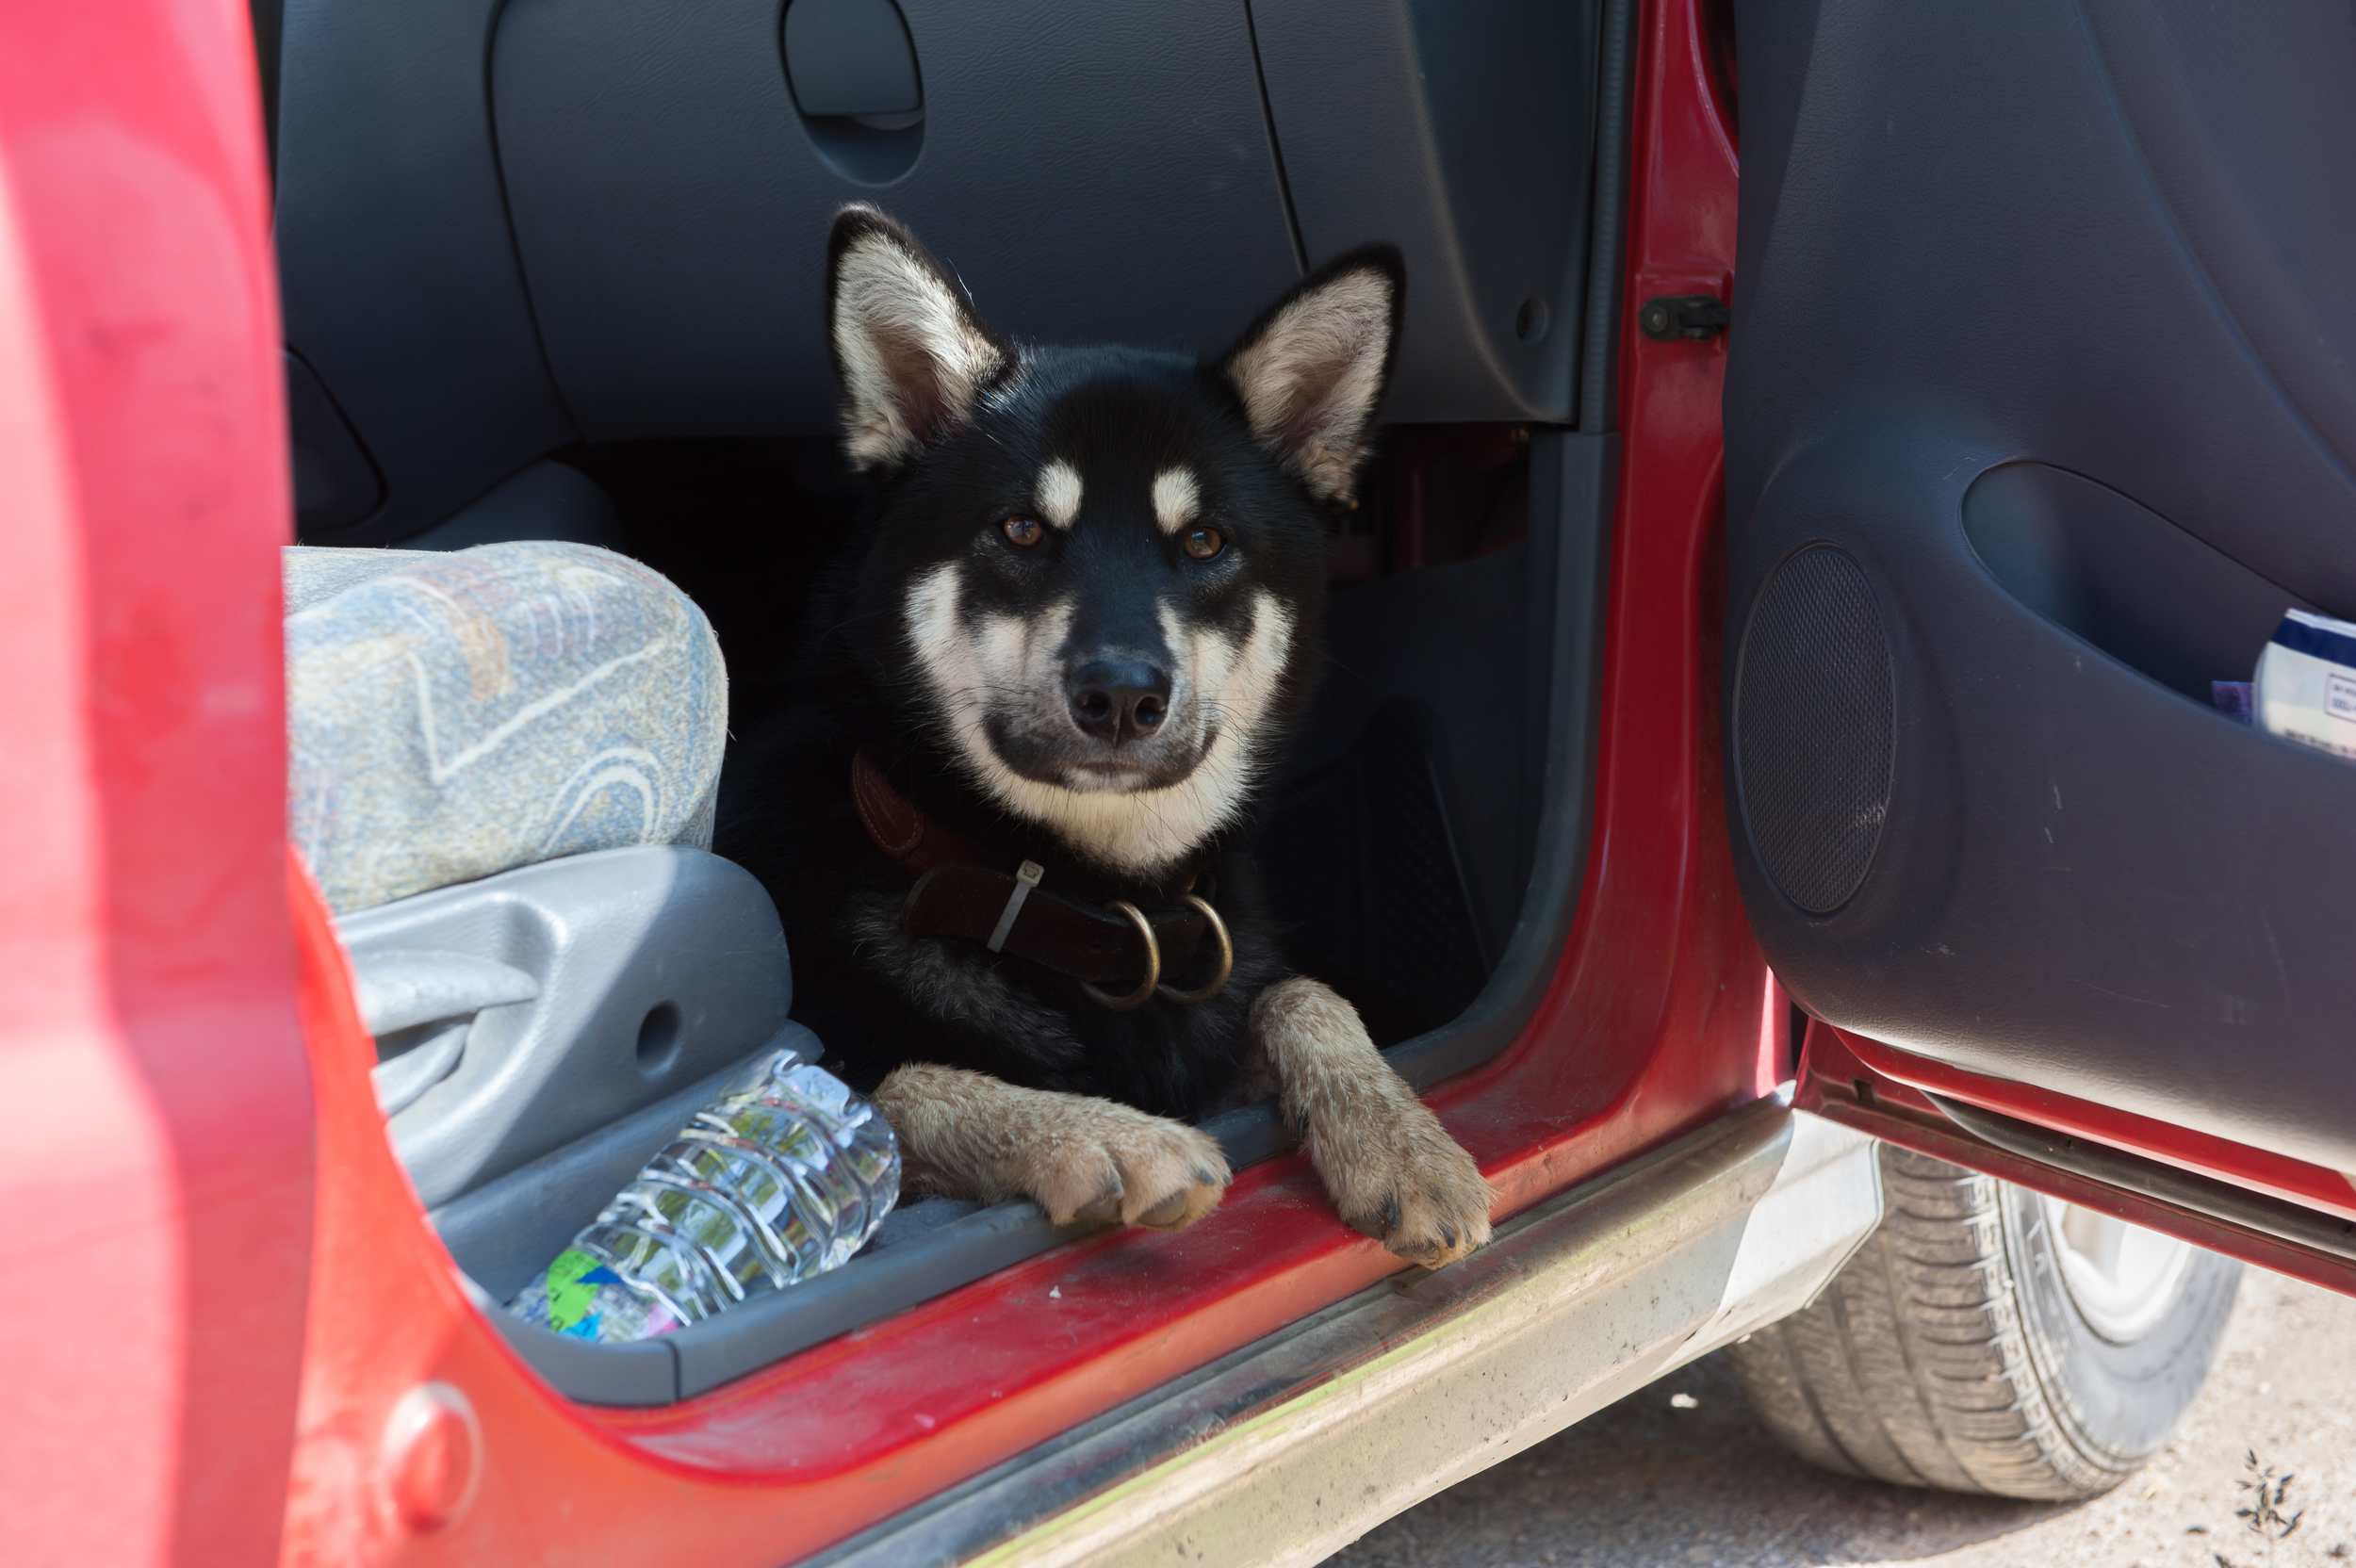
Another problem I have with dog food is that my dog is an incredibly fussy eater. I wasn't sure if it was because he didn't like the food, or whether we was just being a typical Jindo. Jindo dogs are known for being picky eaters, choosing to eat and not eat at will. A lot of JIndo owners free feed their dogs (ie leave a bowl of food out for the dog to help themselves to) as they generally don't over eat and will only eat when they are hungry. Shadow would often go the whole day and night without eating anything. I learned not to worry that he was sick, and just leave his food out for him to nibble on. I did also try adding all kinds of tasty treats, bribing him to eat his food. But that just got ridiculous. The amount of time I spent boiling bones, cooking broth and fussing over adding coconut oil and other treats to his food was just crazy. When he was about 5 months old he would wolf down his food, so much so that we had to get him a special bowl to make him eat slower. Once he got to about 8 months he started being picky, refusing to eat unless his food was covered in coconut oil, or smothered in broth and meaty chunks. 

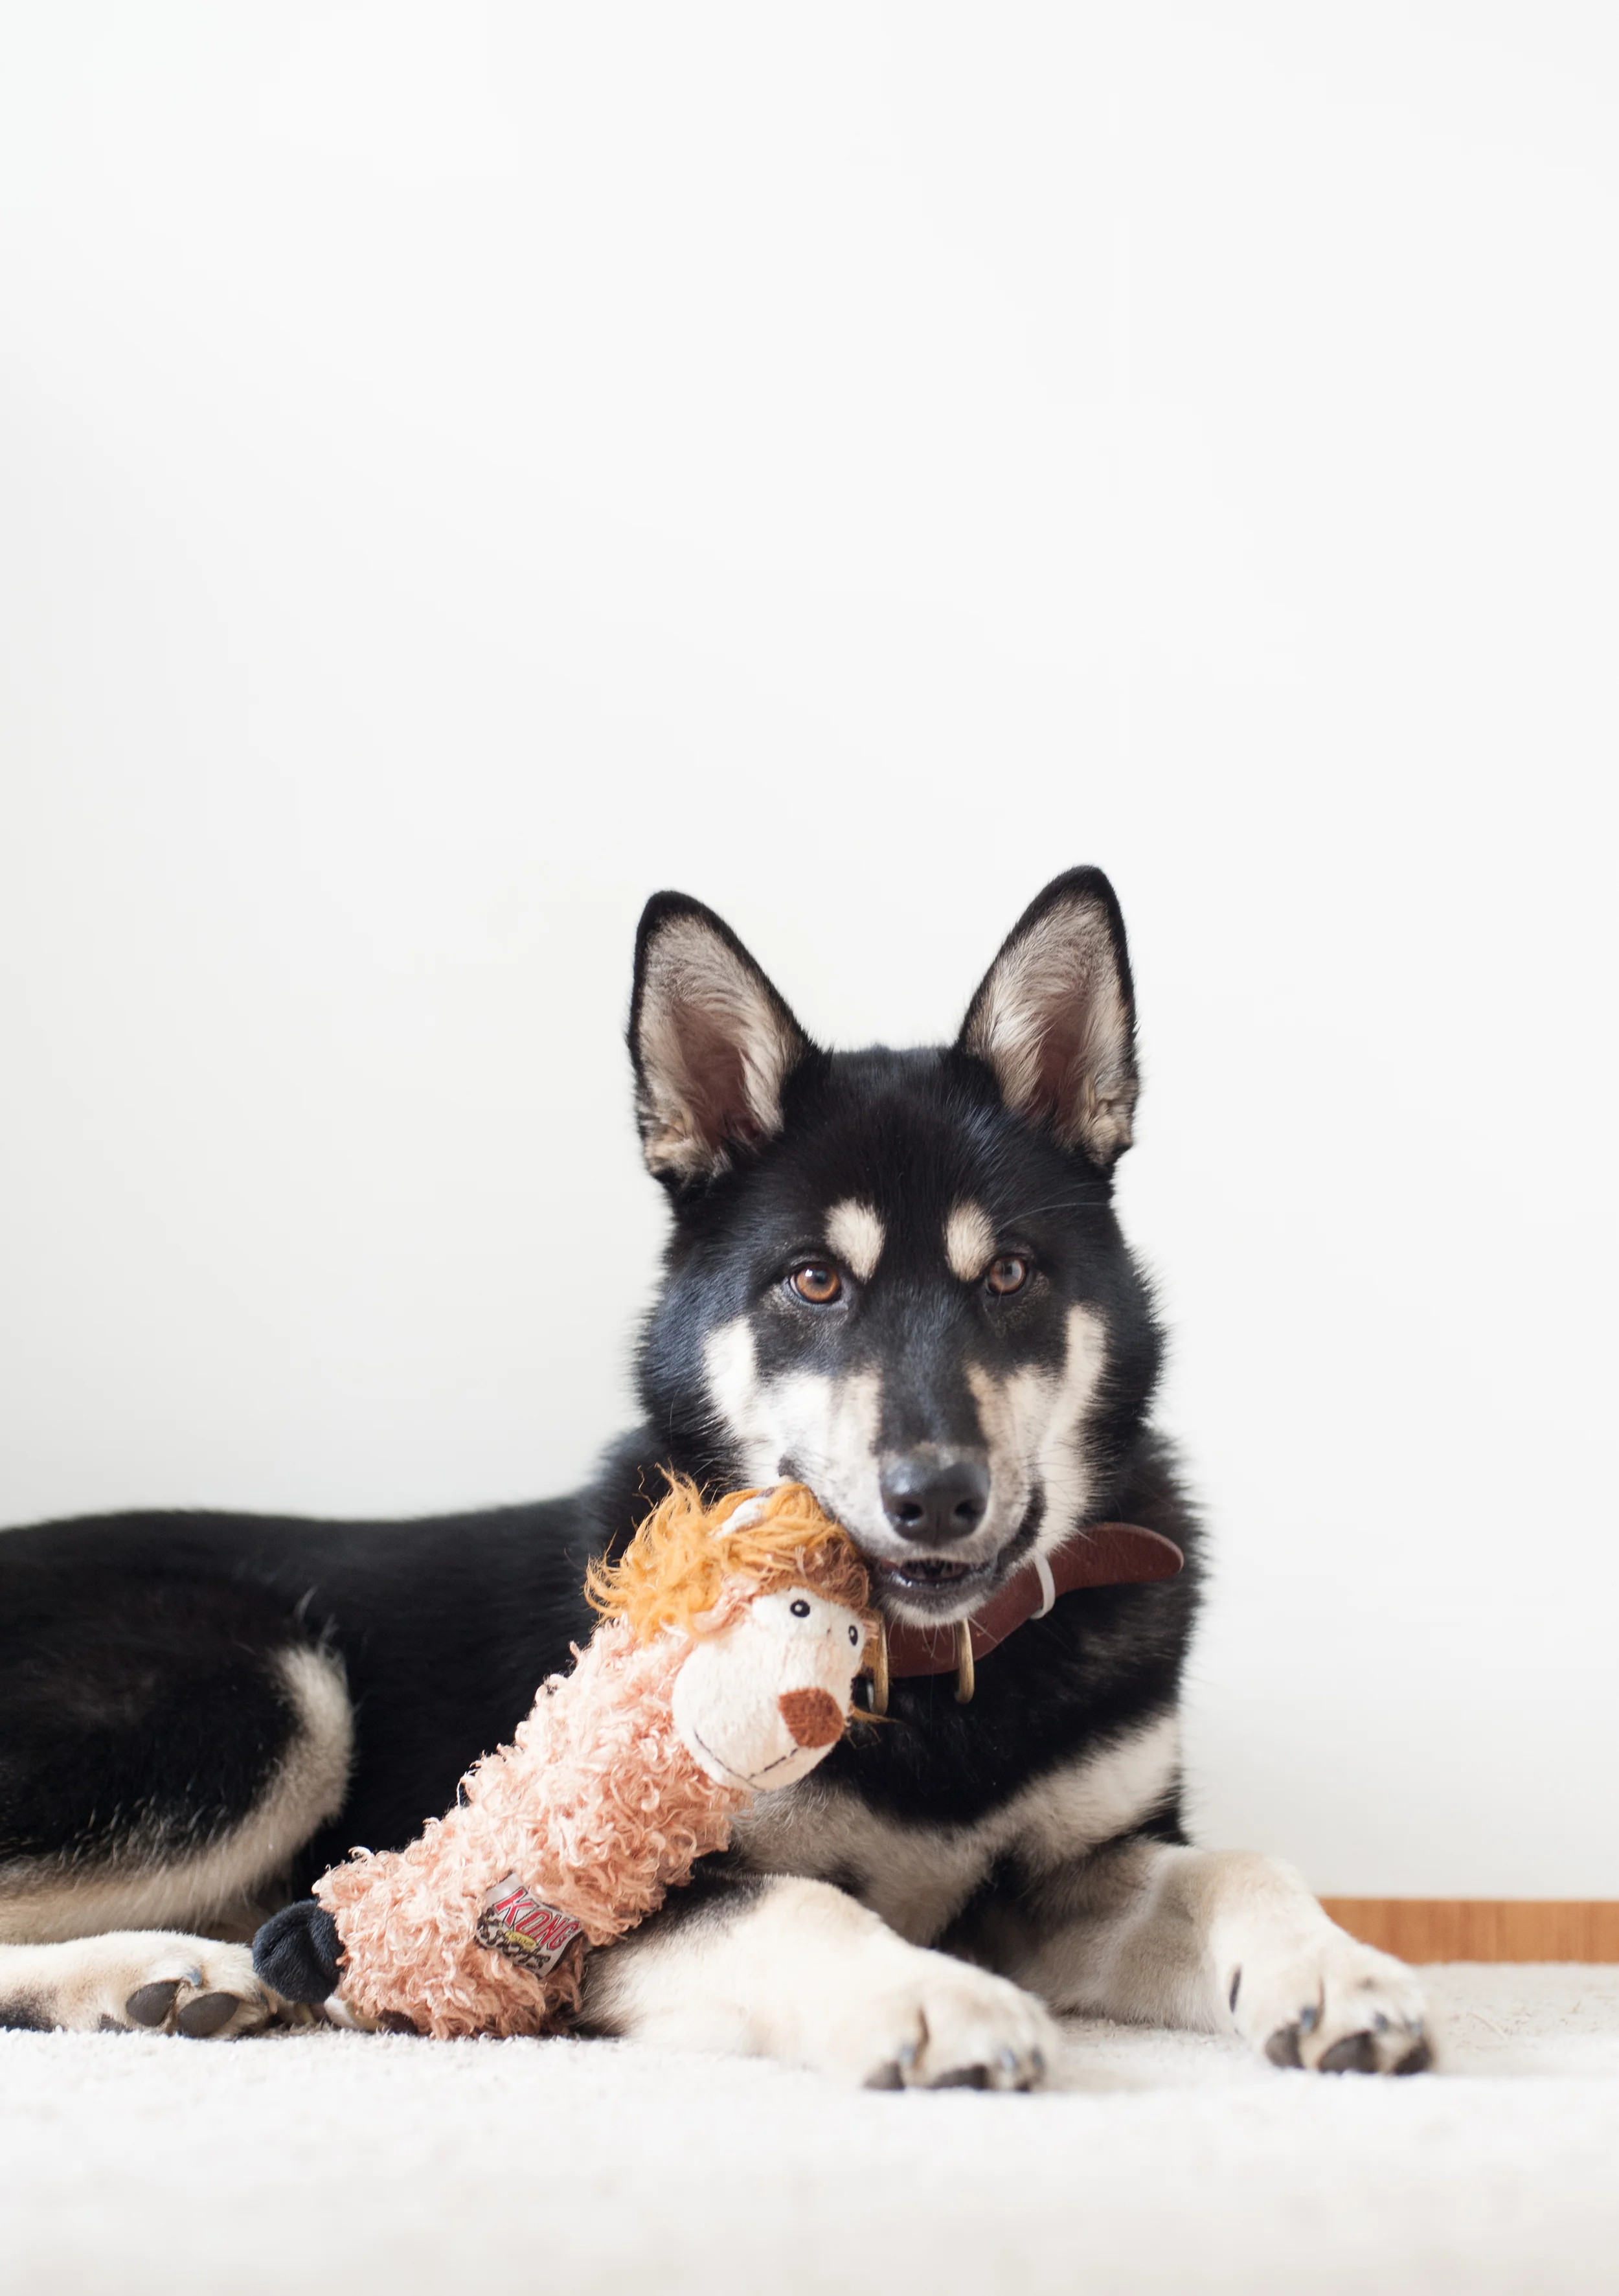
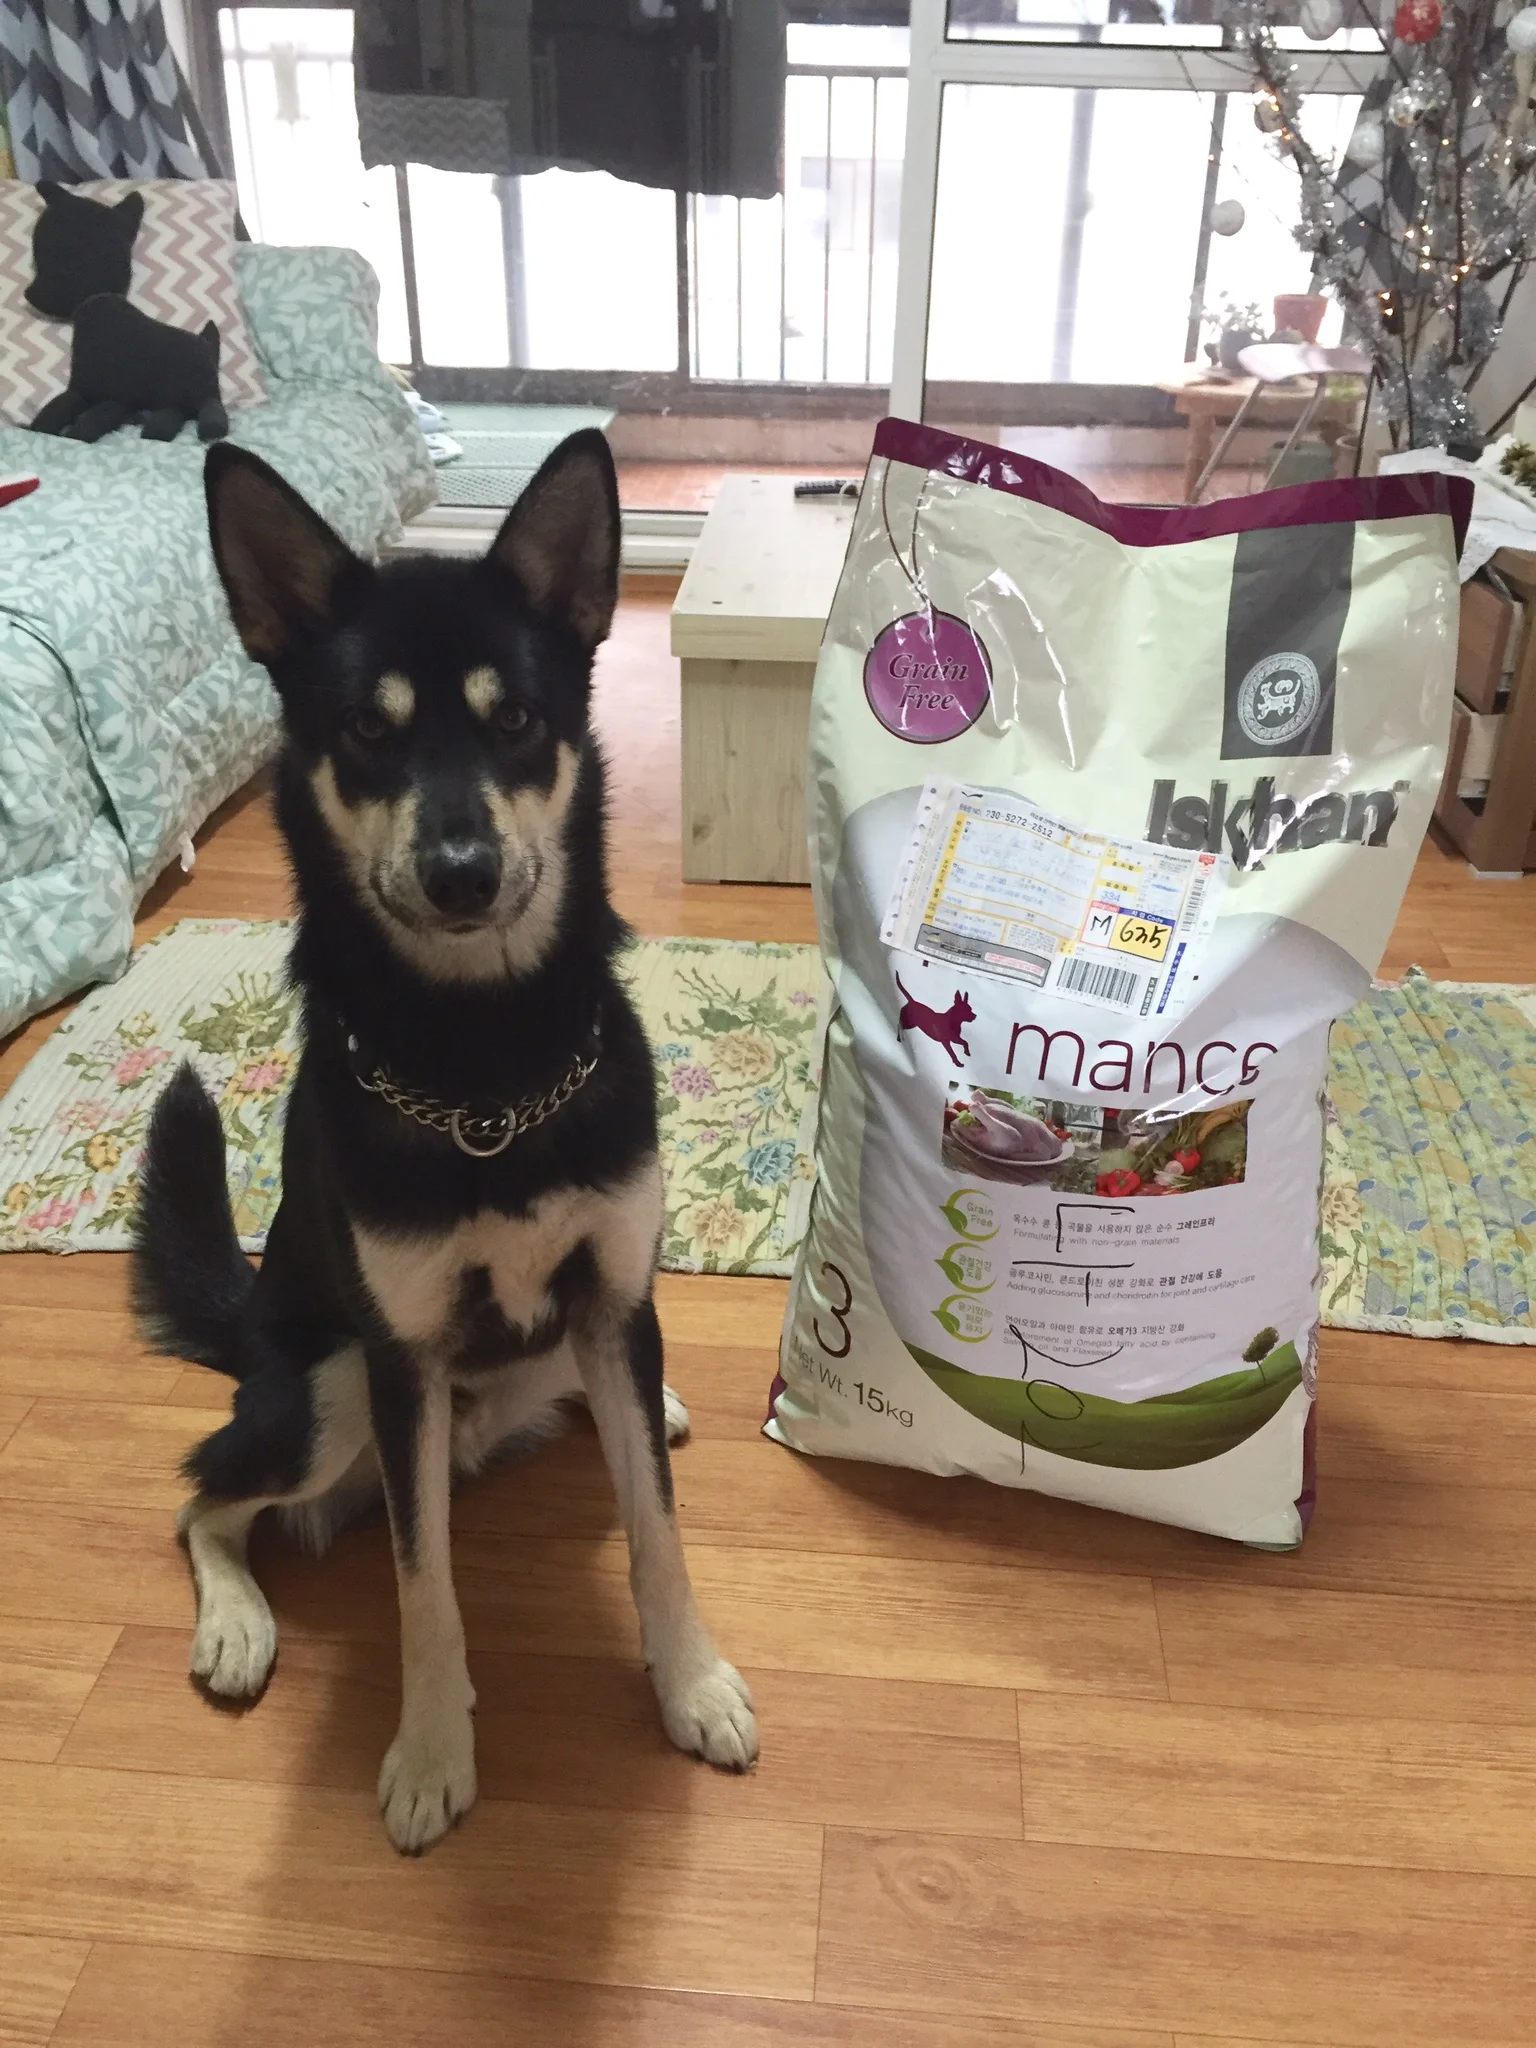
I thought Shadow was in great condition while eating TOW. I thought his coat was shiny and soft, and that he generally looked healthy. That was until I met up with a friend and her husky and I touched her husky's gorgeous coat. It was silky smooth, softer than my own hair. I couldn't get over how amazing her dogs coat was. I asked her what she was feeding her, and how much it cost. She told me she was feeding her husky Iskhan Performance and that it only costs about W40 000 for a 15kg bag. She then helped me order it right away and I've just received our second order.

Iskhan grain free dog food korea

I am so happy to report that Shadow loves the Iskhan food. He still sometimes won't finish the entire bowl but he is now ALWAYS at least interested in his food and waits in his room at meal times (something he didn't do with the TOW). His coat is incredibly soft and shiny, his eyes bright and clear and he has filled out and has stopped looking like he has an eating problem. I am very happy with the food and highly recommend it. It's also great to support a local Korean company, rather than buying from imported brands. 

Iskhan grain free dog food south korea

Iskhan is made by Daehan Feed Co & ere is a little blurb about Iskhan from their website:

NEW ISKHAN - Holistic Pet Food with fresh deboned chicken meat and superior natural ingredients.

"NEW ISKHAN" product is made with superior natural ingredients such as fresh deboned chicken meat, flaxseed, kelp meal, fructo-oligosaccharides etc to give your dog healthy skin, a shiny coat, clear eyes and overall good health while reducing wastes.

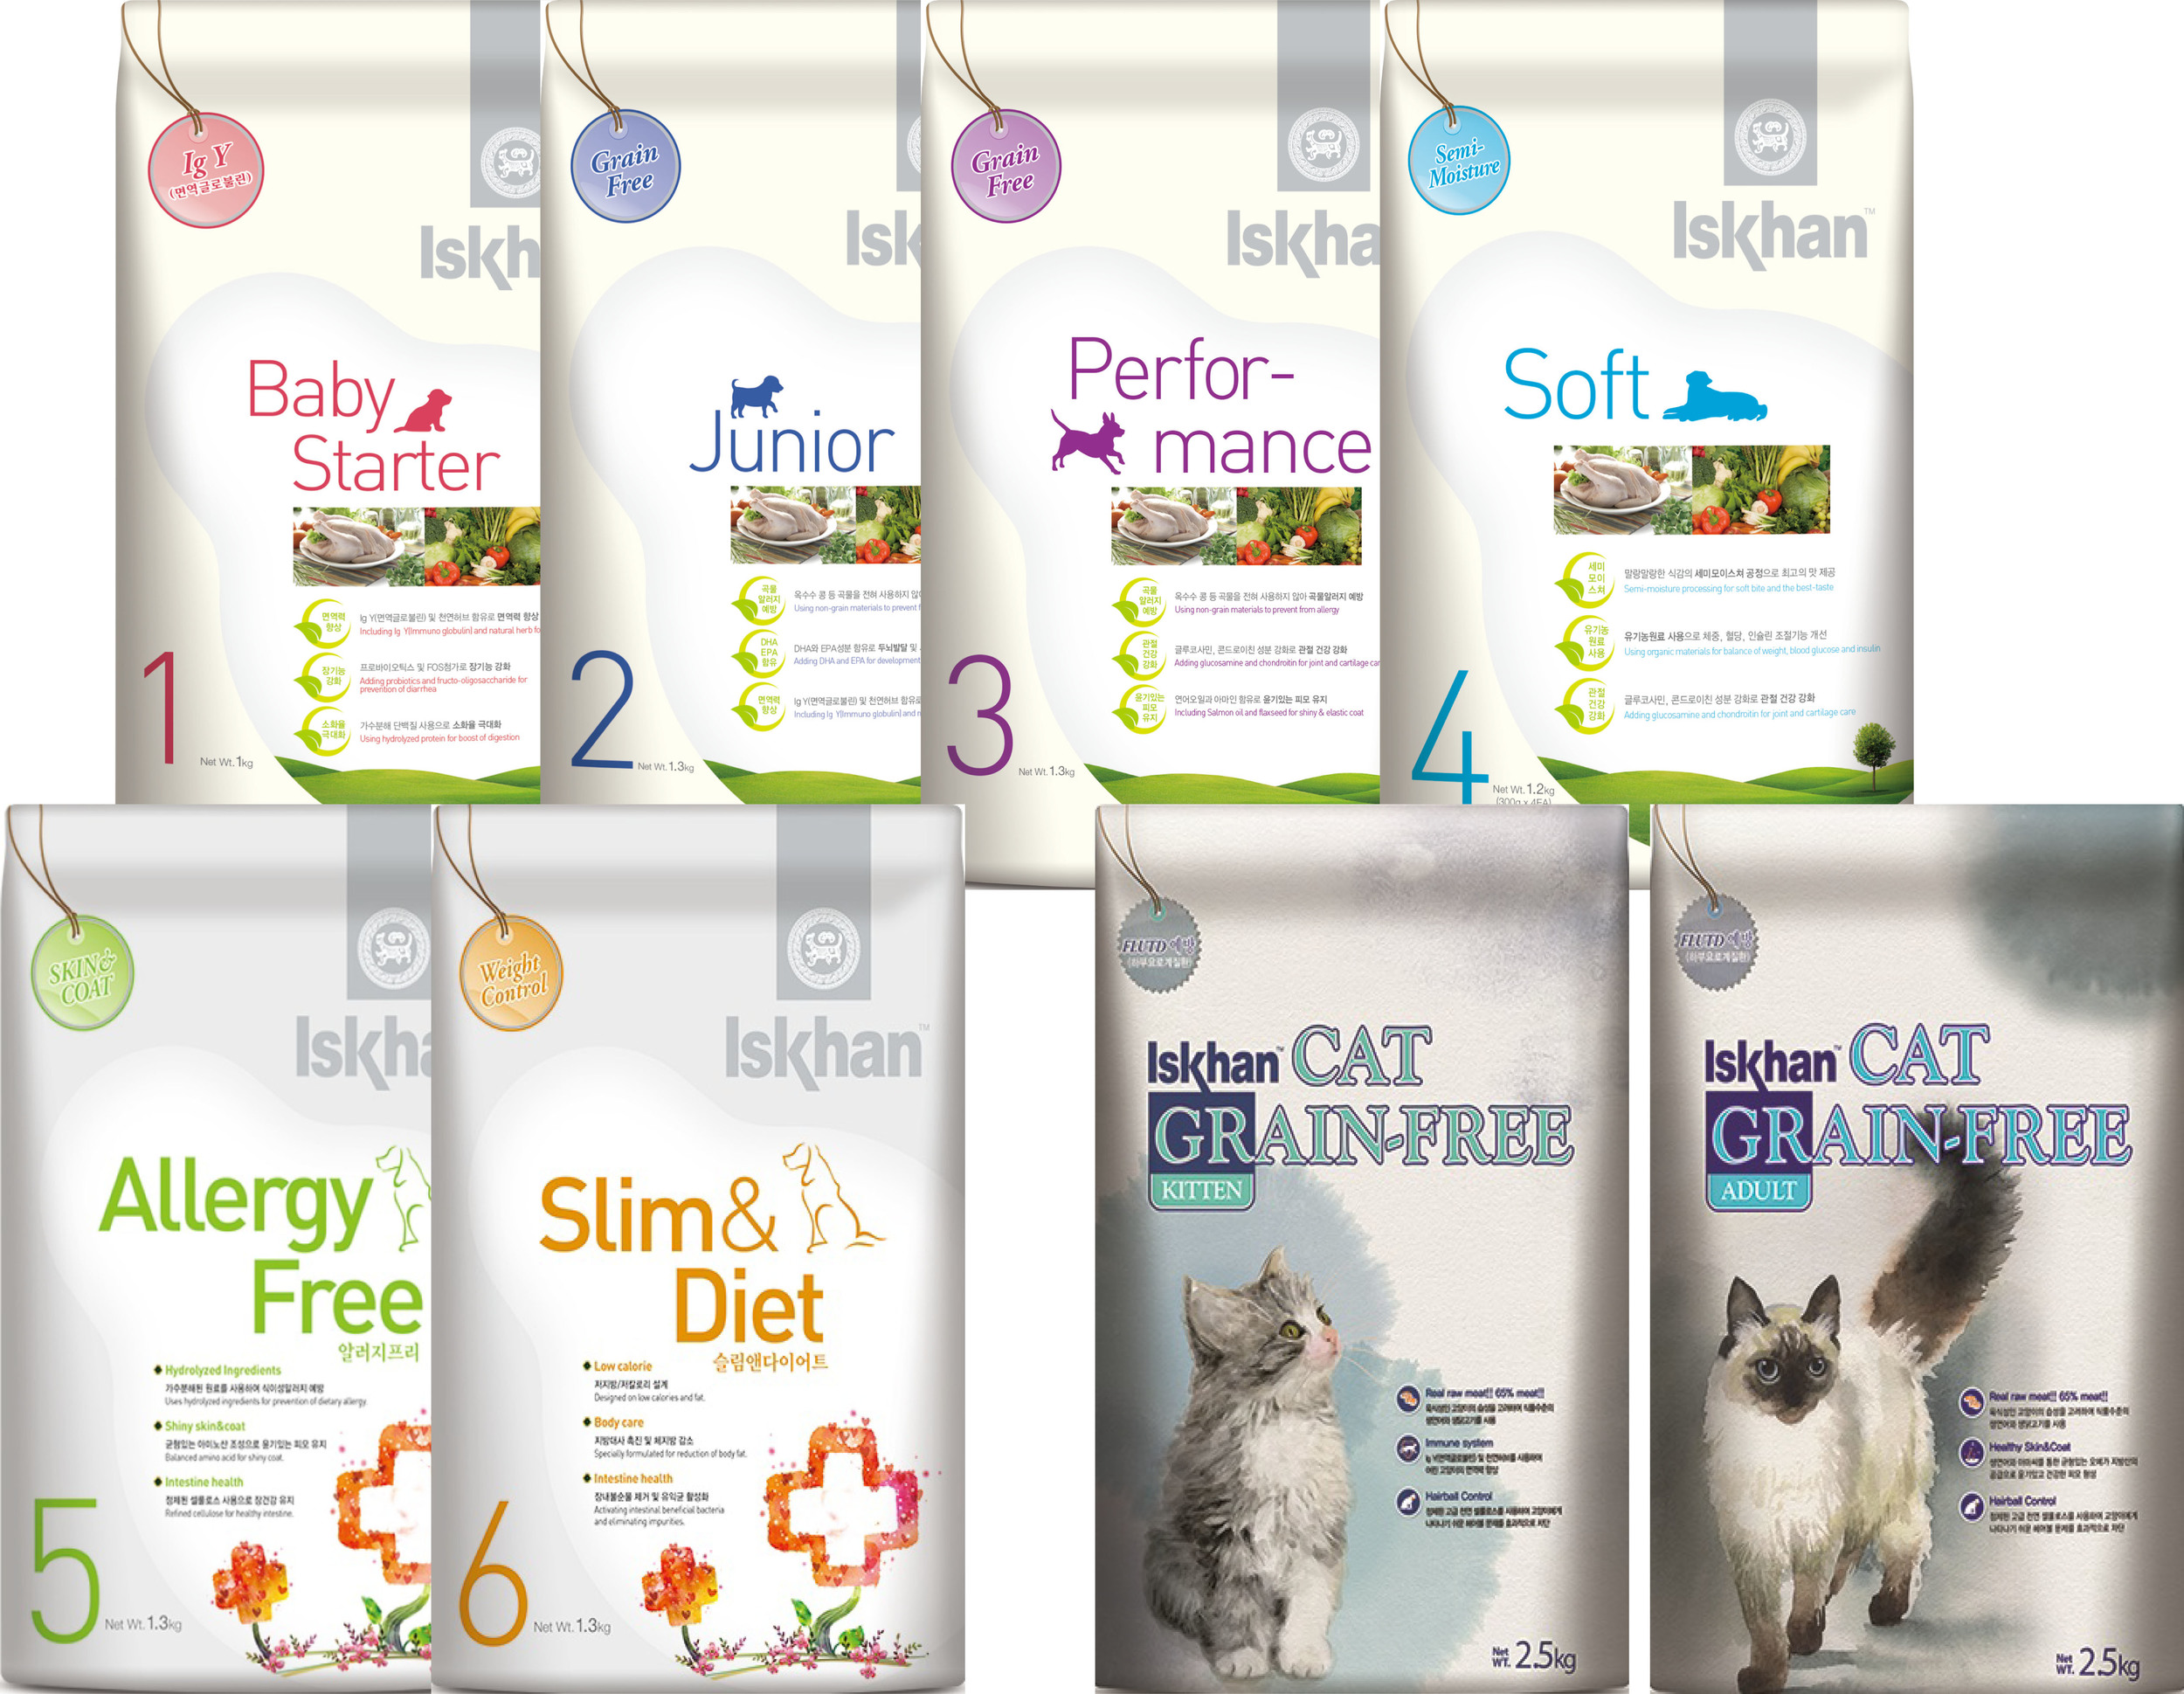
Iskhan has a lot of different formulations (they are numbered 1 - 4 with #1 being for young puppies and 4 being for older dogs) and I have just seen on their website that they also make a grain-free cat food formula too. I fed Shadow the Junior formula, and have just ordered the adult range, Performance, pictured above:

Grain free dog food in Korean Iskhan

I also like that they include English descriptions on their packaging, with their ingredient list being in English too. Here is a link find for Iskhan on Gmarket (click here). It's listed at W50 000 for the 15kg bag of Performance (adult formulation). I have a Korean friend help me order it from a company Wellcares. I just send them a a text message with my address and they send me their bank details to pay and then they send it to me. It's not much cheaper than Gmarket (I pay W43 000 for the 15kg Performance) and would suggest using Gmarket unless you have a Korean friend to help you order each time. 

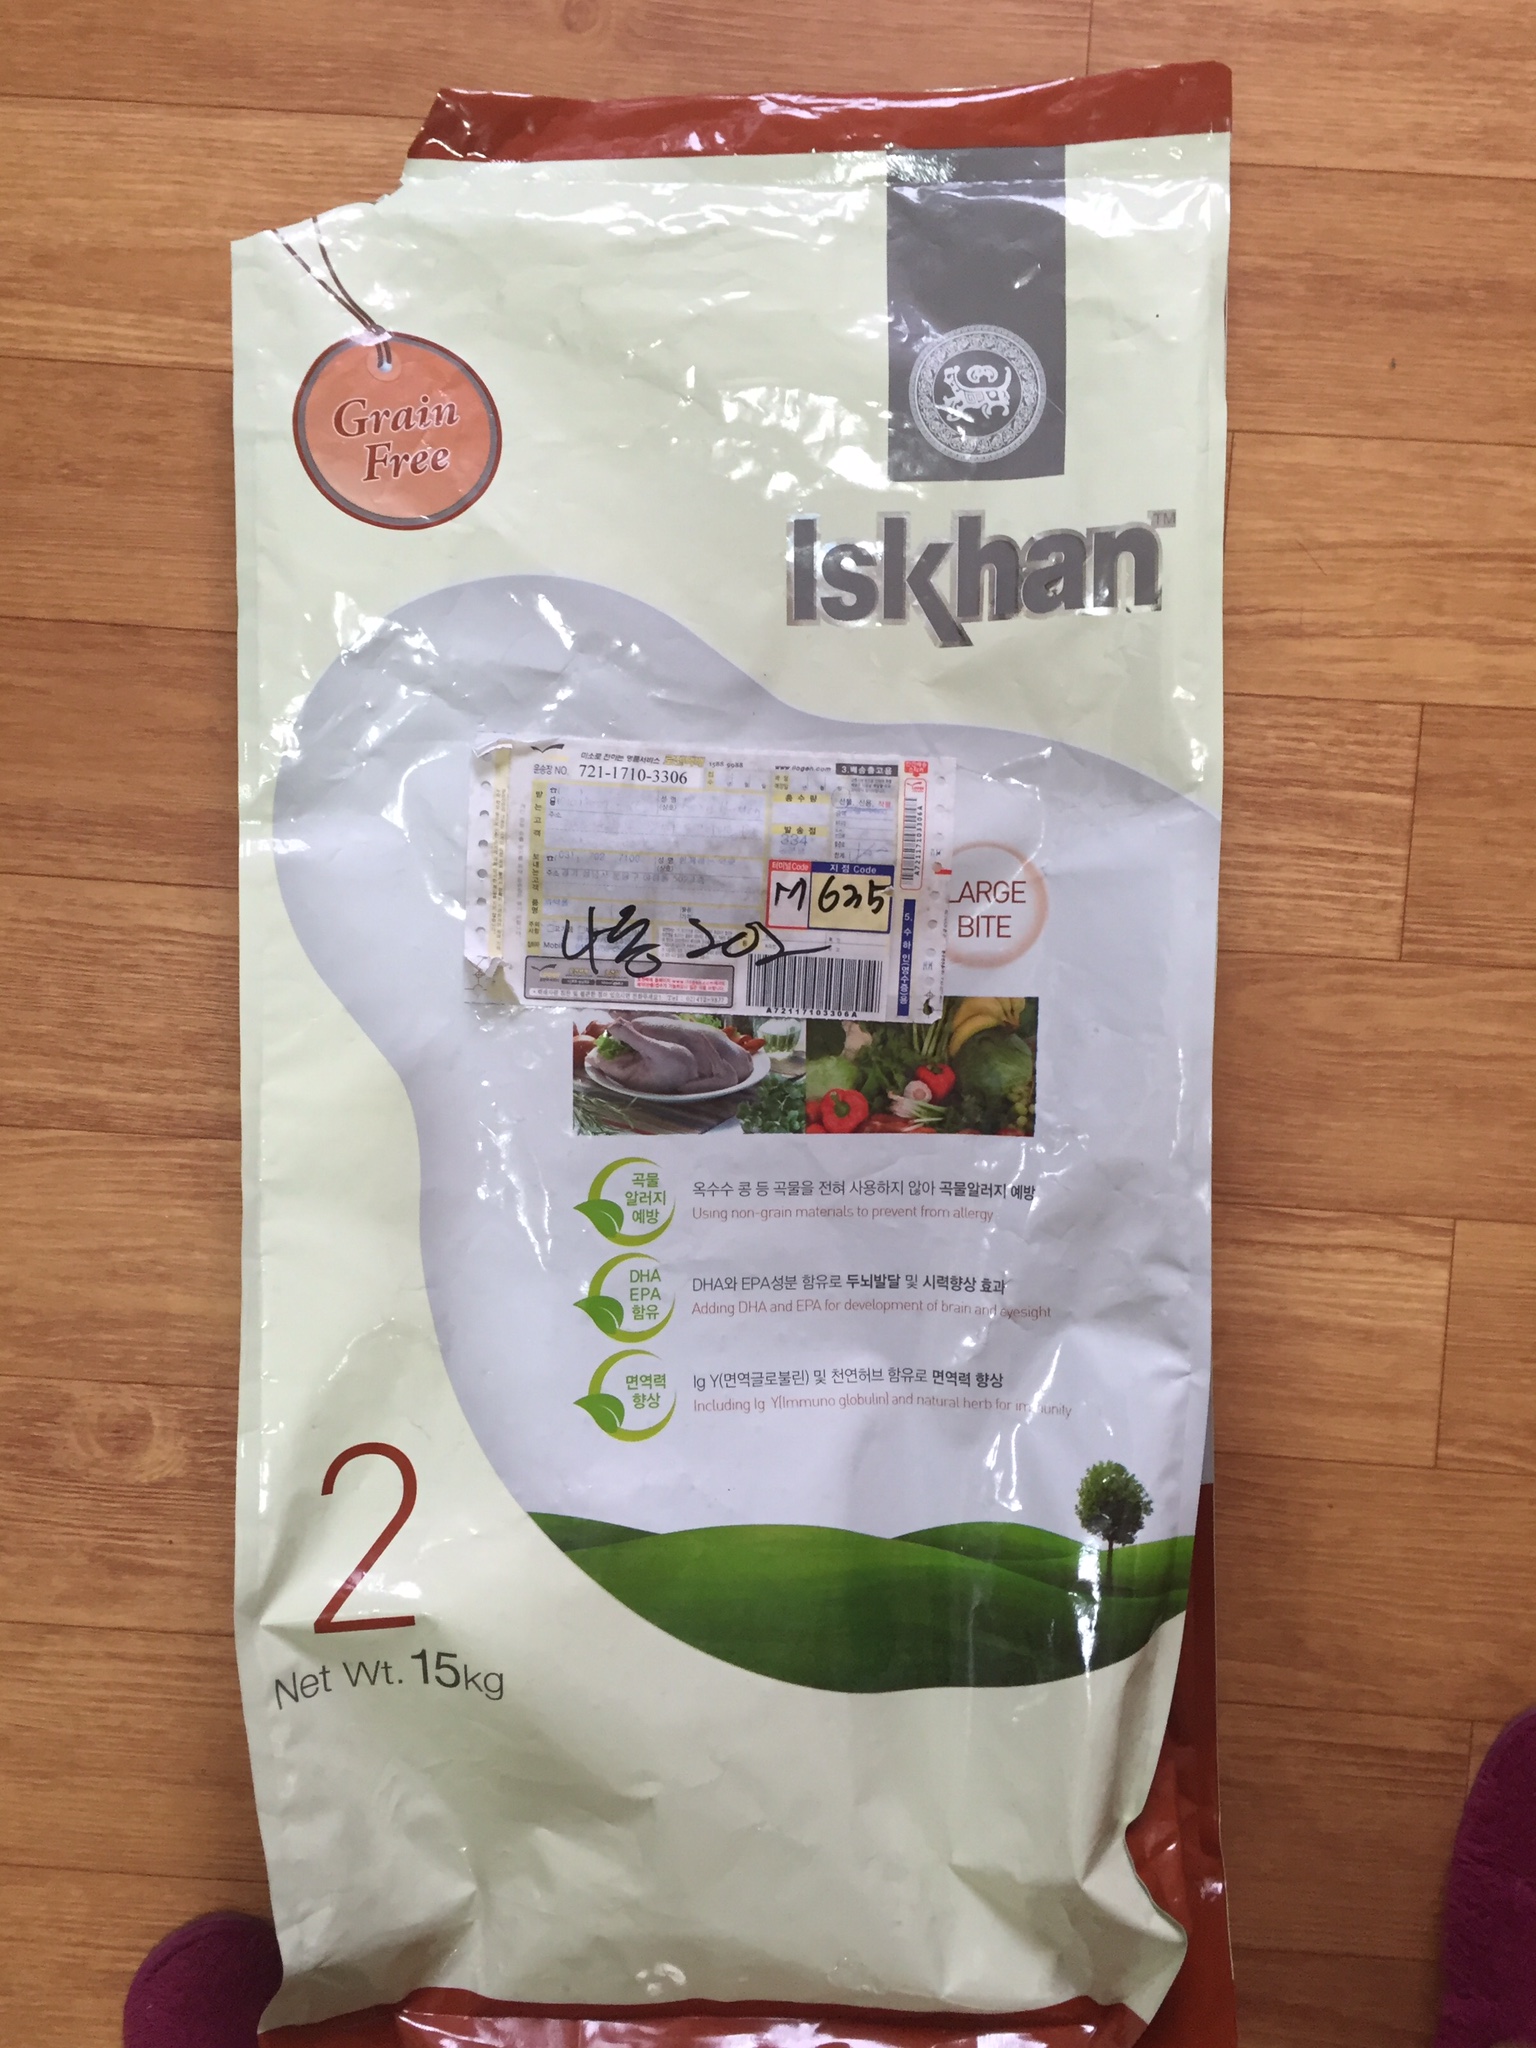
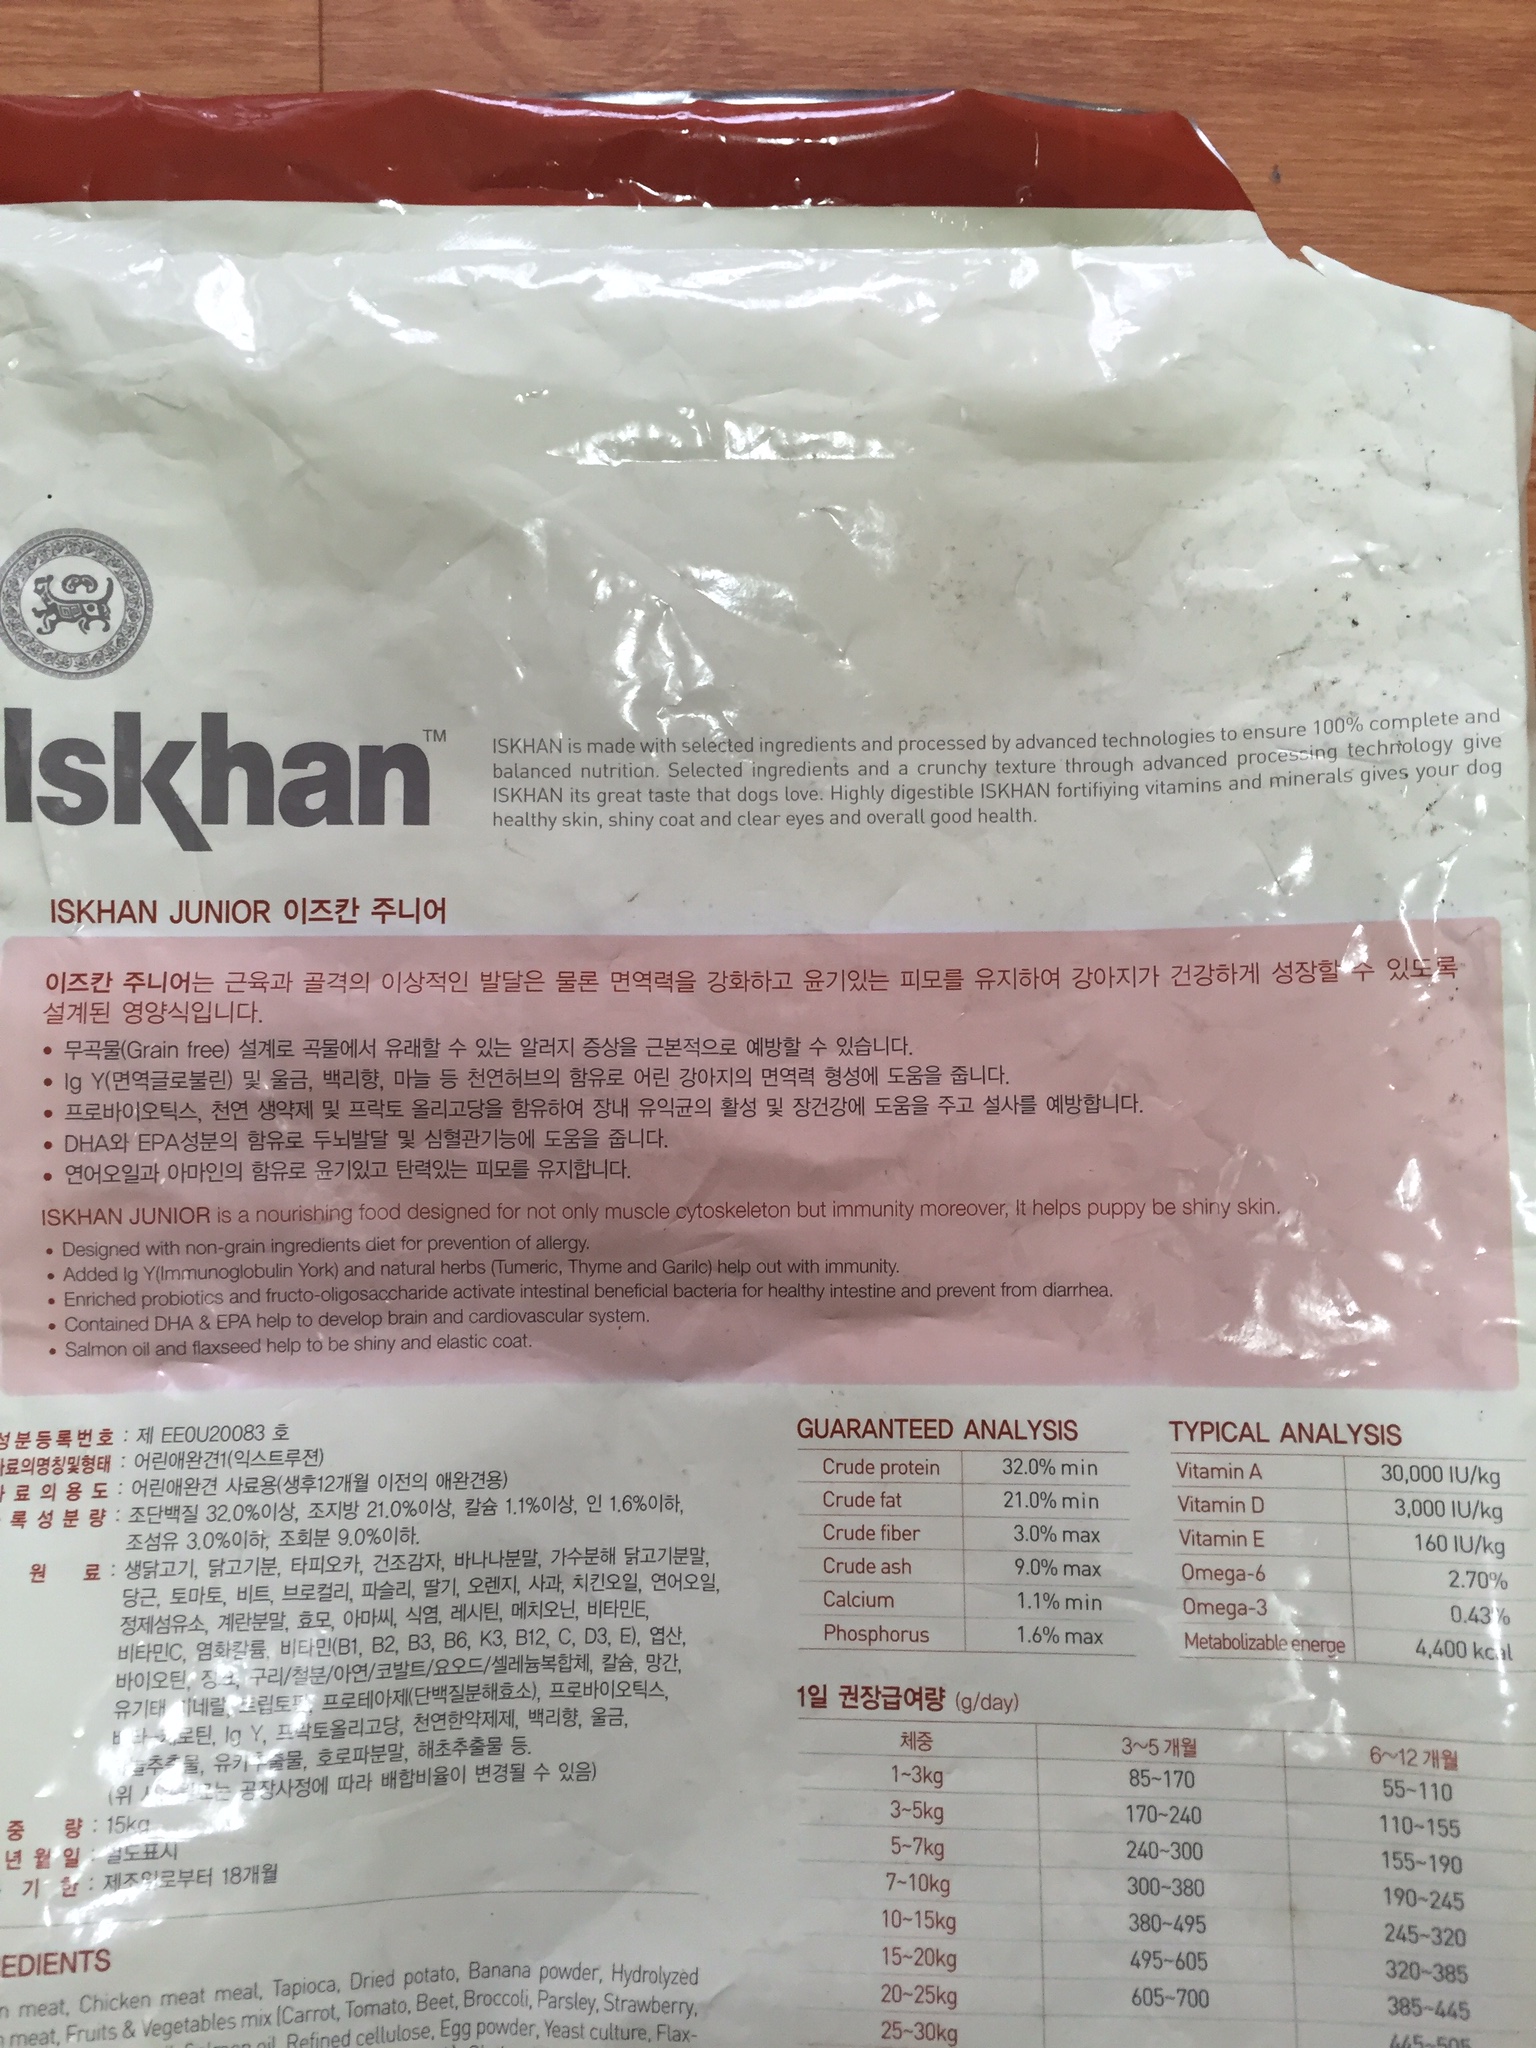
Here are some photographs of the Junior formula packaging so you can see the entire ingredient list. This is what I started Shadow on. He is now around 18 months old and as my order of Performance just arrived, that's what I will switch him to now.

Just a note when switching food, make sure to start off slowly with the new food. If you feed your dog a cup of food, start off with 1/4 of new food, and 3/4 of his old food. After a few days slowly increase the amount of new food and decrease their old food. The whole process should take about 2 weeks to transition them and let their tummies adjust to the new food. If you don't transition slowly your dog will have a very sick stomach and you'll probably have to deal with a lot of diarrhea until their bodies adjust to the new food. This is natural, but can be avoided by going slow.

I hope you found this post helpful. Click the images below to read my other posts on owning a dog in Korea: 

Why you need a 'START HERE' page for your blog

Blog Tips Citygirlsearching Why you need a Start Here page on your blog

Have you ever clicked a link for something on Pinterest, and then been redirected to the home page or blog of that site only to have no idea what you're looking at? So many times I get lost on blogs, looking for something in particular that I saw on Pinterest, only to give up a few seconds later and click away. You may think your blog is incredibly user friendly, but that's because you designed it and know where everything lives.

If someone was visiting your blog for the first time, would they know, just from the first few seconds, what it is you do and what you offer or sell? It's so hard to look at our own blogs objectively, so why not make it super easy for people to find their way around your site by adding a START HERE page (see image below):

Why you need a start here age for your blog

Your Start Here page is another opportunity (just like your About Page & Home Landing Page if you choose to have one) for you to tell your readers what is is you do, and to give them a brief summary of your business or blog. I use my Start Here page as a place to show my blog categories, and as a way to have people sign up for a particular email. I am starting a new email list of people interested in improving their photography for their blog or business, and so use this page as a place for them to sign up. Some people use their Start Here page to sum up their previous blog posts, to answer FAQ's or to share more about themselves.

A few months ago I found a platform called Peek that allows you to submit your website to a panel of random testers who visit your site and answer specific questions about your sites usability. Once you enter your web address and email address up (it's free!) you are then sent a 5 minute video of people testing out your site, their first impressions and their answers to a few questions about the functionality of your site as well as whether you can improve on anything. 

My site was sent first to an older gentleman who really had no idea what I was writing about. At first I was so frustrated watching him make his way around my blog, but then I realised that my site was confusing. He thought the beauty reviews I did were for products I actually sold, and kept trying to find where to buy them. As the first blog post he saw when he clicked on my site was a review for a beauty product, he thought I was a selling skincare & makeup.


PRO TIP: Your latest Blog Posts conveys a lot to your readers and can influence their decision to stay or leave your site


I was happy to see he was actually interested in buying the product after my review, but I was disheartened as I soon realised he had no idea what my site was all about. At that time I even had a Home or Landing page set up, but as I use a lot of images in my design, it took so long for the Home page to show the images that he quickly clicked straight to my blog. I realised very quickly that you need to assume everyone who arrives at your blog (whether they are first time visitors or returning visitors) needs clear instructions about where to click and where to find information...


PRO TIP: This is why SEARCH BARS are so important in your blog design!


The next person to view my site was a young woman who clearly was a blogger herself. She immediately found her way to my blog and my about page, and proceeded to navigate my site with ease. As much as she liked the functionality and white space of my blog design, she did comment on how long the images were taking to load and that she found it rather frustrating. I have since learned to decrease the size of the images I upload, in the hopes that the loading time doesn't scare off my visitors!

So, by implementing a 'Start Here' page on your blog, you are giving your readers one more place to be able to find out about you and what you can offer them. It also helps them to learn how to navigate your site, and in turn, will make them more likely to stick around and come back.

Landing Page Example SquareSpace Blog

I am STILL tweaking my blog design (that's why I love SquareSpace so much as I am able to customise so much without having to know ANY code) and I think I will continue to tweak the functionality of it as I go along. I have just added a Home/Landing page back to my site (see image above). SquareSpace gives you the option to add easy-to-customize landing pages to your site in just a few minutes.  I have chosen to introduce a landing page because I have been told me that this site has so many different things going on that some of my visitors feel rather overwhelmed and unsure of where to start when they first arrive. We can't assume everyone who lands up on our site will be a well seasoned blogger. 

Do you have a Start Here page on your blog? Have you ever tried a user testing site before? How do you feel about your sites functionality and user-friendliness? I'd love to hear from you in the comments below!  

#TeaWithRoxy: My new LIVE weekly Periscope Series

Hello everyone!

I have been having so much fun on Periscope (click here to read the post I did last week on what Periscope is all about and how to use it to grow your blog or business). I want to share MEANINGFUL content with you guys, as opposed to just showcasing random streams of my dog and my Christmas Tree (although I will still be including a few of these as they are fun and a lot of you seem to really enjoy them). 

Incase you're new to the whole Periscope thing, Pericope is a free app (available on both IOS & Android) that allows you to live stream video footage. Not only can you live stream your own content, but you can also watch other peoples content, and share you support by giving 'hearts' while commenting & asking questions. It may seem a bit creepy and weird (and yes there are a few strange people on there) but it's a fantastic way to build engagement as well as me create real, live time relationships with people. I've met so many new blogging friends in the last 2 weeks and I can't wait to continue to engage with all of you through this exciting new platform.

TeaWithRoxy Blogging Tips Series

As a blogger and photographer, I want to do more for you than just show you the behind the scenes of my life. I want to stream useful content that helps you and gives you the inspiration you need to actually do what you've been dreaming about doing. And so, I'd like to introduce you to my new Periscope series; #TeaWithRoxy.

I want this to be a a daily series (I am going to stream at the same time, Monday to Friday) with a different theme or topic each week. That's the plan, but I will be listening to you and your feedback and that will guide me as to whether it will continue to be a daily series or perhaps a weekly series if that's what you'd prefer. I am really excited for the first week's topic, as it's going to be all about blogging!

Here is the schedule for this week, starting tomorrow (Monday 14th December). I have tried to pick a time that will work for the majority of my readers who are all over the world, but if it doesn't work for you don't worry! The great thing about Periscope is it keeps your broadcast for 24 hours, so if you miss it, you're able to go back and re-watch it.

  • Monday 14th - Blogging: Where to Begin (I'll be talking about blogging platforms and which ones I love and use)
  • Tuesday 15th - Making your blog pop (I'll be talking about what I use to make my blog graphics and some tips and tricks to help you create yours)
  • Wednesday 16th - Pro Tips (I'll be sharing with you some of the favourite tools that I use to make my blogging life a lot easier)
  • Thursday 17th - Make or Break (I'll be talking about your 'About' page and why you need one, as well as how to make yours awesome!)
  • Friday 18th - Q & A (I'll be wrapping up the series as well as answering any questions you may have about blogging)

If this sounds like something you'd like to be a part of, all you have to do it download the app (it's FREE!), make a quick profile (you don't have to get too fancy with this, but try and include profile photo so I can see who you are) and then find and follow me @ROXYHUTTON. As soon as you follow me you'll get a notification of when I go live so you know when to pop on and start watching.

Citygirlsearching Persicope Roxy Hutton Blogging Tips

Like I said before, you'll be able to watch the replay for up to 24 hours after I have broadcast the stream, so don't worry if you can't make the time slot. 

I am so excited to have you all be a part of this series, and I can't wait to help you take your blog to the next level. Come and join an exciting community of likeminded people who want you to succeed with your goals. 


Want to make sure you never miss out on blogging or photography posts and freebies? Then make sure you subscribe to my Blogging & Photography email list by clicking the image below:

Innisfree Peony Perfume Room Diffuser

Innisfree Peony Room Diffuser

Today I want to share with you a short post on this delightful room diffuser from Innisfree. I picked this up during their 50% sale last month (oh just in case you see read this post today Friday 11th December) Innisfree are currently having their 30% off monthly sale. Not quite as good as the half price sale, but still a sale giving you a few extra pennies in your pocket for Christmas shopping. 

Innisfree is one of my absolute favorite Korean Beauty Brands (you can see just how much I love them by looking at my Beauty page...I've got 'one or two' Innisfree reviews on there hehe). 

This review is of the Peony Perfumed Diffuser. When I was in store, I also really like the Fig (I think I might need to add that to my Christmas List!) which has a very fresh and clean smell.

When choosing a perfume diffuser, I was worried that about the fragrance being very over powering, but it's very subtle. It gives the room it's placed in a very soft fragrance that lingers, without leaving you feeling sick from the sweetness. Another great one I would recommend is the Lemon scented diffuser. It would make a good kitchen (or even bathroom) addition.

Here is the Korean blurb about this diffuser from the Innisfree website:

Innisfree Peony Room Perfume Diffuser

 The diffuser is sold separately from the reed stick, which comes in 3 different versions - the basic reed stick (this I the one I have), the twig , and the flower . The flower is very pretty but I'm not sure how well it work to diffuse. 

The perfumed diffuser costs 20,000 Won, and the reed stick's price depends on which version you buy. The basic reed stick is 2,000 Won for a pack of 10, the twig version is 4,000 Won, and the flower is 5,000 Won. 

And it doesn't hurt that the bottle is so beautiful to look at, as is the design of each and everything I've ever bought at Innisfree.

Do you own a room diffuser? I'd love to hear from you in the comments below. 

How to get your first 1k followers on Instagram (+ 2 Free Printables!)

How to grow your instagram and how to get your first 1000 followers

I've been on Instagram for about 3 years now, and have only seen any kind of noticeable growth in my following in the last 6 months. I KNOW how frustrating it is to put so much effort and time into something, and then receive the bare minimum amount of engagement (especially when you know that at least half of those likes come from family and your best friends!). It took me a long time to get where I am today (and I'm still a baby in the big bad world of Instagram!) but I want to encourage you on your journey, wherever you may be right now.

While there is no secret, overnight trick to go from 0 - 1000 over night, today I want to share with you my strategies over the past year which got me to my first 1k.

1. Start tracking your numbers

Free-Social-Media-Stats-Tracker-from-CGS.png

First things first. Grab a pen and paper (or even better, print out the free stats tracker I made just for you...it's waiting for you in The #CGScreative Resource Library) and write down exactly where you are right now. It doesn't matter if you have 5 followers on Instagram or 5000. You need to start somewhere and today is a good a day as any to begin YOUR journey.

I have also included place for you to write down your stats for Facebook, Twitter, Pinterest & your email list. It makes life easier having all your social media stats in one handy place. Then keep adding your stats every month (or even every few weeks). When I first started tracking my stats, I counted all numbers every week. It was very encouraging to see the numbers slowly creep up. I have included space for the 12 months of the year on the free printable above, but you can print a many as you need if you want to do it by week instead of month.

2. Write down your goals

As with any journey you need to know where you are going. You write down your 'dream' numbers and keep them small and easily attainable, or you can shoot for the stars and write down something outrageous. Don't get disheartened if you don't reach this number in a week, a month or even a year. The point of this exercise is to know where you are heading and where you want to be. You can put a date a date on your goals, but I find this doesn't end up motivating me, and I end up feeling like a failure if I haven't reached my goals by a certain date. I like to keep my goals open ended, as I want to keep growing and not stop what I'm doing even when I hit a target. Here's a free goal tracker printable to help you. You can write down whatever goals you have for your social media channels; things like hosting a giveaway/joining group boards on Pinterest are great goals to start growing your channels too.


3. Hashtags, Hashtags, Hashtags!

Hashtags WILL help you grow your following by making sure your photographs show up on searches. Before you tag your photo, think about what your photograph is showing/telling people. You want to make sure you use the right hashtags so that the right people find your feed. If you're little unsure of where to start, read this post on using different hashtags.

4. Be Social & Share the Love

If someone takes the time to comment on your photo, make sure to first reply to that comment, and then take a minute to head on over to their profile. If you like what you see, leave them a comment or two, or at the very least go and show their feed some love by liking some of their photographs. If you aren't actively engaging with other people, you're missing out on creating real, authentic connections with potential clients and potential business/blogging buddies. Think about your own feed. When someone simply likes one photo, how many times do you click on over to their feed? But think about when someone likes 5, 10, 20 of your images? How does that make you feel? Okay, it can sometimes feel like they are being a little spammy, but if they comment on your images as well as like them, chances are they genuinely enjoy what you are putting out there. So why not return the favor? It will increase your chances of being remembered by your followers as someone who is genuine and authentic, ie. they are more likely to then click over to your blog and read your content.

When you like an image on Instagram, that person gets a notification. If they have a big following, changes are they get so many notifications that your little like fades into the abyss. If you go and like 10 of their images, your name will appear 10 times in their notifications, making you stand out. I know that I click on profiles that leave me lots of likes (and I definitely click on profiles that leave comments). So why not use this to your advantage and make people want to click on your profile and follow you to see more.

5. Be Consistent with your brand

This step is the most important. Maintaining a consistent feed is what will help you stand out amongst the million of other users out there. Branding is a whole other kettle of fish, but on a basic level, if you want to convey your brand (whether that is the brand you are growing for your blog business or even just your own personal brand of who you are) you need to be consistent. 

When I first started using Instagram I was all about the Valencia filter; you know that brown, sepia filter that gave a vintage edge to every photo? That was all very well and good, but since then my own style has developed into something more feminine, clean and pretty. I now use a white (or at least a light) background for all my photographs and put more thought into what I want to share. If you are serious about growing your brand, you need to think hard about the image you want to convey to your followers. 

To give you an idea of what I'm talking about I want to share with you what happened to my Instagram followers a earlier this year.


At the beginning of May this year (2015)  I decided to take Instagram seriously. I wanted to use it as a tool to grow my blog, not just as a place to share photos of my dog. I started styling my photographs, using a white background, and just putting a bit more thought into my images. I also started to introduce more of my own photography work (you can see this in below image on the left). Slowly, I started gaining lots of new followers. By the end of July I had gained about 200 new, actively engaging followers. 

Then I went on holiday to Borneo

I wanted to share the exciting places we were seeing and things we were doing with my readers. I changed the hashtags I was using to fit in with travel, and even though I was getting more likes on my photographs, I lost nearly 50 followers in 2 weeks. I had no idea what was going on. Yes, Instagram does go through purges where they delete inactive & spam accounts, but to loose so many people had to mean that my followers weren't interested in what I was posting.

You see, people were following CityGirlSearching the lifestyle blogger who posted photographs of makeup, stationery and other pretty things. They hadn't chosen to follow CityGirlSearching the global traveler who posted photographs of beaches & exotic foods. 

It was hard to realise how fickle people can be, and to see such a decline in followers when I thought I was posting interesting new content. I realised I had to start thinking about my Instagram account as an extension of my brand, and not as a personal account. 


Lots of bloggers I follow have ended up creating multiple Instagram accounts to use for different purposes and I have been contemplating doing the same. They have one account for their blog or business, and another one to share personal photographs for family and friends. Right now I have enough social media channels to juggle without adding in a personal IG account, but it is something you may want to consider to help streamline your brand.

How to Grow your instagram following plus free printables by CityGirlSearching

There are a number of free apps to tell you how many people follow/unfollow you but I have just found they make me feel horrible about Instagram. I downloaded Trackgram which has a paid and free features, and I found it took all the love out of Instagram for me. When I actively see who has un-followed me, it makes me want to unfollow them, regardless of whether I like their Instagram account or not.It leaves a bad taste in my mouth being able to see who un-follows me, and it has made me feel very negative towards certain bloggers who I used to love and admire. So I would say us it with caution, or rather, don't use it all. You don't need to be reminded who exactly un follows you, you can get a broad overview of this yourself by looking at your Instagram numbers on your profile yourself.

I hope this post inspired you to tackle the big bad world of Instagram! If you have any questions about it, please feel free to leave me a comment below, I promise to get back to you.

English Science Camp And Activities for kids - VOLCANOES

EnglishScienceCampActivitiesVolcanoKids

I taught a rather fun science English camp to different groups of students at the end of last year. I wanted something that was very hands on for the kids, while being fun and educational. I did these lessons with both elementary and middle schoolers and all my kids loved these experiments. We made exploding volcanoes and did the Egg drop experiment. This post will be focused on...

Volcanoes

I started the lesson by having my students in groups of 4. I gave each group a picture of a volcano that I had cut up into small pieces. I placed the picture facedown and then told them they had to put the pieces of the puzzle together and the first team to do it would be the winner.

Then we went over a very basic power point presentation showing the different parts of the volcano and completed a worksheet (I found the worksheet on Waygook, an incredible research, free rich website aimed at teachers here in South Korea). 

Then we set about making our volcanoes. I found all the ingredients that I needed at my local mart:

Ingredients for the Volcano

Vinegar

Oil

Flour

Dish Soap

Baking Soda

Water

Salt (try to use buy a ground salt...I learnt this lesson from the No Cook Play Dough recipe I did last year, course salt is horrible when making clay!)

Water based paints (i found these at the back of my English room)

Bottles (for the structure of your volcano)

How to Make the Volcano

For the dough a.k.a. the outside of the volcano

- In a large bowl mix together 3 cups of flour, 1 cup oil, 1 cup salt, 1/2 cup of water. Keep mixing! Add more flour, salt, oil as needed.

- Add paint and keep mixing and kneading until fully absorbed

Building your Volcano

-Tape down your bottle onto a plastic plate or piece of cardboard (this is very important and the volcano will make a lot of mess when you ignite it).

-Using bits of clay, build up your volcano. Make sure to leave the top open for the volcano to explode out of.

Making your Volcano Explode

-Now the fun part! Fill the bottle 3/4 full of hot water (be careful as the plastic bottle will melt if boiling water is used).

-Add 1/4 cup dish soap & 2 Tbs baking soda

-Add red paint/food colouring

-When you are ready, add 1 cup of vinegar and watch the volcano erupt!

It's best to do the erupting outside as these volcanoes tend to make quite a big mess. Make sure to come back for the second part of my Science camp, The Egg Drop Experiment!

Periscope & Blogging: Using Periscope to Grow your Blog

how to use periscope and using periscope to grow you blog

Hello. My name is Roxy, and I'm a Periscope addict.

I downloaded the live streaming app on Sunday night, and feel rather sheepish to say I have put myself out there, in live time, at least twice a day. It's only Wednesday and the fact that I have 11 broadcasts in 4 days is rather crazy. I had no idea that it would be so addictive, and SO MUCH FUN. I starting 'scoping' (yes, that's a thing) on a whim and hadn't put much thought into it but I have realised it's potential as a powerful tool for bloggers & business owners.

So what is Periscope?

Periscope is an app (recently purchased by Twitter) which lets you live video stream from your smart phone or tablet. It also lets your audience engage with you through a chat system, that you can respond to in real time. Viewers can also give you 'hearts', much like the Facebook 'like' button, if they agree with you or are enjoying what your are saying or doing.

Using Periscope to grow your blog

Your 'scopes are available for 24 hours before they are deleted. This means viewers can catch up anything they missed, and new viewers can watch you if they missed your broadcast. People can still give you hearts on the replay, which then get added to your overall heart count. The more hearts you get during a broadcast, the more chance you have of being featured. But please don't be that person who spends their entire time online begging for hearts, that's just not cool.

How to use Periscope to grow your blog

Here is a snap shot of my profile. Even though I only have a small following so far, I have received loads and loads of hearts...I told you there were nice people out there. Also, make sure you utilise your profile space well. When you first create your profile, you can choose to log in with Twitter. If you do this, it will automatically upload your twitter profile. Just like twitter, Periscope has a limit on the amount of characters you can use in your profile. Use them wisely and tell people what it is you do and why they should be interested in following you. 

What I have loved so much about Periscope is the fact that it's live, real, and not staged/edited/rehearsed like youtube videos. This means you literally just press a button, and you're live! There is no editing, no hours spent making a studio etc it's literally you and your phone and your viewers. This means people can ask you questions right then and there and you can answer them on the spot. 

As with any social platform, there will always be the trolls (those people who have nothing better to do than to write obscene comments and just be generally annoying) but it's super easy to block people with a swipe of the screen.

There are A LOT of Russians on Periscope, as well as many Eastern Europeans who ask me things in their language and I have no idea what they are saying, but for the most part I have had really nice people join me for my 'scopes'. 

How can Periscope Help Grow your Blog?

There are so many ways that Periscope can be used as a tool to help you grow your blog audience and readership, as well as a tool for growing the rest of your social media platforms. Here is a screen shot of my blog stats for the past month. 

Using Periscope to grow your blog

I usually hit a spike in traffic on days when I publish a blog post. I published a blog post on the 30th November but yesterday (1st December) I did not. And yet I saw a HUGE jump in traffic from my average of 377 page views a day, I got 539 yesterday. That's nearly double the amount. 

The only thing I did different? I placed a white board behind me while I was 'scoping which had my website & Instagram profiles written on it. Nothing fancy, literally a piece of white foam board with my details quickly scribbled on it. 

So you can see the potential right? 

I am really excited to delve deeper into Periscope and to start using it to grow my blog and my online stationery store.

Live streaming can be very daunting. The first 'scope I did I really had no idea what I was doing. I was in my pyjamas, in bed, with the camera facing my dog for most of the time, answering questions people were asking me about life in South Korea. The most asked questions was definitely 'Where are you from' as people were trying to work out my accent. But on that 'scope alone (ie the first one I ever did) I had nearly 300 people watch me. I had no makeup on, there was nothing interesting about my background, it was literally me in bed, drinking tea, and my dog sleeping on the floor. Now imagine I was doing something interesting like putting on makeup, walking around the streets in Korea, showing off items in my stationery store, imagine how many people would join me then?

In my third 'scope I had my husband and friend join me while we ate baked apples and drank tea. I named the broadcast  Apple Pudding & Zombie Brains as we were about to watch the latest episode of The Walking Dead (every time you go live you give your broadcast a title so people can read what your 'scope will be about...ie make it interesting!).Within 5 minutes we were TRENDING! This means that out of all the thousands of people online, our broadcast went to the top of the list! And we weren't doing anything other than eating food and talking about Zombies.

Some tips of what to talk about on Periscope.

So apart from talking about zombies and eating, there are lots of other things I'd suggest doing on Periscope. Things that can be used for actually growing your blog or business. Periscope is not like the other social media platforms. It's also not supposed to be scripted, it's supposed to be raw and real. Here are some things you can use it for if you're a blogger or business owner:

1. Q & A session.

Ask your viewers to ask you questions. Talk about where you are, what you do, what you blog about and let the conversation happen naturally. You'll be surprised how many people will be interested in knowing what you just ate/what your favorite colour is or why you chose to paint your nails electric blue.

2. Behind the Scenes

Use Periscope to show your viewers some behind the scenes footage of where you work. If you have a work studio where you put together stationery orders/take photographs/package orders/cook/teach show your viewers. It's always interesting seeing the other side of the creative scene. The side where everything is a mess, people will be able to relate to you and you'll be showing people a much more authentic side to you and your business.

3. Show off your pets

If baring your face to the whole wide world terrifies you then why not start by sharing your pets? Everyone loves animals, so why not share with the world your furry friend. I was amazed at how many people were interesting in seeing my dog, I even had requests from viewers to bring him on camera. 

4. Show off your products

Do you sell physical products? Show them to your viewers, ask them which ones they like best. Show them how they can use your products and how your products can be used around the house. This gives people a much more in depth look into what you're selling, making them more inclined to buy from you.

5. Show off your talents (or what you love doing)

Do you love baking? Are you an illustrator? Put on some music and invite people to watch you draw/cook/bake/paint your nails. It gives you something to do rather than staring into the screen blankly and people can enjoy your broadcast and still ask you questions.

Some general Periscope Tips

  • When you download Periscope, spend some time customising your profile. Include a link to your website/blog/online store and use an eye catching profile picture to help you stand out.
  • Spend a few minutes watching other people to get a better idea of what to do and what not to do.
  • The first thing you point your camera at when you start broadcasting will be the thumbnail for your 'scope. Make sure your camera is pointed at something interesting and eye catching. You can even make use of your branding/logo here to build up your brand. Your camera will, by default, be pointing away from you. This is why you should use a placeholder image (like your logo) or point your phone at something interesting rather than having it pointing at a blank wall while you wait to be able to turn the camera around. The blank wall will then be what people see when the scroll through their feed. 
  • Use interesting titles for your broadcast. Your title is super important as it is the first thing people will see when scrolling through the feed. Use emoticons and capital letters to draw attention.
  • Ask people to share your 'scope with their followers. You'd be surprised how many people will do this. It's really easy to do and just involved swiping to the right (for IOS ro swiping up for Android users).
  • Greet people as they join your stream. It's polite and helps them feel appreciated.
  • Follow other users and share the love by giving them hearts. 
  • Double tapping your screen while broadcasting changes the direction of your camera, so you can show people your face (if you want to) and you can show people what you are looking at. 

Most importantly have fun. Periscope is meant to be a fun platform for engaging with people. Don't get so caught up in trying to sell your blog/product that you forget about your audience and why they are there. People want to be entertained (and I don't mean the dodgy way here) so be real, be you and just relax. My first scope I was a shivering wreck, I couldn't even keep the phone straight as I was shaking so much. Within a few minutes I realised that it didn't matter if I said the wrong things. It takes a little while to warm up, so play some music in the background, and just have a good time.

Come and find me on Periscope (@RoxyHutton) and join in the fun.

How to Make your own Dried Apples

How to make dried apples

Apples are currently in season here in Korea, which means we are able to buy them without the usual $10 a pop price tag that that comes with them at any other time of the year. The apples used in this blog post were bought from a little farm stall near Naejangsan National Park.  

These dried apples were made with a dehydrator we were given by Farmboy's school, (here is a link to buying them on Gmarket) but you can easily do the same thing using your oven. 

It takes a while for the apples to get really soft and chewy (anything from 12 - 24 hours) but it's definitely worth the wait, and using a dehydrator instead of an oven will make your life easier. If you want them to be crunchy instead of chewy, then leave them in for even longer.

So far we have dried apples, pears (these have been the best so far!) and persimmons (another fruit that is also currently in season) and I plan on trying to make doggy snacks out of chicken breasts for our pup #ShadowTheJindo. I am also going to try my hand at making Biltong (the South African equivalent of Beef Jerkey) so let me know in the comments below if you can recommend any great recipes for Biltong!

If you have a dehydrator, the process is very simple.

1. Peel your fruit.

2. Chop/Cut/Core your fruit into small pieces. If you want to make apple rings then you will need to get hold of an apple corer. I was only able to find an apple corer than also slices (the green thing pictured below).

3. Place your fruit pieces as close together as possible, without actually having any of the pieces touch each other.

4. Turn on and adjust the temperature if your dehydrator has a temperature control switch. Turn up your dehydrator the the highest temperature (the higher the temperature the faster the fruit will dry out).

5. Leave for 24 - 48 hours. The first batch of fruit (pictured in this post) was only dehydrated over nights (about 15 hours) and so the apples were still quite soft and squidgy. We made another batch using persimmons and left those over night and the following day and they came out crunchy and delicious. I definitely recommend leaving them as long as possible.

6. Place the dried fruit in airtight container. You can use an ordinary ziplock bag and a straw to suck out all the air. Store in a cool, dark place. Your fruit will keep for a good couple of months (although ours doesn't last longer than a few days as we eat it all!).

Thanks to a friends suggestion, we just finished a batch of dried apples covered in cinnamon. Out whole house smells like Christmas and those apple pieces were absolutely amazing! Experiment with different spices, you can't really go too wrong.

If you don't have a dehydrator you can theoretically use your oven, but I'm not sure whether you'd actually want to leave your oven on overnight while you're sleeping? It is possible with the oven, but using a dehydrator is much easier. You can buy a dehydrator like ours on Gmarket (click here) for about W30 000.

DIY Hanging Photo Display using Square prints from Sticky9 & a GIVEAWAY!!!

Welcome to the next instalment in my #DIYDaysInKorea series. These posts are about making beautiful things for your home, whether that home is in South Korea, South Africa, or any where else in the world. This post follows on from the Gold Animal Fridge Magnets and these jars are what I used to store the Fig jam I blogged about last year.

If you are based here in Korea and would like to join one of my DIY days (click here to see what went on at the previous get togethers we've had) you can pop on over to the Facebook group for more information.  It's a wonderful place to meet new friends and spend an afternoon.

I hope you enjoy this series and that you leave feeling inspired.

x


DIY Hanging Photo Display Using Square Prints from Sticky9

I recently ordered a pack of square prints from Stick9 made up from my Instagram photographs (Stick9 offers a whole bunch of products that are made up from your Instagram photographs...if you use my code FRIEND2JNT you'll get 15% off your first order!) and had been brainstorming uses for them for weeks. When the world map we had stuck up above our TV fell down one day, I decided that their square prints would fill the space perfectly. 

Farmboy and I live in South Korea in an apartment rented out to us by the Education Office, so we are unable to go about knocking new holes or nails into the walls. I made use of the existing nails (hence the very non-conforming shape that ensued this DIY) when I strung up my photographs.

This DIY is super easy, quick and completely customizeable! You can hang your photographs in any shape or form you wish! The options are endless and only limited by the number of nails you have available!

You Will Need

  • plain wooden pegs (I bought these at my local CNA stationery store here in Korea for W500 for a pack of 5)
  • newspaper/kitchen towel
  • gold spray paint (I bought this at my local DC mart, you can also find spray paint at Daiso but their colour options are limited)
  • string/wool (I had planned to use wool, but soon realised it wouldn't show up very well against my white wall)

Step 1

Order your Sticky9 prints by clicking here. Free delivery worldwide! My prints arrived in South Korea about 10 days after I placed my order.

Step 2

Cover your workspace with kitchen towel or newspaper to protect your floor. You can see clearly that I missed this step in my last DIY by the evidence in the below photograph...oops!

Step 3

Fold over the paper towel before you place your pegs to allow for even coating. Spray your wooden pegs with the gold spray paint, ensuring you keep an even distance with your spray paint to make sure the paint dries evenly. 

Step 4

Get hanging! There really is no exact science behind this, and as you can see, it doesn't really matter if you ignore all the rules of shapes and symmetry and go wild. 

Step 5

Snap a pic of your hanging photo's & and share them with me on the CityGirlSearching Facebook page so I can see them!

Win sticky9 prints with citygirlsearching

And now for the fun part! I have teamed up with Sticky9 and have 2 sets of square prints to giveaway to two lucky winners! All you have to do to enter follow the steps in the widget below.

The two winners will be chosen on Friday 27th November and will be notified via my Facebook page (click here).

Good Luck!

Current Favourite South African Youtubers

South African Youtubers

I recently added the title 'Vlogger' (video-blogger) or rather 'Youtuber' to my belt (click here to watch my videos!). As I am South African, I wanted to take some time today and share with you some creative South Africans who have their own youtube channels. Youtube is dominated by American voices, and so I am very happy to share these ladies with you. They make me proud to be South African!

I am always on the lookout for new Youtubers to follow and support, so if you also have a Youtube channel please leave me a link to your channel in the comments below so I can say hello.


MY CURRENT FAVOURITE SOUTH AFRICAN YOUTUBERS

In no particular order, here they are. Simply click on the image below to be redirected to their blogs and youtube channels. 

Cape Town based beauty & lifestyle Blogger LeChelle Taylor. You can find her blog over here: Taylor Made


Pretoria based beauty blogger Luzanne. You can find her blog here: Pink Peonies


Cape Town based beauty and lifestyle blogger Chereen Styrdom. You can find her blog here: For the Beauty Of It.


Johannesburg based beauty blogger Chantelle Bester. You can find her blog here: Not Another Poppie


Pretoria based beauty blogger Chicara. You can find her blog here Lipgloss Kisses

Am I missing out on any other awesome South African vloggers and bloggers? Please let me know in the comments below if you have a youtube channel, or if you know someone who does that deserves a mention. I am always looking for more Bloggers & Youtubers to connect with!

My FitBit Flex - Why I both love and hate this excercise tracker

My FitBit Flex - Why I both love and hate this excercise tracker

For anyone who may not know what a FitBit is, you've come to the right place. A FitBit is an exercise tracker, designed to put the fun back into working out, making it easier to monitor your progress. It's also one of the most unobtrusive trackers on the market, as you don't wear a chest strap like a lot of other trackers. FitBit has a range of different trackers, but I will be talking about the FitBit Flex in this post. 

The FitBit flex is not designed to be a hardcore heart rate monitor/GPS tracker but rather is meant f to track their your basic movements. It monitors your steps, calories burnt as well as being a very cool sleep tracker when you put it into sleep mode. I always forget to do this, but on the few nights that I did remember, I was able to see my sleeping pattern and how many times I moved/was awake during the night. This is really great for those people who go to bed early but still wake up feeling exhausted. You may be unconsciously moving around during the night, therefore not hitting REM meaning your body is not getting the steady soundless rest it needs. Hmmm....Interesting.

I mainly use my FitBit as a step counter, to make sure I reach my step goals. I find that when I am in the routine of checking the app and being aware of my steps, I am more motivated to exercise and more inspired to get out the house and get my body moving. Because, let's face it, we're all a little lazy deep down inside, myself included!

Read More

Gwangju Dog Park 'Pet Theme Park' {광주애견테마파크}

Gwangju Dog Park

Socialsing a dog in Korea can be really hard. Unless you have friends nearby who own dogs, the chances of your dog being able to play with other dogs is slim. There are dog cafes in the bigger cities that allow you to bring your dogs to them (like this one in Gunsan) but cafes and parks that have outdoor space for big dogs to romp and play are few and far between. I was so happy to hear about the 'Pet Theme Park' dog cafe in Gwangju which features a swimming pool, air conditioned indoor area and a really big fenced off outside area. 

The Dog cafe is located about 20 km west of the centre of Gwangju, so isn't in the city itself so it might be harder to get to without your own car. But if you have a friend with a car or your dog is small enough to take in a carrier on a bus & taxi, the trip is definitely worth it!

Gwangju Dog Park

There is even a big swimming pool for the dogs when it's really hot. When I was there, the pool area was closed off for what looked like a private lesson for a very sweet looking spaniel. I think the pool is open to all when it's really hot.

Here's a quick video I made of Shadow having a grand old time with his new Corgi friend (as well as two Huskies). It also gives you a bit of an idea of what the inside of the cafe looks like. There are snacks and drinks available to purchase, as well as coffee and tea to order.

The whole cafe is set up in such a nice way, with lots of scented candles and soaps which really make it smell wonderful, rather than 'doggy' as most dog cafes can't help bit smell like disinfectant and wet dog. The cafe also offers a 'dog hotel' service and the accept dogs of all sizes to stay. I think the prices for overnight stays are around W30 000. For the use of the cafe it was W7 000 per dog (at least for my dog it may be less for smaller dogs) and W7 000 per person. It's a little pricier than other dog cafes, but it was worth it for the huge amount of space they have for your dog to run around safely. 

Here is their (Korean) website: Gwangju Dog

Here is their Facebook Page: Pet Theme Park

Address: 300-1, Daesan-dong, Gwangju

Tel: 062-941-5880

The Hunger Games English Camp - Lesson Ideas for Teaching English in Korea

The HUnger Games English Camp ideas for teaching english in korea

If you're an English Teacher here in Korea you will have (hopefully) heard or know about the English camps you are required to teach your students during the winter & summer holidays. According to your school schedule and hoe many schools you teach at you may have 1 or 2 camps (or even more) camps. We are all supposed to teach 20 hours of camp during the vacation (you may have more/less) but 20 hour is the standard. I usually break this up into 1 week of camp with 4 hours a day. My classes have always been in the morning. 

Hunger Games English Camp Plan

In my first year at my current middle school I developed a Hunger Games English camp (thanks to this  wonderful thread and the original creator 'Marbar' on Waygook!). I have successfully done this camp 3 times now with different students. They all LOVE it! I teach at an all girls school, but the lessons would suit mixed students too. I have taught this to First & Second Grade Middle School students, and then have just slightly adapted the lessons for the higher/lower level grades.

The camp is based on the first book, with lessons and fun activities surrounding a poster they will complete by the end if the camp, leading up to the final day where the students present their poster and watch the full screening of the first Hunger Games movie.

I want to share these lessons with you in the hopes that they might help you in your camp planning. I will post a Google download link to the camp below where you will be able to download the plan, lessons I created (and be able to edit them to suit your school) as well as the workbook I created for the students to fill in as we went along (I basically just inserted the powerpoint slides and made blanks for them to write down notes etc). Here is a link to download the plan, the printables, the ice breaker for the first day, the actual power point slides and the workbook:

I don't break my schedule up into hours/lessons (although this is how the plan works) but I rather teach until I can see the students need a break and then stop to give them some time to relax. I have found on some days we only stop for a short bathroom break as the students get really into the lessons and have a lot of fun. You will have to judge the timing based on how your students respond.

I always start off my camp with an ice breaker activity, and then divide my students up into their teams. I did this following the reaping ceremony in the Hunger Games whereby my students reach into a hat and pull out their team. They stay in that team for the entire camp and the activities are based upon that team. I also use their team names to keep score of points for prizes/snacks throughout the camp. (pictured aboveO. 

I wanted my students to produce a poster by the end of the camp, and so on the first day I had my students divide their poster page into 5 sections (4 sections and a centre circle for their team name/logo). I have the section 'Homework' on the camp plan above (that is more for admin purposes as some schools will want to see you at least plan to give the students homework) but I have never given them actual homework to do. There has always been time in the lessons to finish all the work.

Here are the finished posters:

One of the activities my students loved the most was designing the costumes for the Opening Cemerony. I went to my nearest Daiso and bought a whole bunch of random supplies (bubble wrap, tinsel, gloves, ribbon, string, cleaning cloths and sponges etc) an then gave the students free reign to do what they liked. This is what they came up with:

I hope you found this camp idea useful. If you use this idea or have any other great ideas for English camp themes I'd love to hear from you in the comments below.

Happy camp planning!

Where to see the Autumn/Fall Leaves in Korea 2015

Where to see Autumn Fall leaves in Korean 2015

Typically, mid-October into early November is the peak time to see the leaves turning here in Korea. But this year, the leaves have begun to change earlier than expected. 

Just as wonderful as the spring blossoms (click here) the Autumn/Fall foliage is breathtaking. For us South Africans, we just don't get sights like this back home. The trees turn of course, but it's just nothing like the sea of red and yellow that greets you here in Korea.

The four most popular mountains (and therefore the busiest!) places to see the Autumn colours are Naejangsan (내장산) just outside of the town of Jeongeup, Jirisan (지리산) which is close to Namwon, Seoraksan (석악산) in Gangwon Province and Gwanaksan (관악산) which is closer to Seoul. 

We made it to Naejangsan (pictured below) in 2013 and and last year I took some photographs at Seonunsan, just outside Gochang (pictured at the bottom of this post).

As with many outdoor activities here in Korea, be prepared for the crowds! We were stuck on a bus for 2 hours making our way to Naejangsan, due to the hoards of people and cars, and eventually jumped off the bus and decided to walk the 5km road from the base of the mountain to the actual main viewing. It was a logistical nightmare. But, as long as you know it's going to be chaos and you are prepared for that, you will be rewarded with stunning sights. Seoununsan is much quieter, and offers just as much beauty as Naejangsan.

Here is a map of the expected Autumn/Fall foliage here in Korea:

Fall Leaves Foliage Korea 2015

Naejangsan (Jeongeup, Jeollobokdo)

Seonunsan, Gochang Jeollobokdo

Do you have any recommendations of places to see the foliage here in Korea? Any secret spots you've been to? I'd love to hear from you in the comments below.

5 ways Buffer will change the way you blog forever!

How Buffer Will Change The Way You Blog Blogging Tips

I've been using Buffer for about a year now, but it's only been in the last few months that I have come realise just how powerful it can be when fully utilised to grow your blog. For those who have never heard of Buffer, let me break down what exactly it is.

"Buffer is the best way to drive traffic, increase fan engagement and save time on social media" Buffer

Basically, Buffer is a platform for you to schedule twitter statuses & Facebook posts (LinkedIn & Google plus too and Pinterest for their paid upgrade) ahead of time. For those of you who wonder how it is that I am able to post things on all my social media platforms while living in a different time zone to the majority of my readers this is how I do it. Once I publish a post on my blog, I head straight to buffer to make sure it gets posted to my social media platforms at times that are optimised for my chosen time zone.

If you are just diving into the world of social media marketing for your blog, you may have noticed that some of your posts are getting more attention on different days or at particular times of the day. According to research, weekdays at lunchtime are said to be the best time to post content on Facebook ('best time' meaning your posts are more likely to get the most likes, shares & comments).  This is quite a simple thing to understand if you think about your own personal use of Facebook. When do you spend the most amount of time on Facebook? Most people are asleep/busy in the early morning and so it makes sense that the lowest engagement on Facebook posts is before 6am right? Buffer has all sorts of fancy tools to do all the hard work for you, suggesting optimal posting times for your social media platforms based on your timezone and your past reader engagement.

Here are 5 ways that Buffer has changed the way I blog. Buffer itself is free and I think if you're serious about your blog, this tool can really help you take it to the next level. 

Blogging Tips CityGirlSearching

Analytics

Once your post has been published on your chosen platform, Buffer will give you a breakdown of how well it did. It will show you how many likes/shares/comments/retweets you got. This helps you to see what sort of content your readers are engaging with, and especially what you are posting when. Buffer also adds a little star to posts that have done the best (calling them 'Top Posts') so you can easily scroll through and see what has worked best for your content. This helps you to determine when your followers are online and when they are engaging.

In the image below you can see how the following Facebook post performed (you can see how many comments/likes/clicks on the link I posted/shares and also how many people the post reached). From this post I can see that it only reached 380 people. I know that I have 1800+ fans on Facebook and yet only 380 of them saw this post. Interesting. Some of the analytical elements are for paid for members of Buffer (such as the 'Most Popular' tab but I have yet to need any of their added features and am very happy with the free version so far!).

Buffer review CityGirlSearching

For me, I have readers in many different timezones; I am South African (so many of my readers are there), I live in Korea (a lot of my makeup reviews are seen by people in Asia as these products are more widely available here) and finally a lot of my readership is based in the US and Europe too. This means in order to make sure that everyone sees my content, I need something that allows me to schedule my posts for these different timezones (refer to point 3 below!). I use the free analytics section of my own blogging platform (Squarespace) and I use Google Analytics to get a better breakdown of the countries where my readers are based. Once I know where they are based, I can then schedule my posts for optimal times in those timezones.

Scheduling

I mentioned this at the start of this post but scheduling is what Buffer is built to do. Buffer has a new tool for optimizing your posting times. You can either choose your own times and how often you want posts to go out for your different platforms or you can let buffer do the hard work for you with their Optimal Timing Tool. When you add content in the 'Content' tab, those posts will then be added to a list that will publish those posts at the times you have chosen above or let Buffer choose for you: 

Buffer App Review

When I click the above 'Want Buffer to optimize your schedule? Try our Optimal Timing Tool' I get directed to the following page where I can choose which platform I want my optimal times to show:

Once you choose your platform, and the number of times a day you want to post, Buffer uses it's fancy algorithms and spits out a graph like this: 

Buffer App review

From the graph above I can see that if I want to post to Facebook twice a day, the optimal times are between 2pm & 8pm for my chosen time zone (Asia/Seoul). You can then have Buffer automatically replace your exisitng schedule or you can do it yourself in the schedule tab in your dashboard.

Buffer is super easy to add content to. Simply choose which profile you want to add content to, click on the 'Content' tab and begin writing and uploading images. Right now you can see I have zero posts scheduled:

Buffer App Social Media Scheduling review

What's also handy is you can write one piece of content and set it to be posted to all of your social media platforms linked to Buffer. I usually schedule short posts for twitter, and more image based content for Facebook. Although I have noticed that the images I have shared to Twitter get more re-tweets than my written posts (thanks to the analytics tab!).

Buffer Blog

One of my favourite features of Buffer is, funnily enough, their own blog. They have such great articles and guides to all elements of social media and constantly post tips for making the most out of Buffer. Their blog is definitely worth checking out if you want to learn more about the science behind social media. It's a no-frills place to learn more about Social Media.

Blogging Tips CityGirl Searching

TIME SAVING

Because I can post my content ahead of time, it saves me from having to be at my computer and manually post each bit of content, as well make sure I have an image for each one. My brand is very image based and so being able to sit down once a week and schedule social media posts to go out throughout the week saves me so much time. It also means I can turn my phone off when I am out and not worry about posting content. Buffer does all the work for me.

SHORTEN LINKS

This is a big benefit to Buffer. I was using Bitly to shorten my web links, especially for twitter. I actually still use Bitly on the odd occasion when I want to manually post something to Social Media but having a platform that shortens links and schedules posts for me just saves me more time, and that's the point really isn't it. Shortening your links helps you keep to the strict 140 characters for Twitter, and it also helps Buffer to provide you with analytics for the number of people who clicked on your link. And to be honest which of the following looks better on the eye and more 'click worthy':

https://sticky9.com/?pid=117&referral_code=FRIEND2JNT&utm_content=buffer17f3b&utm_medium=social&utm_source=facebook.com&utm_campaign=buffer

or

http://buff.ly/1JumpJ9

Blogging Tips Tricks CityGirlSearching

I have more thing to say about Buffer. While scheduling your posts is a massive time saving tool, do remember that social media is about being social. It's about engaging with people. Don't just set up a bunch of posts and then hope your blog will grow magically. As with any blogging tool, it is designed to be used in partnership with you. You are the person behind the blog and you are not a machine. Here is a really great guide to Social Media automation by the Buffer Blog. It's definitely worth a read. 

Do you use Buffer? Have you found that it's saved you time and helped grow your own blog or website? I'd love to hear from you in the comments below.

Happy blogging!

*I have not been asked by Buffer to write this post or been paid to do so. I simply want to share with you how this great site has helped me become a better blogger.*

Dog boarding for Big Dogs in Korea - 4MenDogs, Daejeon

Dog Boarding for Big Dog Korea 4MenDogs Daejeon

Having a dog here in South Korea is both wonderful and challenging and delightful and frustrating all at the same time. If you have adopted/rescued/own one of the small breeds then you're life here will be infinitely easier than those of us who have larger dogs. Just to be clear, it seems that anything bigger than 10kg's is deemed big/large here. I have had lots of people back home in South Africa say to me that, "Oh, Shadow is actually quite small" and I have to remind them of the fact that the majority of dogs kept as pets (especially kept indoors) are of the maltese/Pomeranian size. When we rescued Shadow he was a measly 2kg's and we had no idea how big he was going to get. He has grown into a rather handsome and healthy 19kg (medium in Western standards) dog.

My husband and I came here to Korea with the goal of traveling to as many places as we can, and having a dog was definitely not part of the plan. We also go away a lot, although we have swopped hotels for a tent so we can now accommodate our pooch.

Camping with a dog in Korea

But, as much as our lives have had to change with him in them, we still go away on holiday and have had to find a place for him to stay. I know a lot of people feel that leaving your dog somewhere if you go away is stressful for the dog, I have to say that every-time we have picked him up from the boarding establishment he barely seems to have noticed we have been gone. We may be very lucky to have a very independent, self sufficient dog, but I think it also has a lot to do with all the training we did with him when he was younger. He sleeps in his own room (if you don't have another room here in your apartment you could section off part of your apartment or use a crate). This really helps with separation anxiety as your pup gets used to the fact that you aren't around 24/7. If you get them used to their crate they should be able to travel anywhere, and at least have their crate as a place of safety for them to retreat into if they feel scared or stressed. 

Big Dog Boarding South Korea 4MenDogs

4MenDogs in Daejeon

I have done extensive research into boarding/dog hotels for my pup and the reality is I just can't justify spending a small fortune on him every-time we go away. I found that most pet sitters/hotels will charge anything from $30 - $50 a day. If I was just going away for the weekend this wouldn't be so bad, but for extended periods of time (like our vacations which are 2 - 3 weeks) this amount is just too much. I know pet sitters work hard for their money, but as it costs us close to $4000 to take a 20kg dog back to South Africa we are on a strict budget.

I was thrilled to find out about 4MenDogs in Daejeon who cater for all sizes and breed of dogs in their rather large establishment on the outskirts of the city. Shadow has stayed there twice now (once over a weekend and then for our winter break of 2 weeks). Both times he hardly acknowledged our arrival wanting to carry on playing with his friends and came back just as happy and healthy as when we dropped him off.

It has been a little difficult communicating with the people who run 4MenDogs as they don't speak much English but you can make a booking via email with a very nice English speaking lady (details posted below). We decided to visit the place before Shadow stayed the first time and two of the staff members were super helpful and had their phones out to translate any questions we had and they explained to us the schedules for the dogs. 

What I like most about 4MenDogs is that they have a number of large, outdoor enclosures in which the dogs are rotated around throughout the day. The dogs are crated overnight (so you need to supply your dog's crate...another reason to crate train them before hand so they get used to being in there and will feel safe and comfortable while in them...click here for a post on where to buy a crate online here in Korea) and then they are crated again at lunch time. 

4MenDogs are able to hold a lot of dogs as they have a big warehouse type set up where the crates are kept, as well as outdoor pens (pictured above nder the shadoe cloth) where I saw different dogs kept during my visits to drop off and pick up Shadow. They also offer training and grooming.

Another great thing about them is when we arrived the first time they put Shadow in an enclosure fenced off from the other dogs to see how he behaved and how the other dogs behaved towards him. It was noted that one male was quite aggressive to Shadow and they moved that particular dog and then put Shadow in with the other dogs. So they really are careful about placing dogs with even temperaments. This should put your mind at ease if you have a very shy dog or one who has not had much socialising with other dogs. They also separate the male and female dogs and will ask you whether your dog is fixed or not. This may be a pre-requisite for boarding. 

I did have a Korean friend phone for me to make our first booking and they had asked a lot of questions about my dog before hand. Things like whether he had stayed apart from us before, and what his eating habits are like when he is away from us as JIndos are known as being very picky eaters (Shadow did go on a 3 day hunger strike apparently when we were gone but then went back to eating normally after that). 

4mendogs boarding daejeon

4MenDogs use their website (click here) to upload photographs and videos of your dog so you can see how they are doing (see pictures above). This was great and something I really appreciated being a very soppy dog mommy I missed my pup rather a lot, and seeing him having such a great time with other dogs helped put my mind at ease. 

As they don't offer a drop off/pick up service you will need to think about getting your dog there and picking them up. We have a car here in Korea and I'm not sure how anyone manages without one if they have a big dog!

I've posted the nitty gritty info & prices below. Please do have a Korean friend call them if you have any specific questions relating to 4MenDogs. This post is my personal opinion of the place, and I have been very happy with them. Please note that we, as bigger dog owners can't really be too fussy about places like 4MenDogs as there just aren't that many places that accept big dogs for longer periods of time without charging the earth. Please note, there was a recent complaint from someone that their dog contracted Canine Influenza at 4MenDogs but as a responsible dog owner you should be vaccinating/titre testing your dog annually if your dog spends time with other dogs. I hope you find this post helpful, and at the end of the day it helps you with finding a place to board your pup.

Dog Boarding big dogs Korea 4MenDogs

More Information from the Animal Rescue Korea Site (this information is current):


Address: 421-5 Yongsan-dong, Yuseon-gu, Daejeon.
It’s about 15 minute walk from North Daejeon IC (북대전 IC).
There is a bus of 704, 301, 918 & 5 you can take and should get off bus station 북대전IC네거리.
Pick up service available from the bus stop to the center.

Contact
For a pick up, kyungkuen@naver.com (010-2236-4004)
For further inquiry, sylvia@kepco-enc.com (not a trainer, for English communication)
You can visit your dog anytime from 09:00 am to 19:00 pm (please call ahead to give them warning)
For urgent enquiries, you can contact in advance and visit your dog anytime since at least one of 4 trainers stays at night everyday.

Price for boarding:
*Per day / More than 10 days / Per month / Normal Discounted for ARK
Small 15,000  10,000  300,000 450,000 400,000
Medium/large 20,000 10,000 300,000 500,000 450,000
*No pick up service available for boarding.

Prerequisites and things to bring
* Dogs should be up to date with vaccinations.
* For a male dog, he should be neutered.
* A small bag of hard food your dog eats and things such as toys, blanket which help your dog feeling a bit at home.

Trainers
There are 4 trainers who all majored in animal training area. Mr.KWON, Gyung-geun has more than 3 years of experience in a training facility in near Seoul. Other 3 have junior level of training experience. Most of all, all of them love dogs and are passionate about training dogs.

Training Style
The trainers use positive reinforcement training techniques using clickers, treats and ball. Choke collars are used upon the request of the owner, or when the trainers deem it necessary for safety.

Payment
Payment is preferred by cash or bank transfer. You’re asked to pay it on the day your dog starts training or boarding. Please inquire the account info if needed.

Other services (Playground open from 12:00pm to 19:00pm)
You can bring your dog and use the playground everyday except for every Thursday.
It is 5,000won per person and it doesn’t matter how many dogs you bring together. The dog should be fully vaccinated and not aggressive or sick.

Chopping off your locks - Donating your hair to Charity in Korea

Chopping off your locks - Donating your hair to Charity in Korea

It's the start of the cooler weather here in South Korea and I have been wanting to cut a fringe for the past few weeks. Cooler weather means much less maintenance when it comes to a fringe, or bangs as my American friends say. All girls with a fringe will sympathise with me when I say that that part of your hair does not tame easily, especially if you exercise a lot.

A few weeks ago I noticed a number of my students had cut their gorgeous, long hair in favor of a bob, and when I asked them why they had cut their hair, I was quite surprised at their answer. They had donated their hair to cancer charities. After asking a few more questions about it, I decided I wanted to do the same with my hair. In the past 20 years I have only had one 'short' hair cut and that was to below my shoulder, hardly short I would say, and so this was quite a big deal for me. Instead of thinking about it too much, I decided to make the change last week Tuesday and then walked into a salon here in my small town and had it all chopped off. Over 30 cm's of hair!

Here are a few snaps of my hair pre-cut (as in, the morning of the day I cut my hair). It was long, wavy and looked a bit endy. I was never the type of girl to spend hours curling or straightening my hair, and this is how it looked naturally after a quick once over with the hairdryer after a shower. 

Read More

Microchipping your dog in Korea

Microchipping dog in Korea

A microchip is a small device (about the size of a grain of rice) which is implanted in your pets skin. There are no batteries, no tracking technology and no radiation involved. The chip is implanted under the skin between the shoulder blades and contains all your information (phone number, address etc). The needle used is a bit bigger than those used for vaccinations, and so some people prefer to have their pet microchipped while their pet is undergoing another anaesthetic operation (such as neutering) to avoid any unnecessary pain. However, most pets tolerate the procedure with little or no reaction (Shadow included).

Once your pet has a micro chip, your vet will then scan the chip and load your personal info onto a data system, thereby registering you as the owner. South Korea is clamping down on dog owners, imposing heavy fines of up to KRW 1million on unregistered dog. So many pets are abandoned in Korea (after they loose their puppy cuteness or when their irresponsible owners realise how expensive it can be to own a pet) registering the pet allows those owners to be traced. 

Microchip pet in Korea

There are three methods of registering your dog in Korea;

  • an embedded RFID chip (Radio Frequency Identification)
  • an electronic tag
  • or an ordinary dog tag

Microchipping your dog in Korea is a very simple process. The only thing you need to research is what kind of micro chip is used in your home country, or the country you plan on taking your pet to when you leave Korea.  Different countries have different chips/scanners, and so depending on where you will be taking your dog when you leave Korea, you need to keep this in mind. As Shadow will be returning with us to South Africa, we needed to make sure his micro chip was an ISO (International Standard Organisation) either ISO 11784 and ISO 11785. South Africa, Canada, Europe & South Korea are countries that I know have 15 digit ISO chip and so getting your pet chipped here will mean they will be able to be scanned in those countries. I have been told by my local vet that I will be able to change my information and address easily when I get back to South Africa as currently Shadow has been registered with my address & phone number here in Korea. In most countries, pet microchips adhere to ISO to promote compatibility between chips and scanners (this refers to the 15 digit ISO chip I mentioned before). In the US, however, there are three different types of chips other than the international standard. Click here for more info on the different chips and scanners.

Microchip Dog in Korea

South Africa (our home country) have a very strict import policy with animals and as such, pets have to be microchipped. For travel to the US, I have read that your dog doesn't have to be chipped (do check with your travel agent to be sure). Also, having your dog chipped and registered here (or any country) just gives you peace of mind, knowing that if they get lost for any reason, they have a much higher chance of being returned to you. A lot of dogs are able to get loose of their collars, and so there is a chance that an electronic tag on a collar could get lost.

All vets will be able to chip your dog. I live in a very small 'rural' town and my vet was able to do it for me quickly and effectively, and all with his very limited English and my even more limited Korean. As I live in a small town, the cost of veterinary services is much cheaper than the bigger cities here in Korea. Micro chipping and registering cost me W25 000 (about $25) but W40 000 ($40) seems to be the going rate in bigger cities. The actual procedure was very quick. It just involves a needle and the chip is implanted into the base of the neck, just below the skin. The needle was large though, that was a bit scary, but it was over in a few seconds and Shadow didn't even notice anything afterwards. Afterwards I was given a certificate as well as a few copies of his 15 digit chip number. It was so easy to do and I can't urge pet owners, especially those here in Korea, to get one done for your pet. I have also heard of people who have ordered their own chip from the US and then simply asked their vet to insert it for them. You are then able to configure the chip to your home address in the US. That option might appeal to you if you are leaving the country soon and know where you are going to be living when you get back home. As we will still be in Korea for at least another year I need to have my Korean address and phone number set up on my dogs chip.

Have you had any experience microchipping your pet? Please leave me a comment below, I'd love to hear from you!

Inspirational Instagram Profiles

InstagramInspiration.png

Instagram has been my favourite social media platform for a while now. When I first started I was following all sorts of random people. As the months went by I realised just how powerful Instagram is as a networking tool and I began to look for fellow creatives in my field (lifestyle/travel/beauty bloggers) to follow and I've built real friendships with a lot of them. I even collaborated with someone I met via Instagram on this Boho Bridal styled Wedding shoot (click here to see my photographs). 

A basic search will turn up loads of interesting new brands and people to follow, but I'm not so much interested in the huge corporations as I am the smaller business owners and creatives. I find the people who are in the same boat as I am, trying to take our blogs and businesses out into this big bad world and so much more real, more genuine, and ultimately so much more likely to spend time following you back or commenting and actively engaging in your work. I'm not sure about you but I know that I'd rather have 100 engaging followers than 100 000 fans who simply follow without knowing a single things about who the person is behind my brand. 

I find that the more relatable creatives I follow, the more I am inspired to create better content for my own feed and more my blog. Are there any Instagram profiles you absolutely love? Share them with me in the comments below. Even better than that, share your own profile below and I'll pop by and say hello. 

Here is small list of some of my current favourite profiles on Instagram, simply click each image to find them on Instagram.

Enjoy!

Fall For DIY

The Philippines Travel Guide: El Nido

El Nido Travel Guide Philippines

Farmboy and I spent two weeks in the Philippines over the December holidays in 2010. Even though that was a few years ago, the following information is still relevant and all the links have been updated to help you in planning your trip. We spent a total of 5 days in Puerto Princess (click here) at the start and end of our trip, and the rest of the time we spent in El Nido.

I have been told that there are now direst flights to El Nido, but when we were there we had to take a 7 hour mini van trip. That trip was pretty horrendous as we were packed into a van with a number of other people and it was terribly uncomfortable. But it was cheap and that was the idea. We hadn't booked any accommodation before arriving, and so spent the first few hours walking from place to place in search of a room. We spent one awful night at a place on the beach called Spider Pension (AVOID AT ALL COSTS!) which consisted of a dingy room, hole in the floor for a toilet and cockroaches and flies everywhere. After that awful experience we set off early the next morning in search of anything better. We eventually found some newly build cottages set off the main road and part of Rosanna's Pension. Clean and cheap it was the perfect place to base ourselves for 3 nights. From there the restaurants and cafes were a short walk into the main part of town.

We ate a lot of our meals at Art Cafe; a wonderful laid back spot that served great food and drinks all day.

As it was the holiday period and it seemed most of the nicer places were fully booked but we eventually found a place with 2 double beds and air-conditioning. Although El Nido at the time was running on generators which turned off in the middle of the day and the middle of the night, something to keep in mind if you need to charge things or plan to have a hot shower at a particular time. We managed fine though and barely noticed the power outages. 

El Nido itself is gorgeous. When we were there it was still very undiscovered, with only a few restaurants and cafes. I think there is much more variety now, but friends have told us it is still magical and not over crowded like Boracay. From El Nido you can take boats out for the day to hundreds of different islands and spend the day seeing no one. Pure Bliss! 

We booked a 3 day 2 night island hopping tour with Tao which was both incredible and disastrous at the same time. Incredible because of the sights, but disastrous as we were served pork which had not been kept cold and gave us all food poisoning...not something you want when spending the day on a boat traveling from island to island. Even though we were all rather queasy throughout the trip, it was an incredible experience. It costs us at that time about $250 per person for all meals, boat rides and accommodation in basic local lodging.

Once back in El Nido it was New Years eve and we welcomed the new year in the woven basket pods surrounding The Alternative restaurant. We then spent 2 days hiring scooters and traveling around El Nido where there are more beautiful beaches to discover, our favourite being Nacpan Beach. Hiring scooters is a great way to avoid the crowds and it's very inexpensive too.

After our fill of beaches we headed back to Puerto Princessa by the local public bus for our final night.  We spent it the one and only 'fancy' hotel we could find, for some well deserved luxury (at the time it was $65 for a room for 4 people for the night). We did some last minute shopping at the pearl markets, and finally headed back to the bustling metropolis of Manila, and finally home to Korea.

USEFUL TRAVEL INFO FOR THE PHILIPPINES

  • 30 day visa free entry for citizens of South African, USA, UK, New Zealand, Australia (and a number of other countries...click here for more info).
  • Pack an emergency medicine kit. As this was only our second trip to Asia, none of us had packed the basic supplies like flu/stomach cramps/pain pills. After the food poisoning I went and got full on flu and just had to live through it for the last 4 days of our holiday...make sure to pack some nose spray/decongestants to help with any flu symptoms you may have. Rather be safe than sorry!
  • Use travel apps like Orbitz to book hotels/hostels if you can (they often give discounts for using the app and you can score some great deals!)
  • Pack a travel towel/cotton sarong that you can wet at night and sleep under if you don't have airconditioning. This will help keep you cool if you only have a fan in your room (and this will especially help you sleep at night if you have no fan/electricity).
  • Buy a waterproof bag to store your valuables in when going on boat rides. At the very least have a few spare ziplock bags handy to store passports and cash in, just in case your bags get wet.

Do you have any recommendations of things to do and see in Puerto Princessa? I'd love to hear from you in the comments below!