How to Plan your own Murder Mystery Party

How to plan murder mystery party

I organised a Murder Mystery party for Farmboys birthday and it went so well that I thought I'd share some details on it in case you too want to host one. I hadn't been to a murder mystery party before, and so really had no idea where to even begin. I started off getting in touch with a girl here in Korea who holds an annual murder mystery event, and she was so incredibly kind. She gave me all the info I needed to get started, as well as as sample character bio's. Her event is the larger end of the scale, with up to 40 people attending. As I only had 22 guest, things were a little easier. You can buy complete party kits online, and there are loads and loads of free printable goodies on Pinterest, but to really save time I followed an awesome plan I found online, put together by Nick Breen (click here).

Nick lays out an entire scenario, characters, backstories & email templates so all the hard work is done. Then it's just up to you to send out characters to your guests and hope they all dress up! I would also suggest asking a friend to help you if you aren't the creative type. I had the help of a very talented friend, Kim, who helped me in creating more characters and their backstories. Thank you Kimmie! I couldn't have done it without you!

Thank you for all the help Kim! Photo taken by Ian Bethune

Thank you for all the help Kim! Photo taken by Ian Bethune

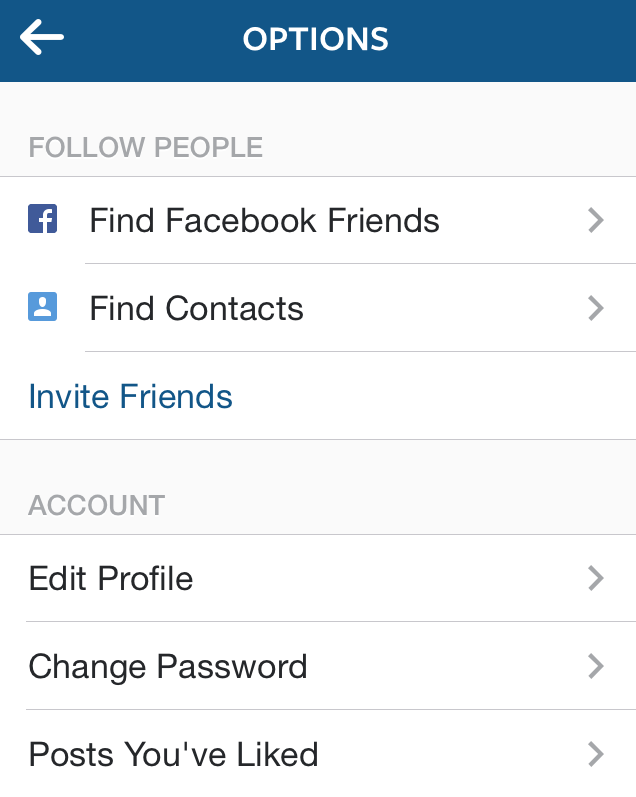
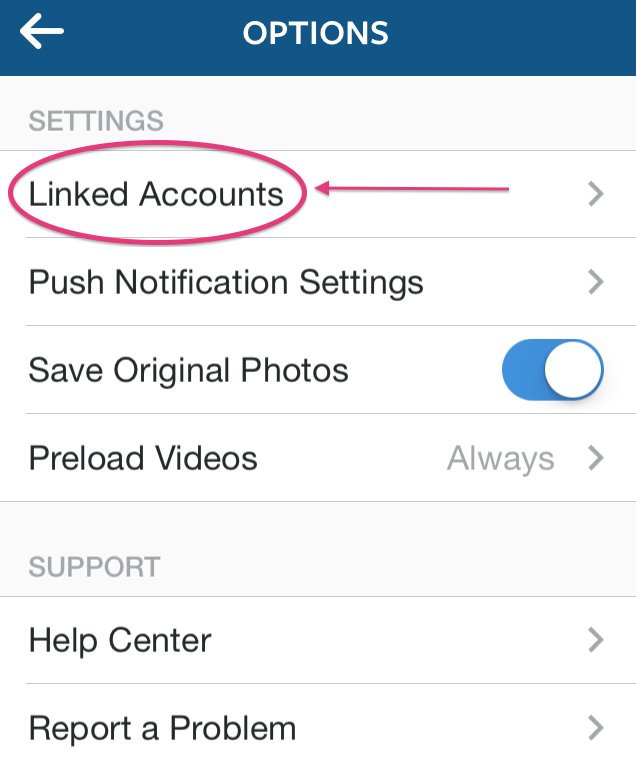
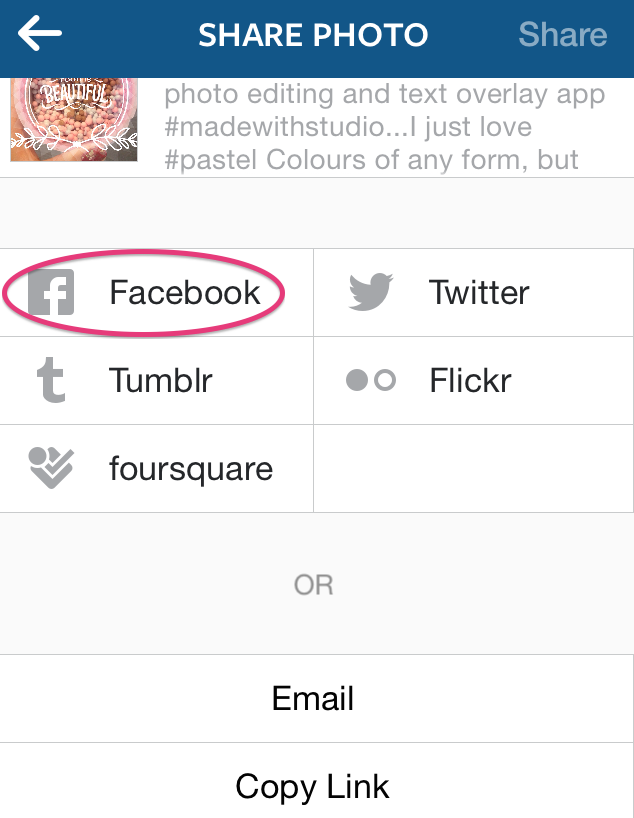
I used Facebook to create an event for the party, and from there was able to send out group messages (I'm sure theses were terribly annoying at times) but they helped to let guests know what was going on, as well as to send reminders for things like directions, starting times & pre-ordering food.

The hardest part of the entire planning process was making sure I didn't send the wrong character information to the wrong person! I sent out a message 3 weeks before with the basic details of the event (time, place & theme) using the following template adapted from Nick Breens site:

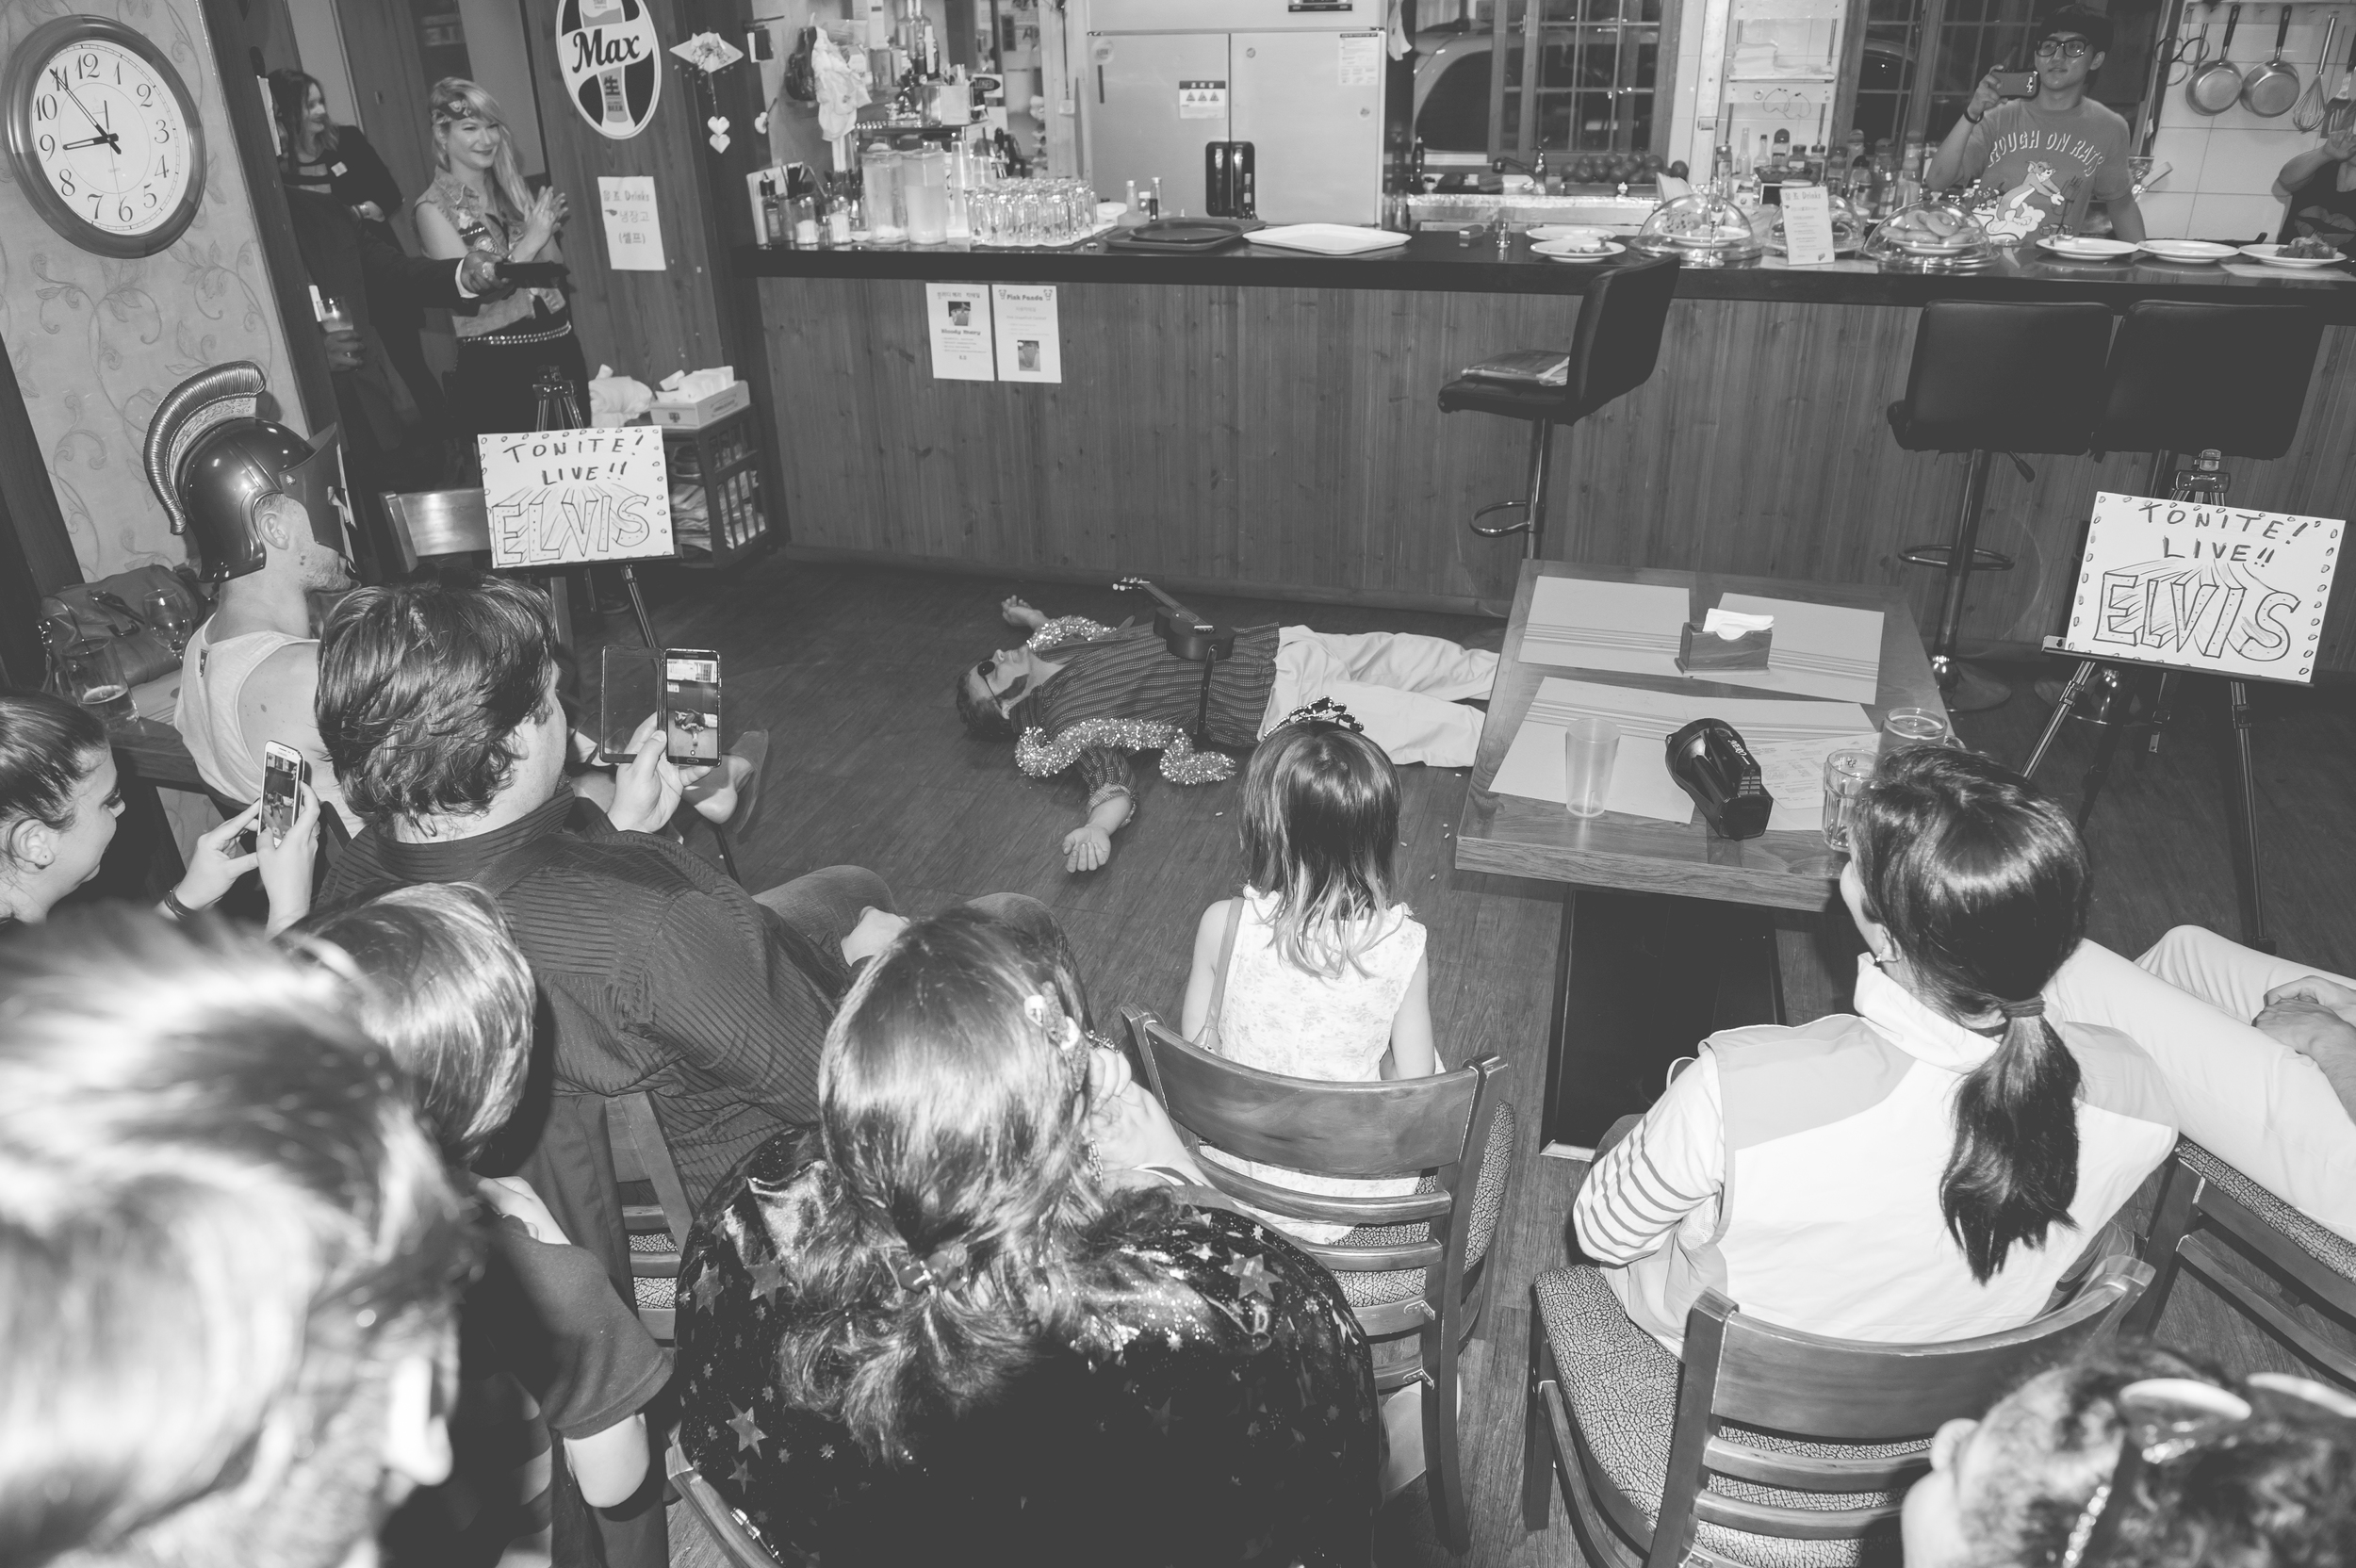
You are all guests at an upscale casino in Las Vegas. You have very rare tickets to the best night of excitement on the strip; the famous Elvis Impersonator. It's 8 o'clock and everyone has gathered into the swanky casino bar for the star performer, the best Elvis Impersonator of all time. 
As the show starts, a gunshot echoes throughout the bar. The curtain comes up, and Elvis goes down. The casino's bar doors slam shut and everyone in the bar is now a suspect.

You are requested at the party to determine which of our friends is the murderer. Throughout the night you can talk to any of the suspects to see who they are and to determine if they are the murderer. One person will be the murderer, if you are not the murderer, you can try and trick everyone into believing you are, or you can simply hunt for the murderer.

I will be giving everyone attending a short character backstory. I encourage you to develop your character as much as you want. I have given you a lot of room to be creative with your character. The more you shape your characters backstory, the more believable it will be. Some of the character backstories that I will provide you with will contain clues which you must tell everyone else at the party. Piece together enough clues and you may find the murderer.

In order to guess who the murderer is, you must answer the following three questions;

1. Who Murdered Elvis
2. How did they murder Elvis
3. Why did they murder Elvis.

Each person will be allowed two guesses throughout the evening. All guesses will be made publicly. The first person to correctly guess these three questions will get a prize.  I will be sending out your character information next week so you can prepare a costume etc.  It should be a lot of fun! 

I had 22 guests and so had to create a few more characters than those suggested by Nick Breen on his blog. If you do this, you need to make sure the new character stores tie in with the existing ones. I also suggest creating one or two extra characters in case you have a few unexpected guests. You can make these character roles minor, so that if they aren't in the plot the story still makes sense.

Then I sent out the characters 2 weeks before the event, and a few final reminders in the last week.

I asked Dave (the owner of the Jeonju Diner in Jeonju) if we could host the event at his restaurant. I also asked very nicely if he would be our Elvis too. He was very gracious and went all out in preparation for his role as the murdered showman. It was fantastic.

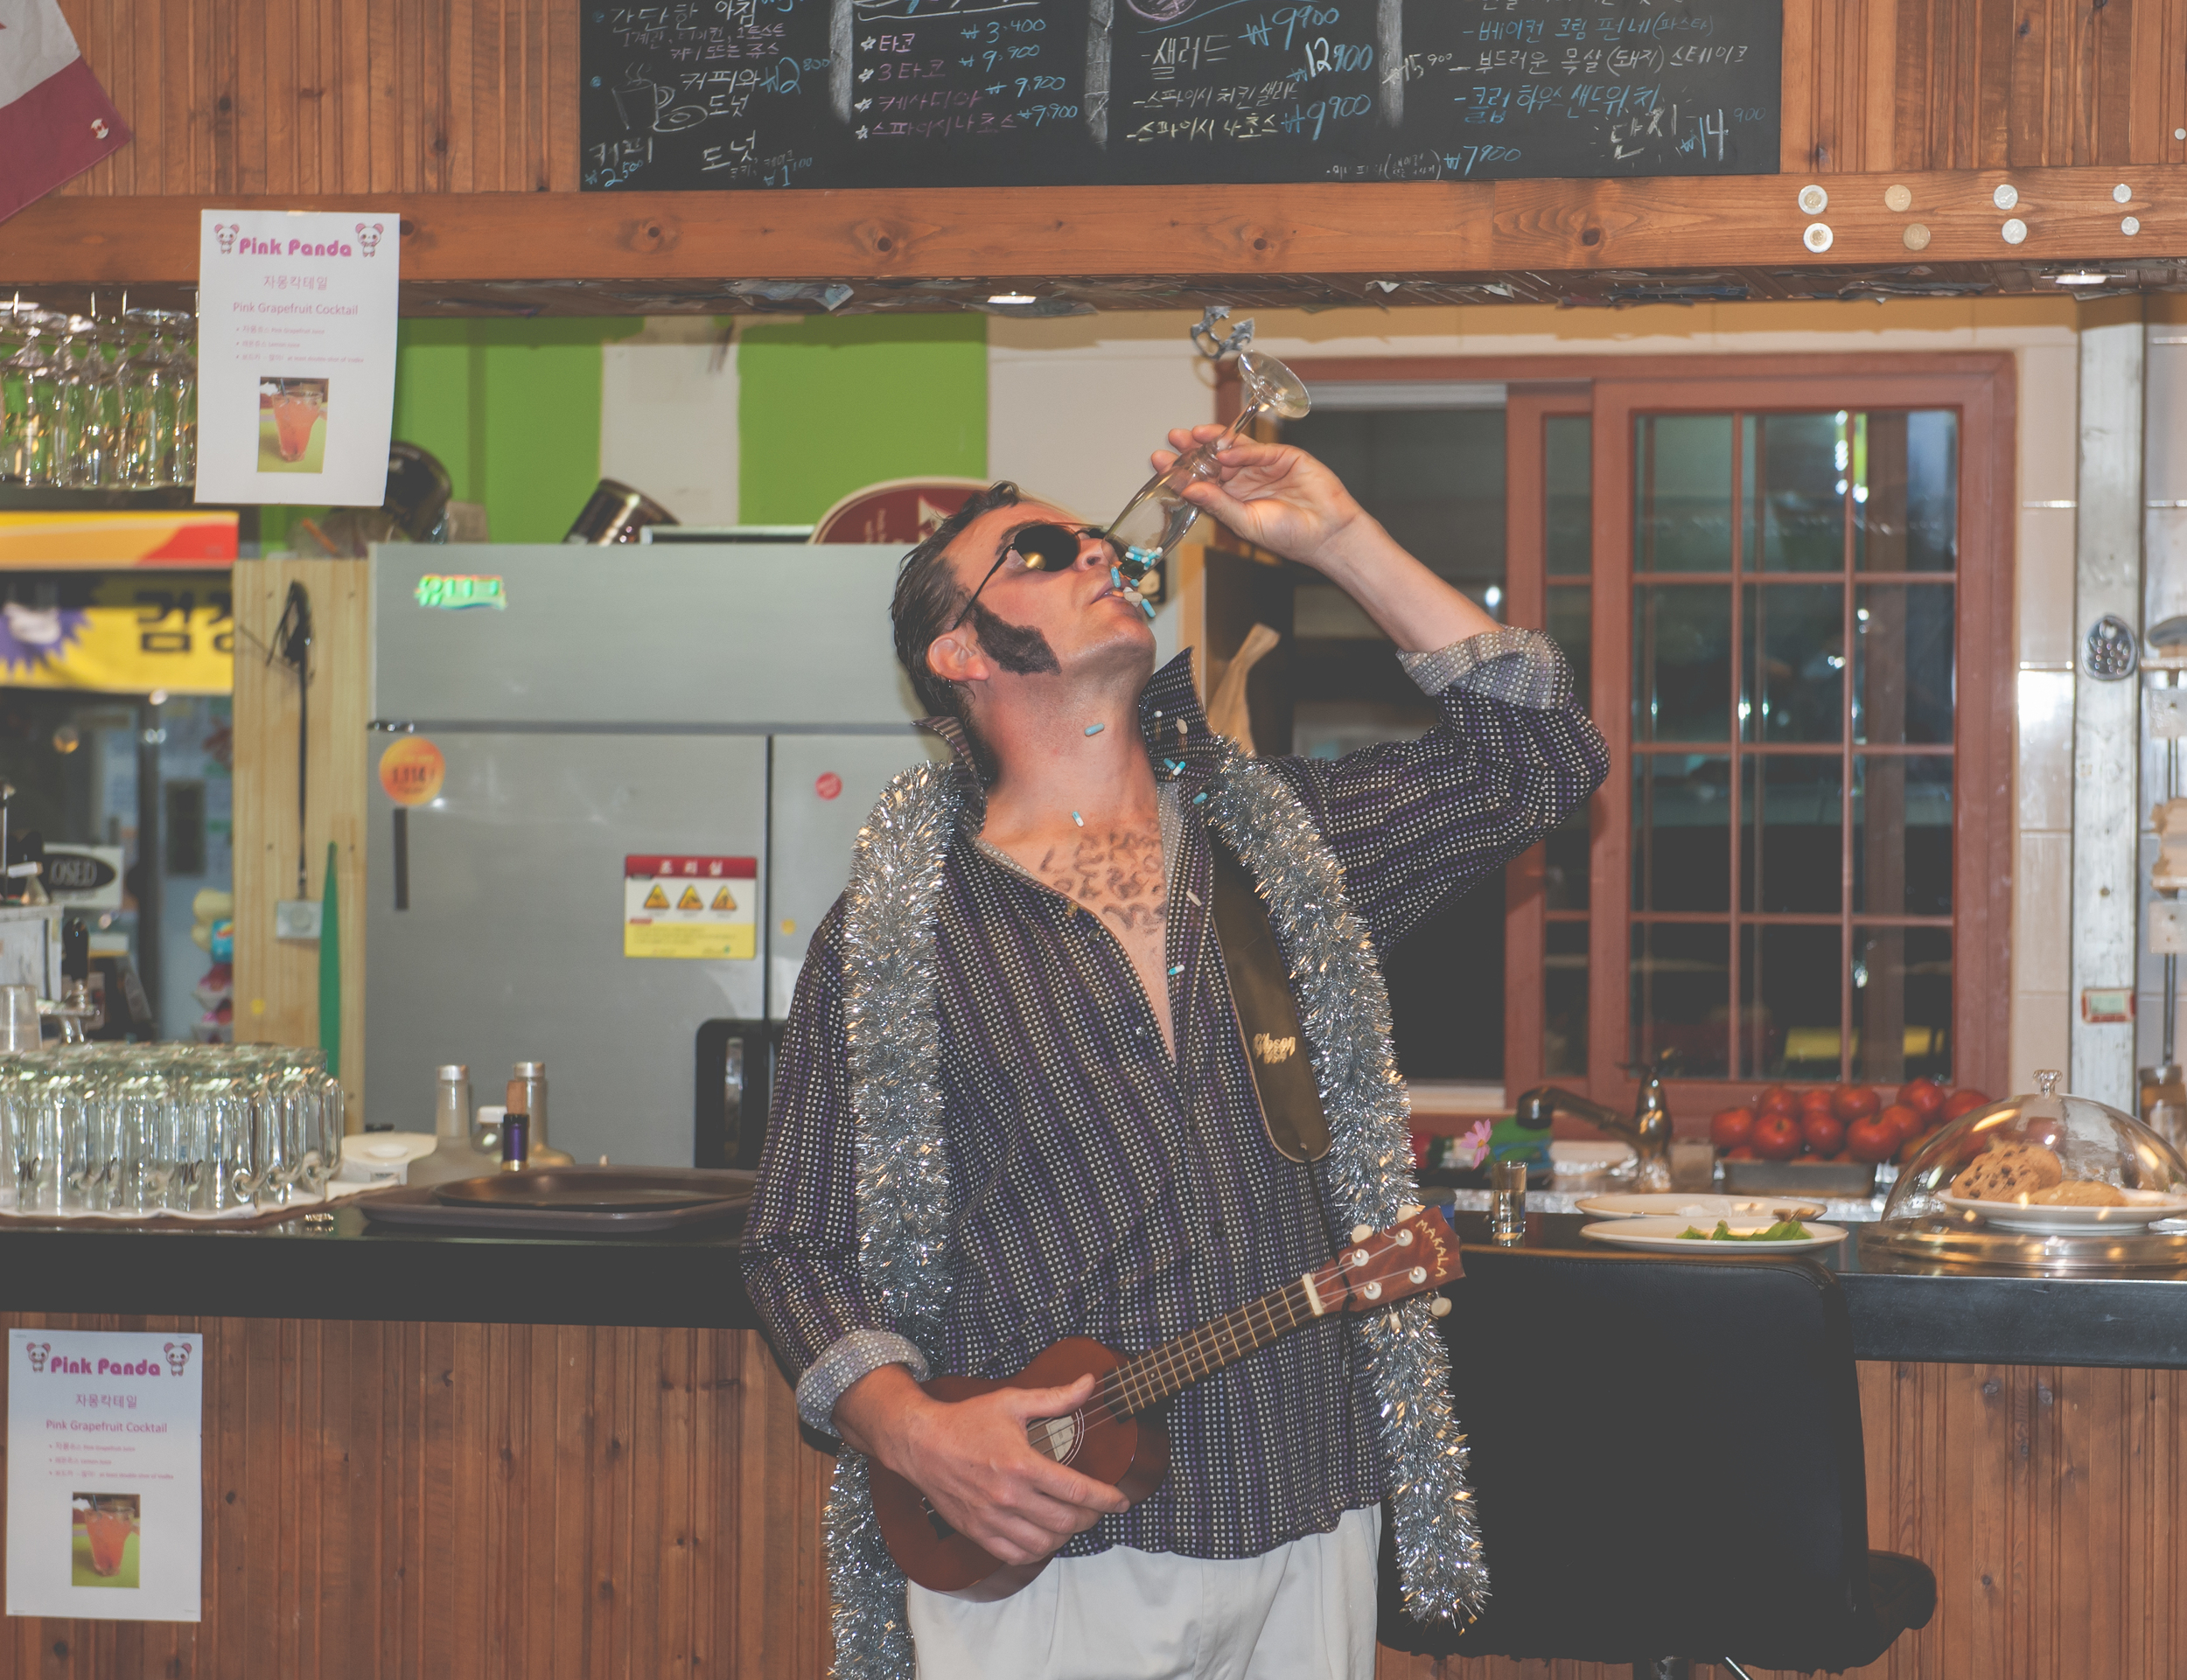
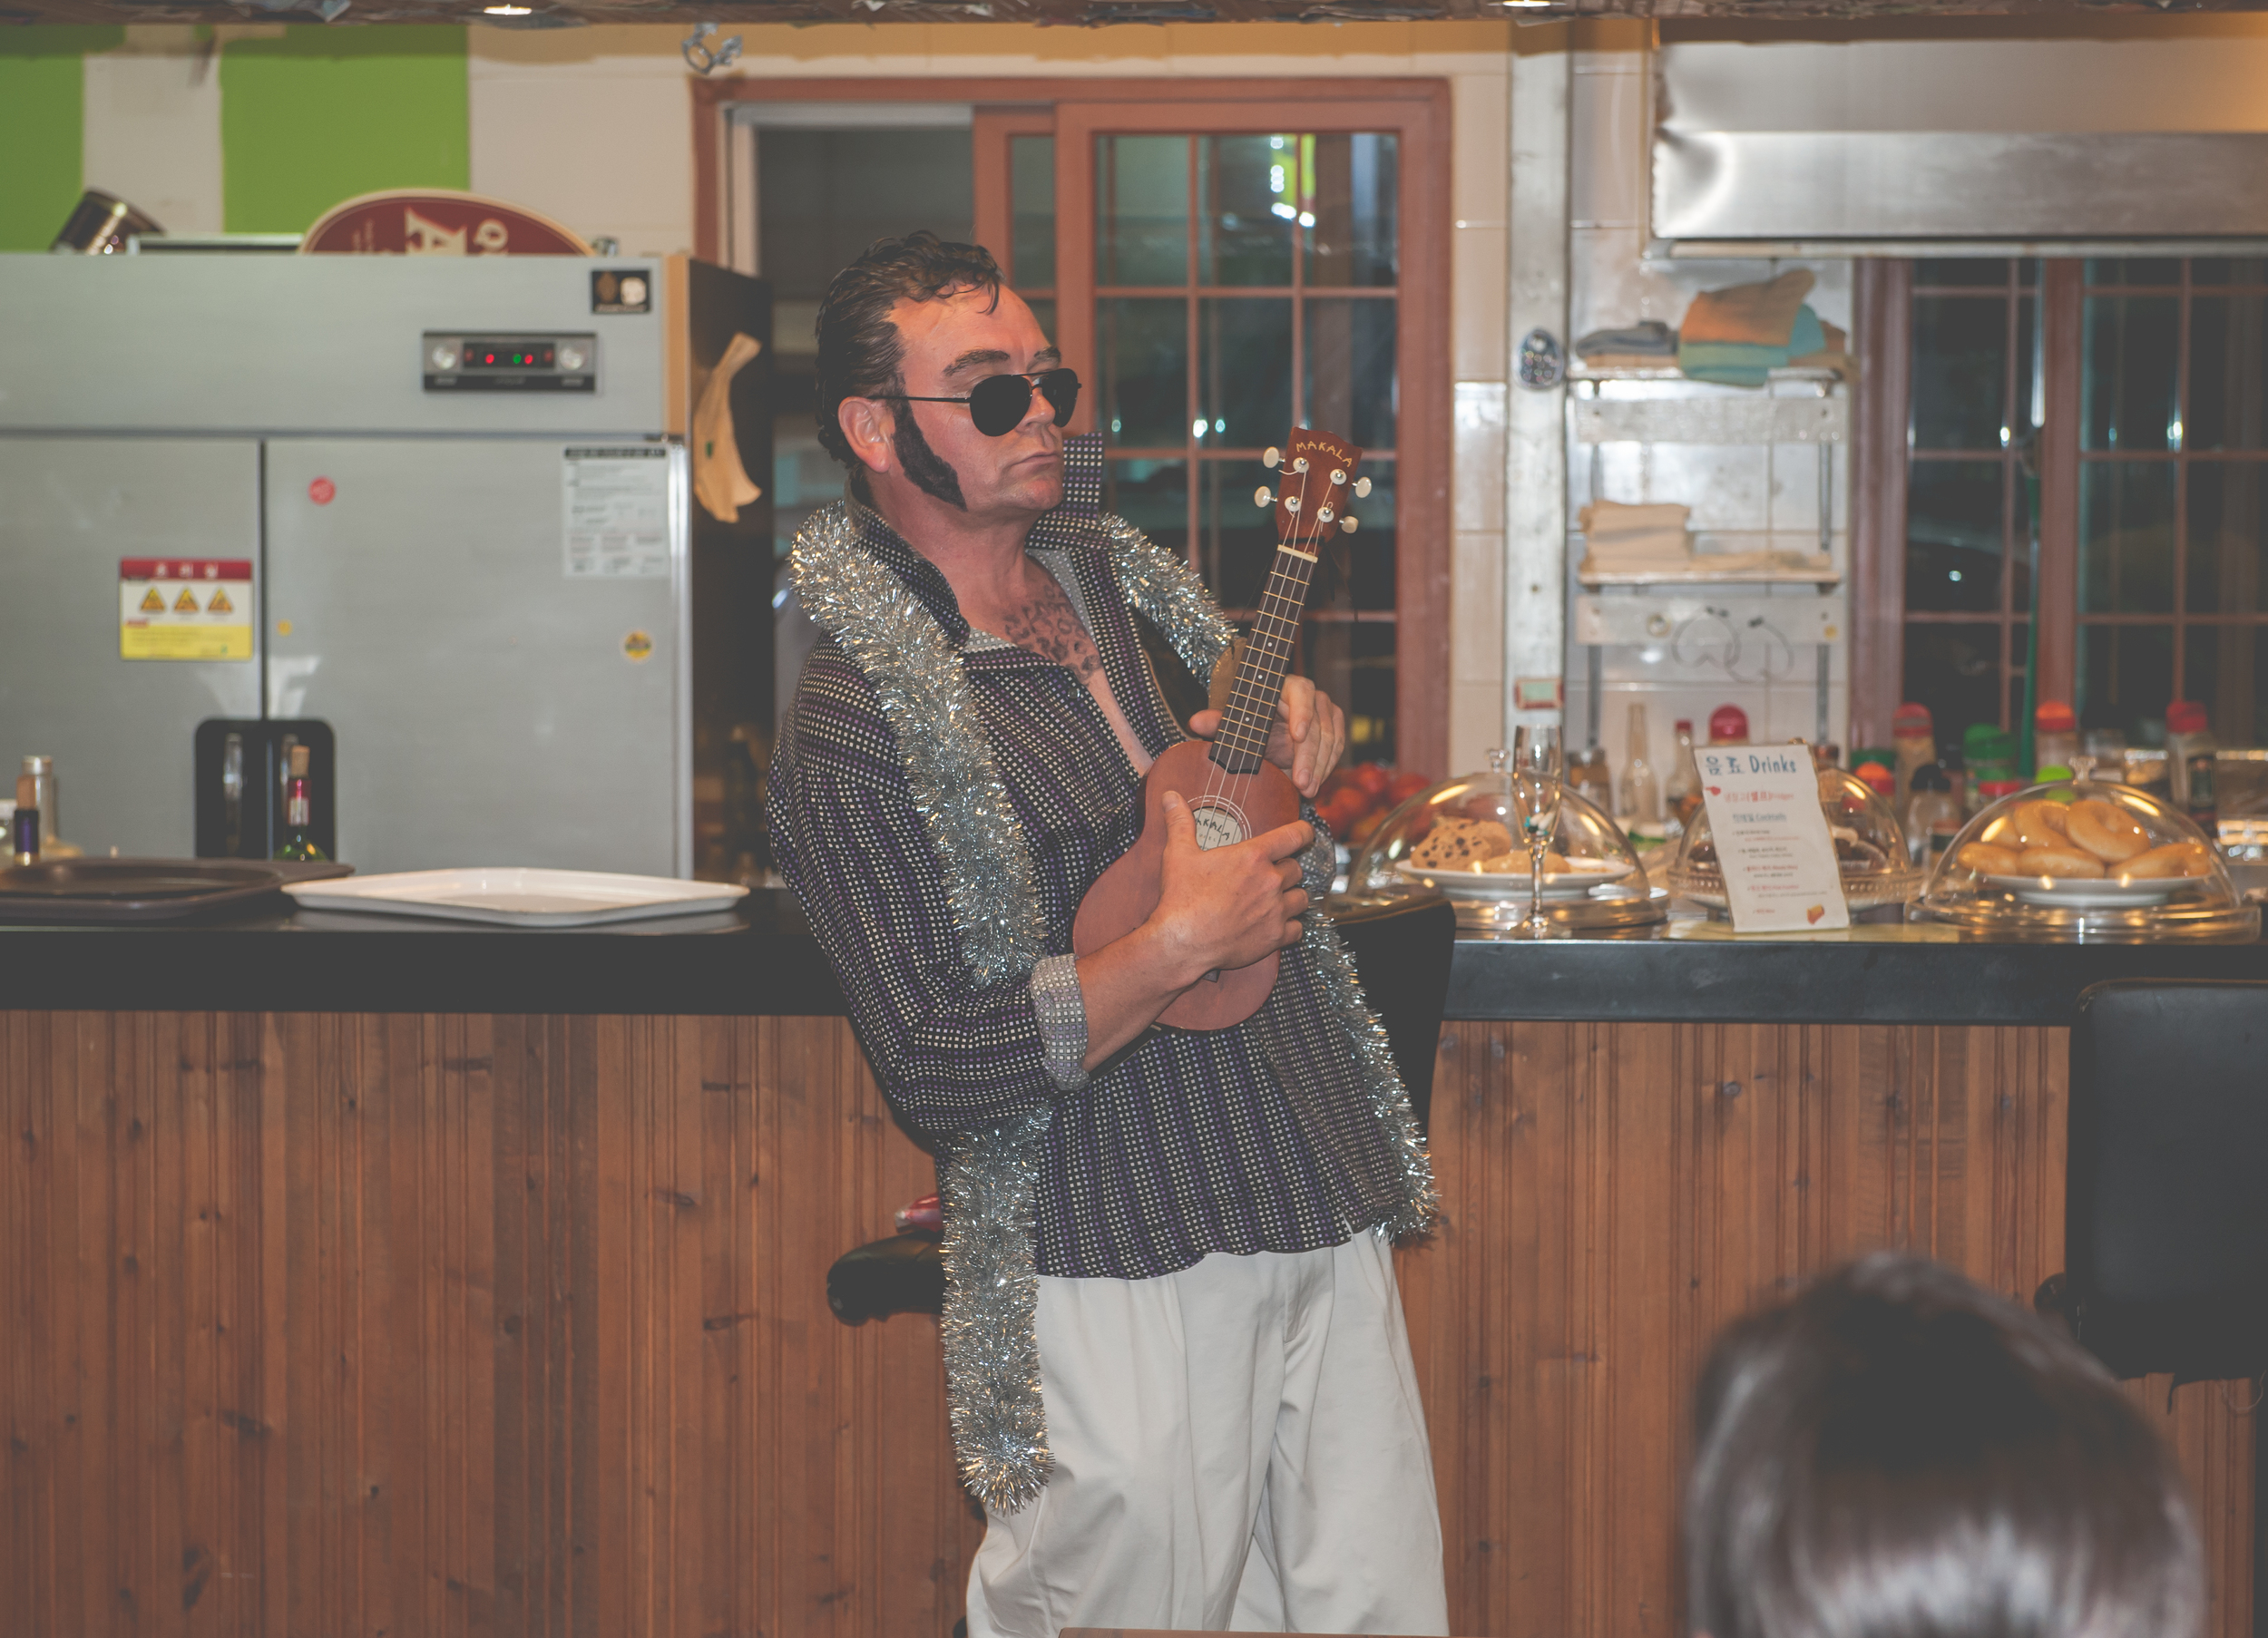
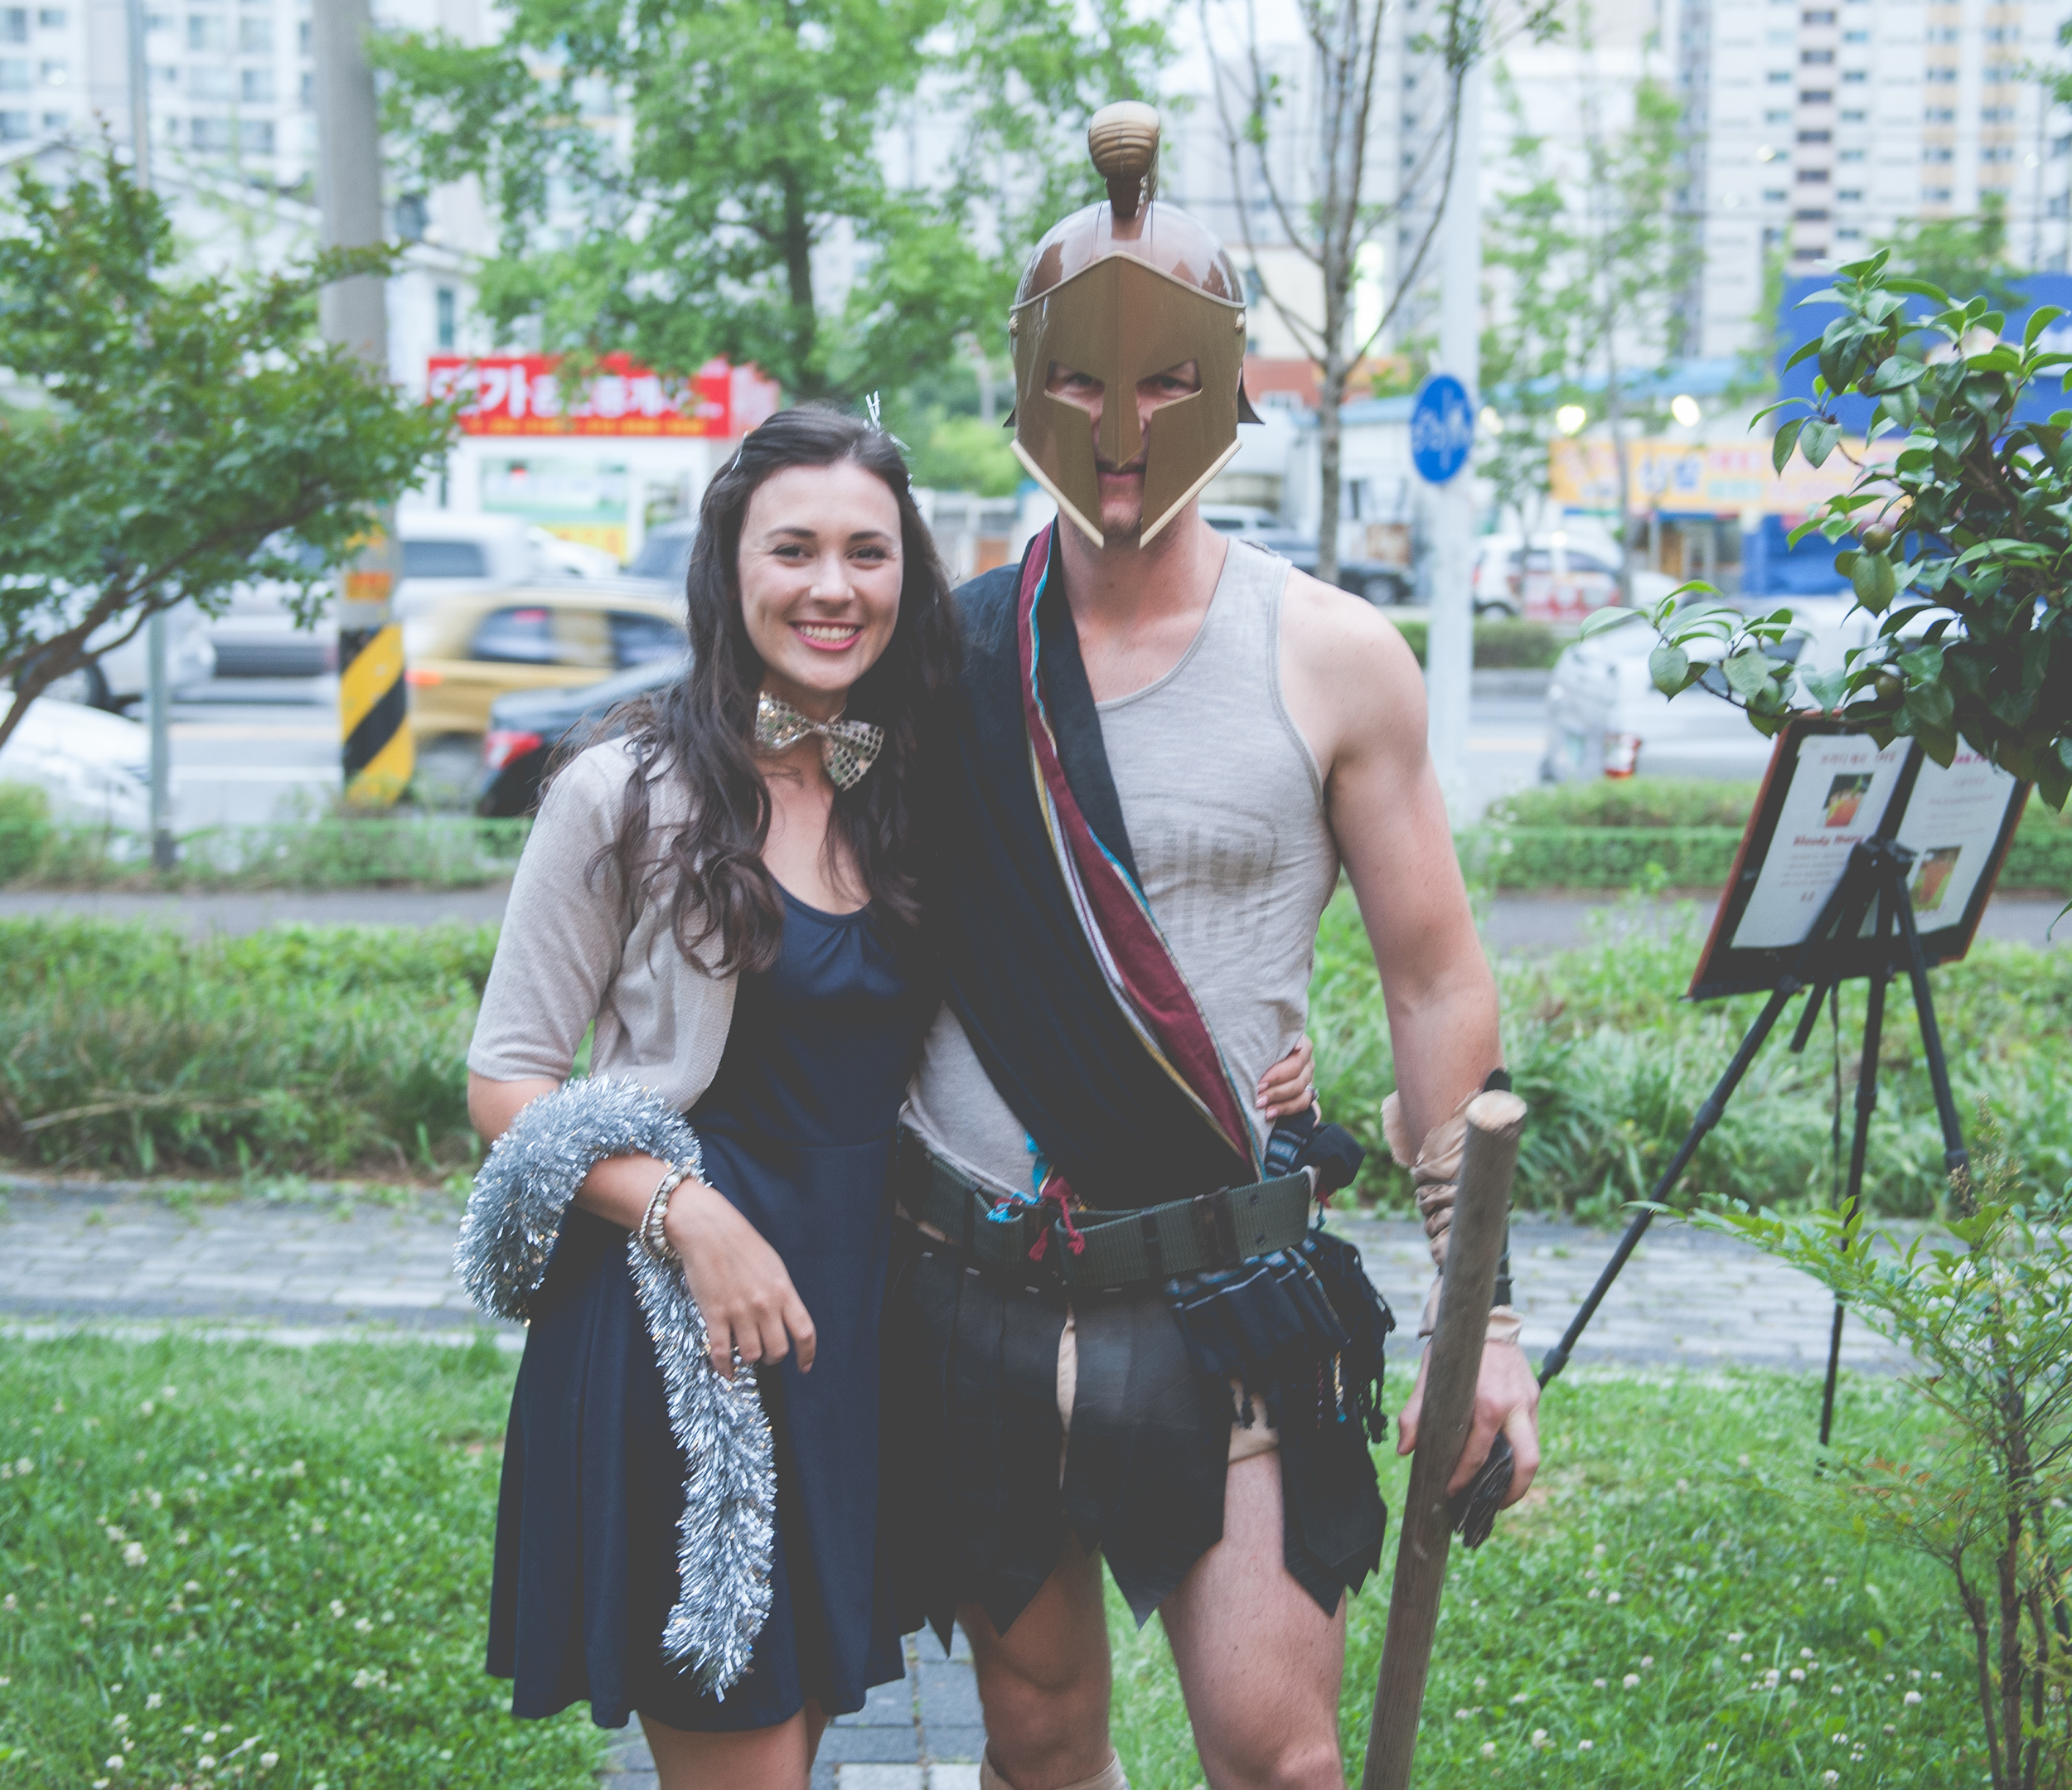
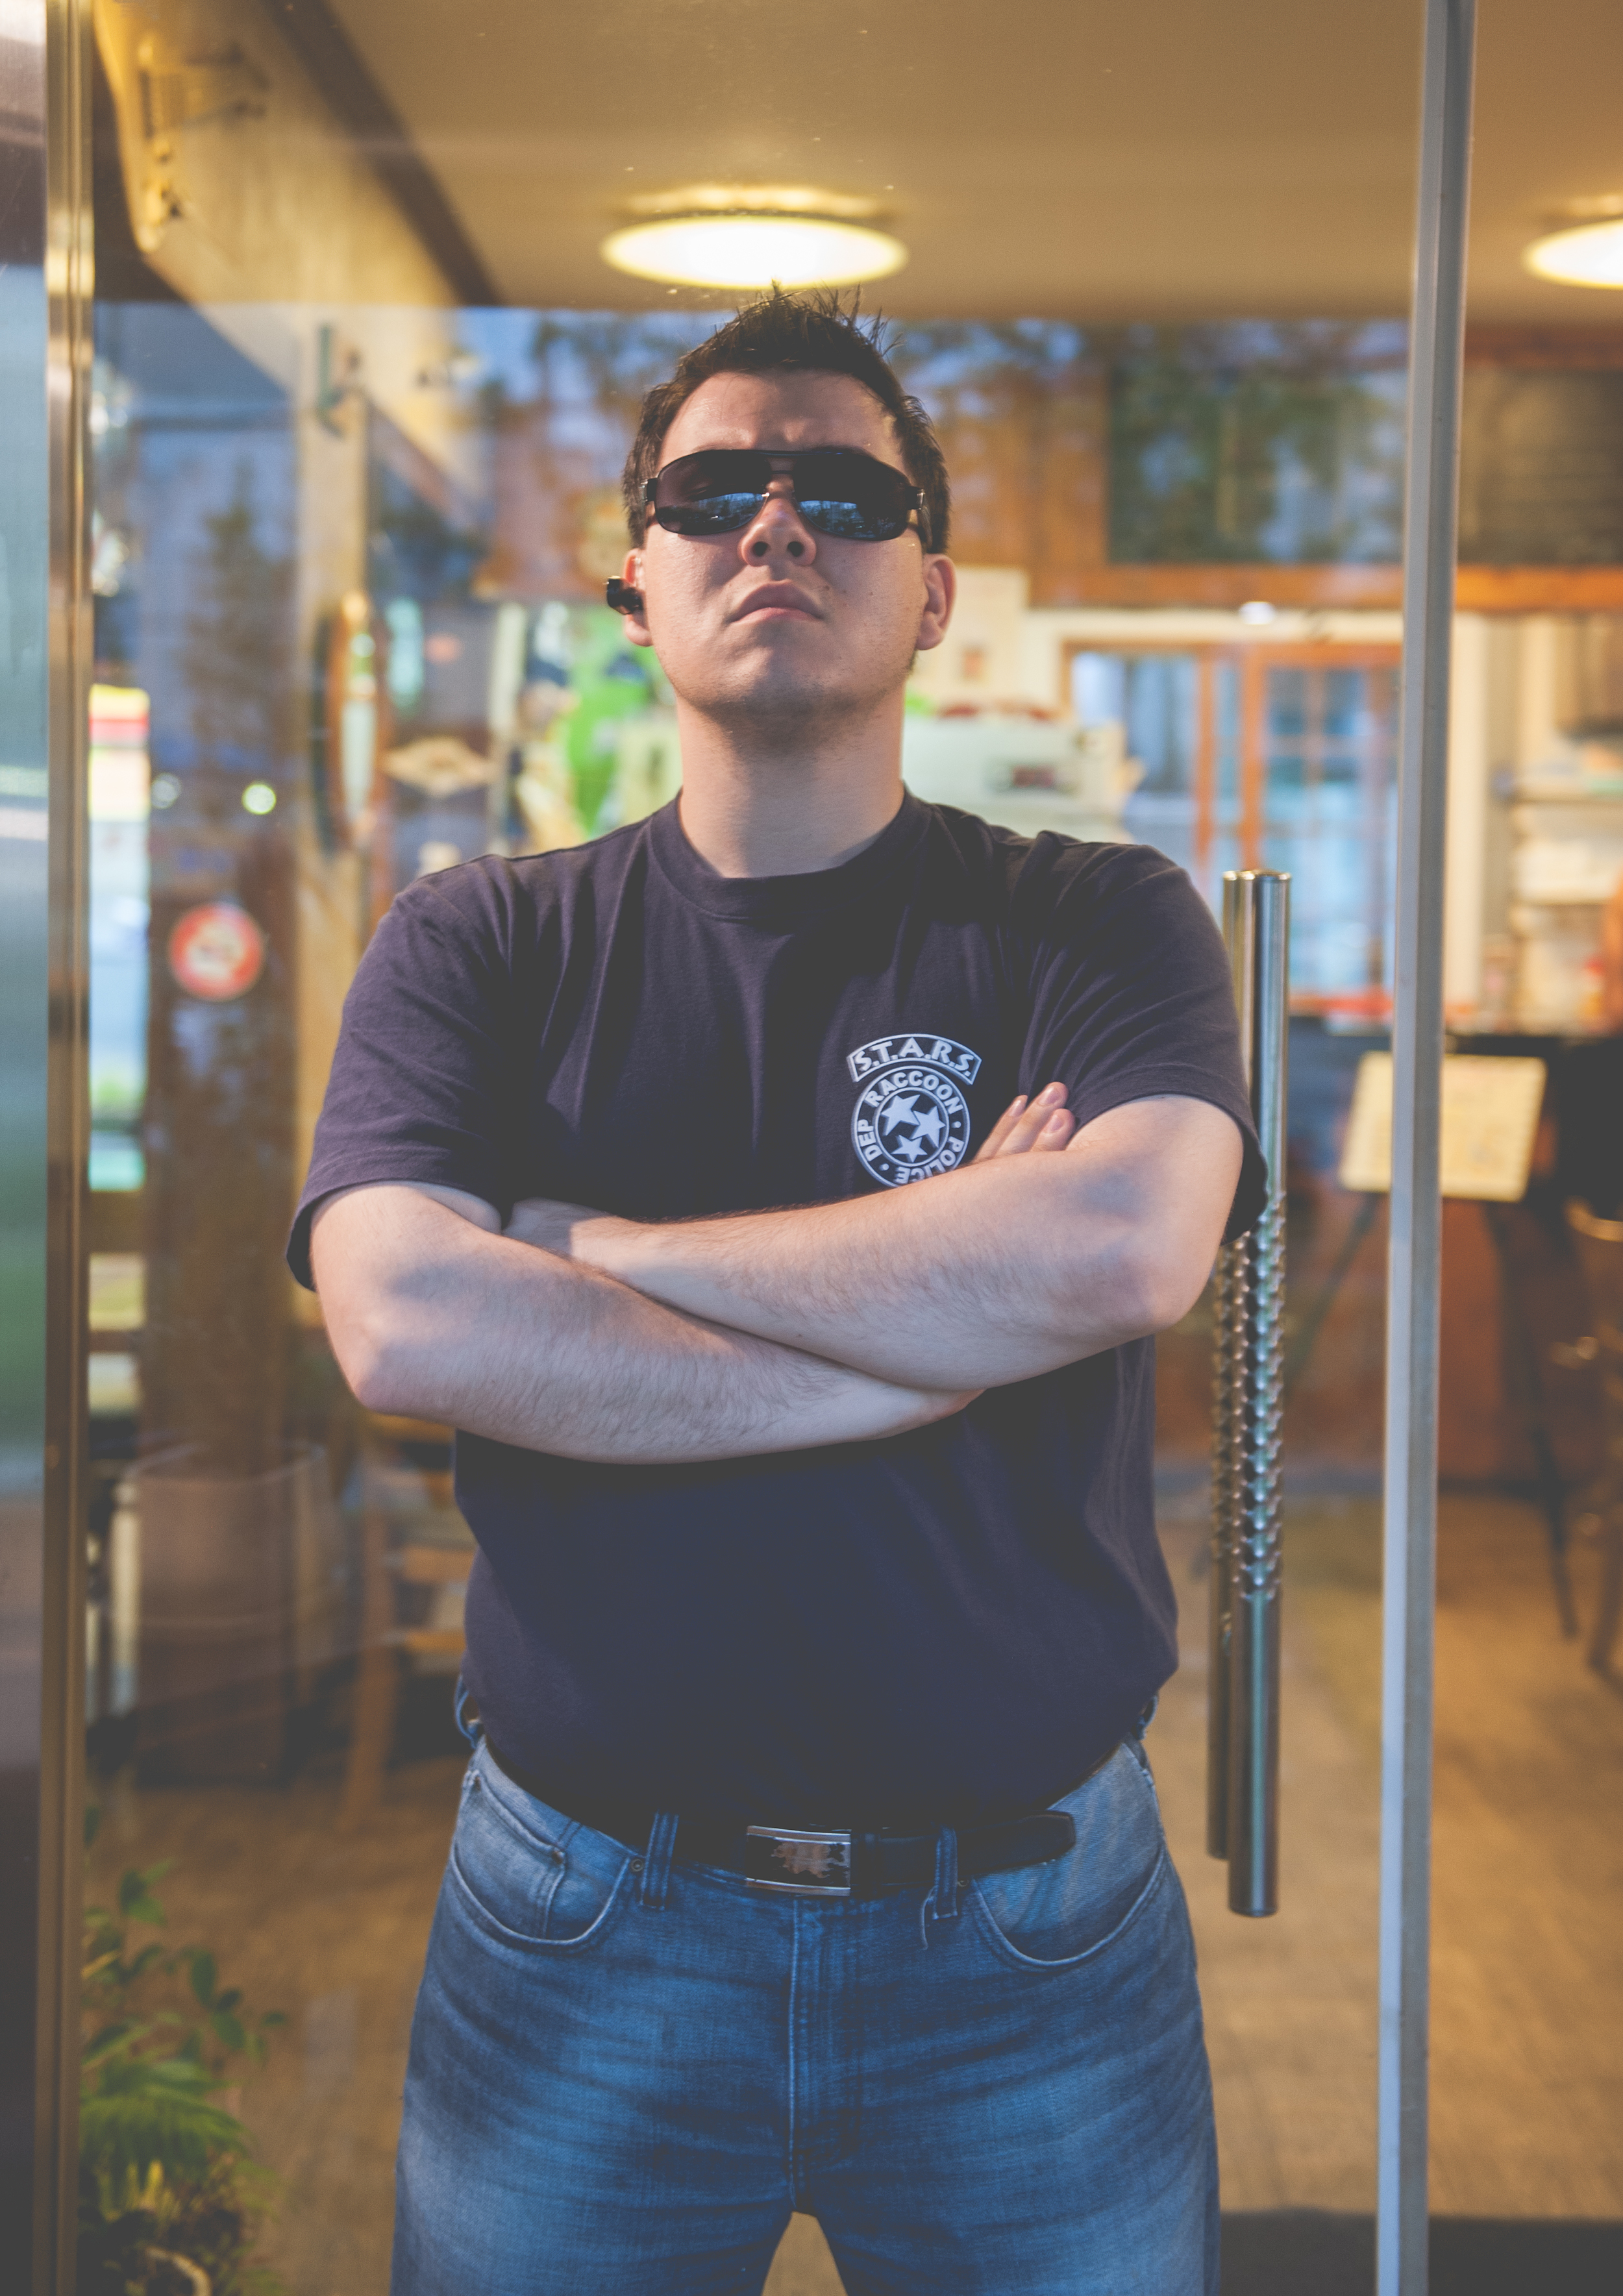
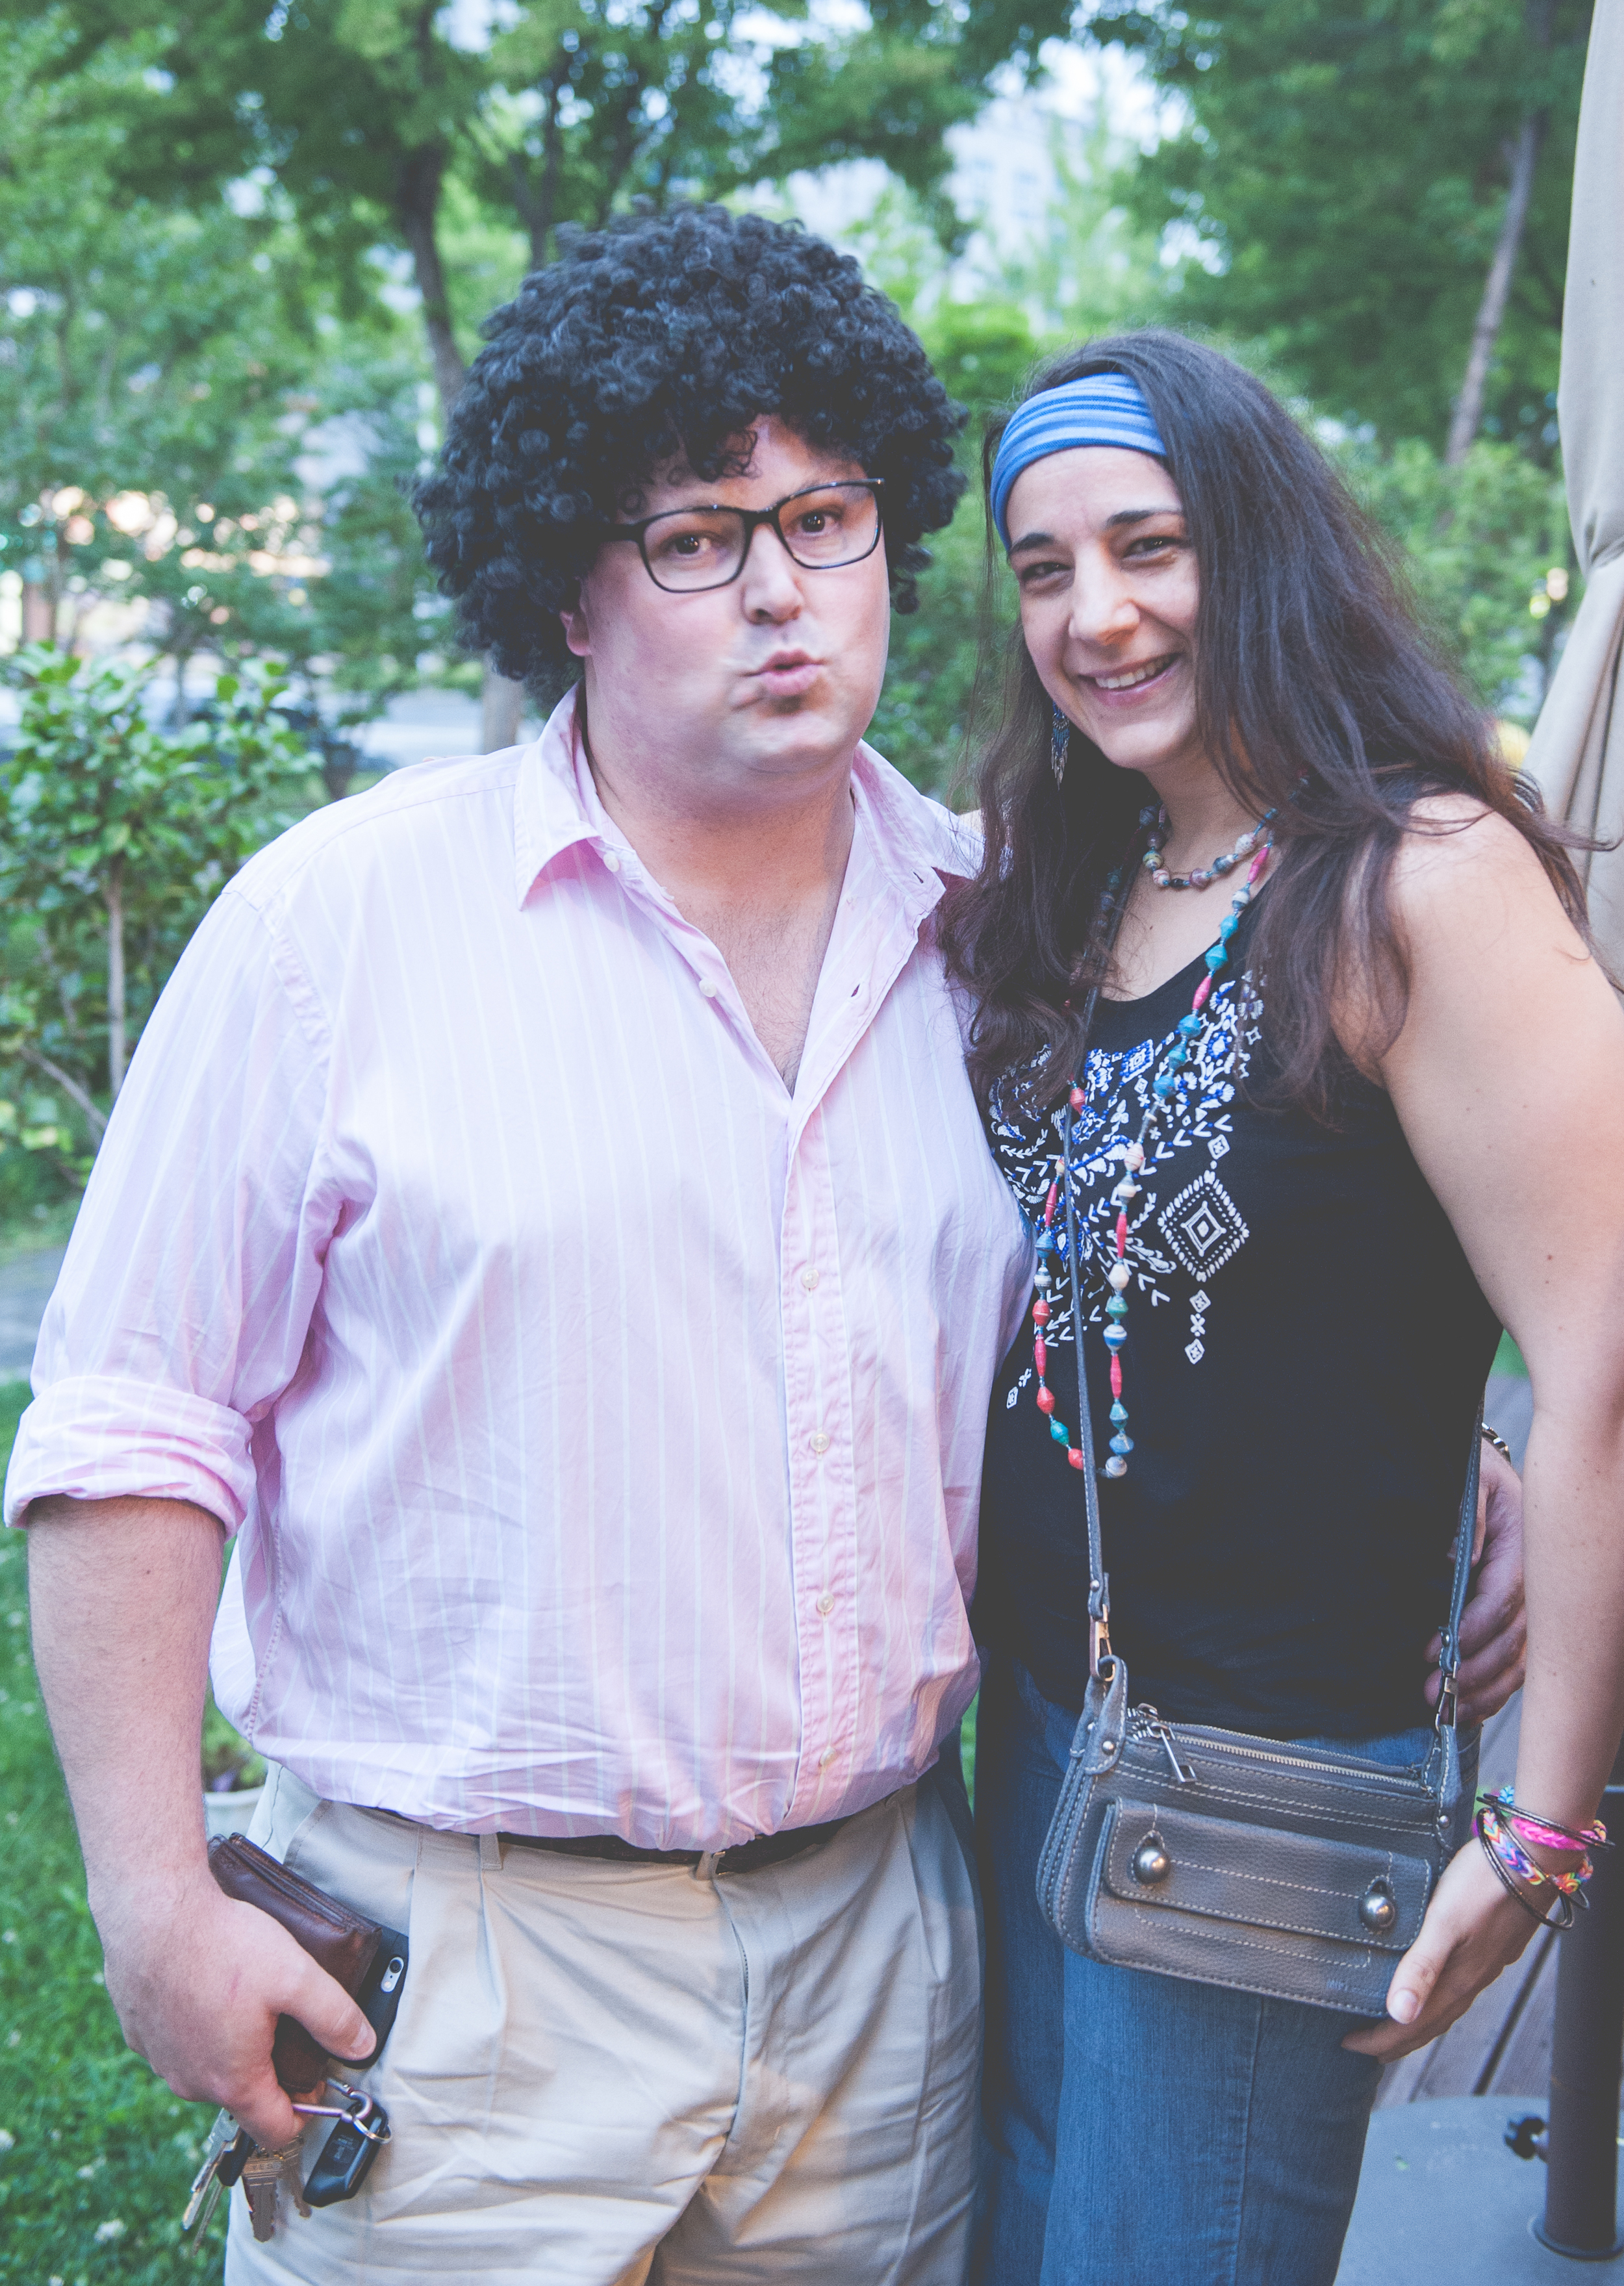
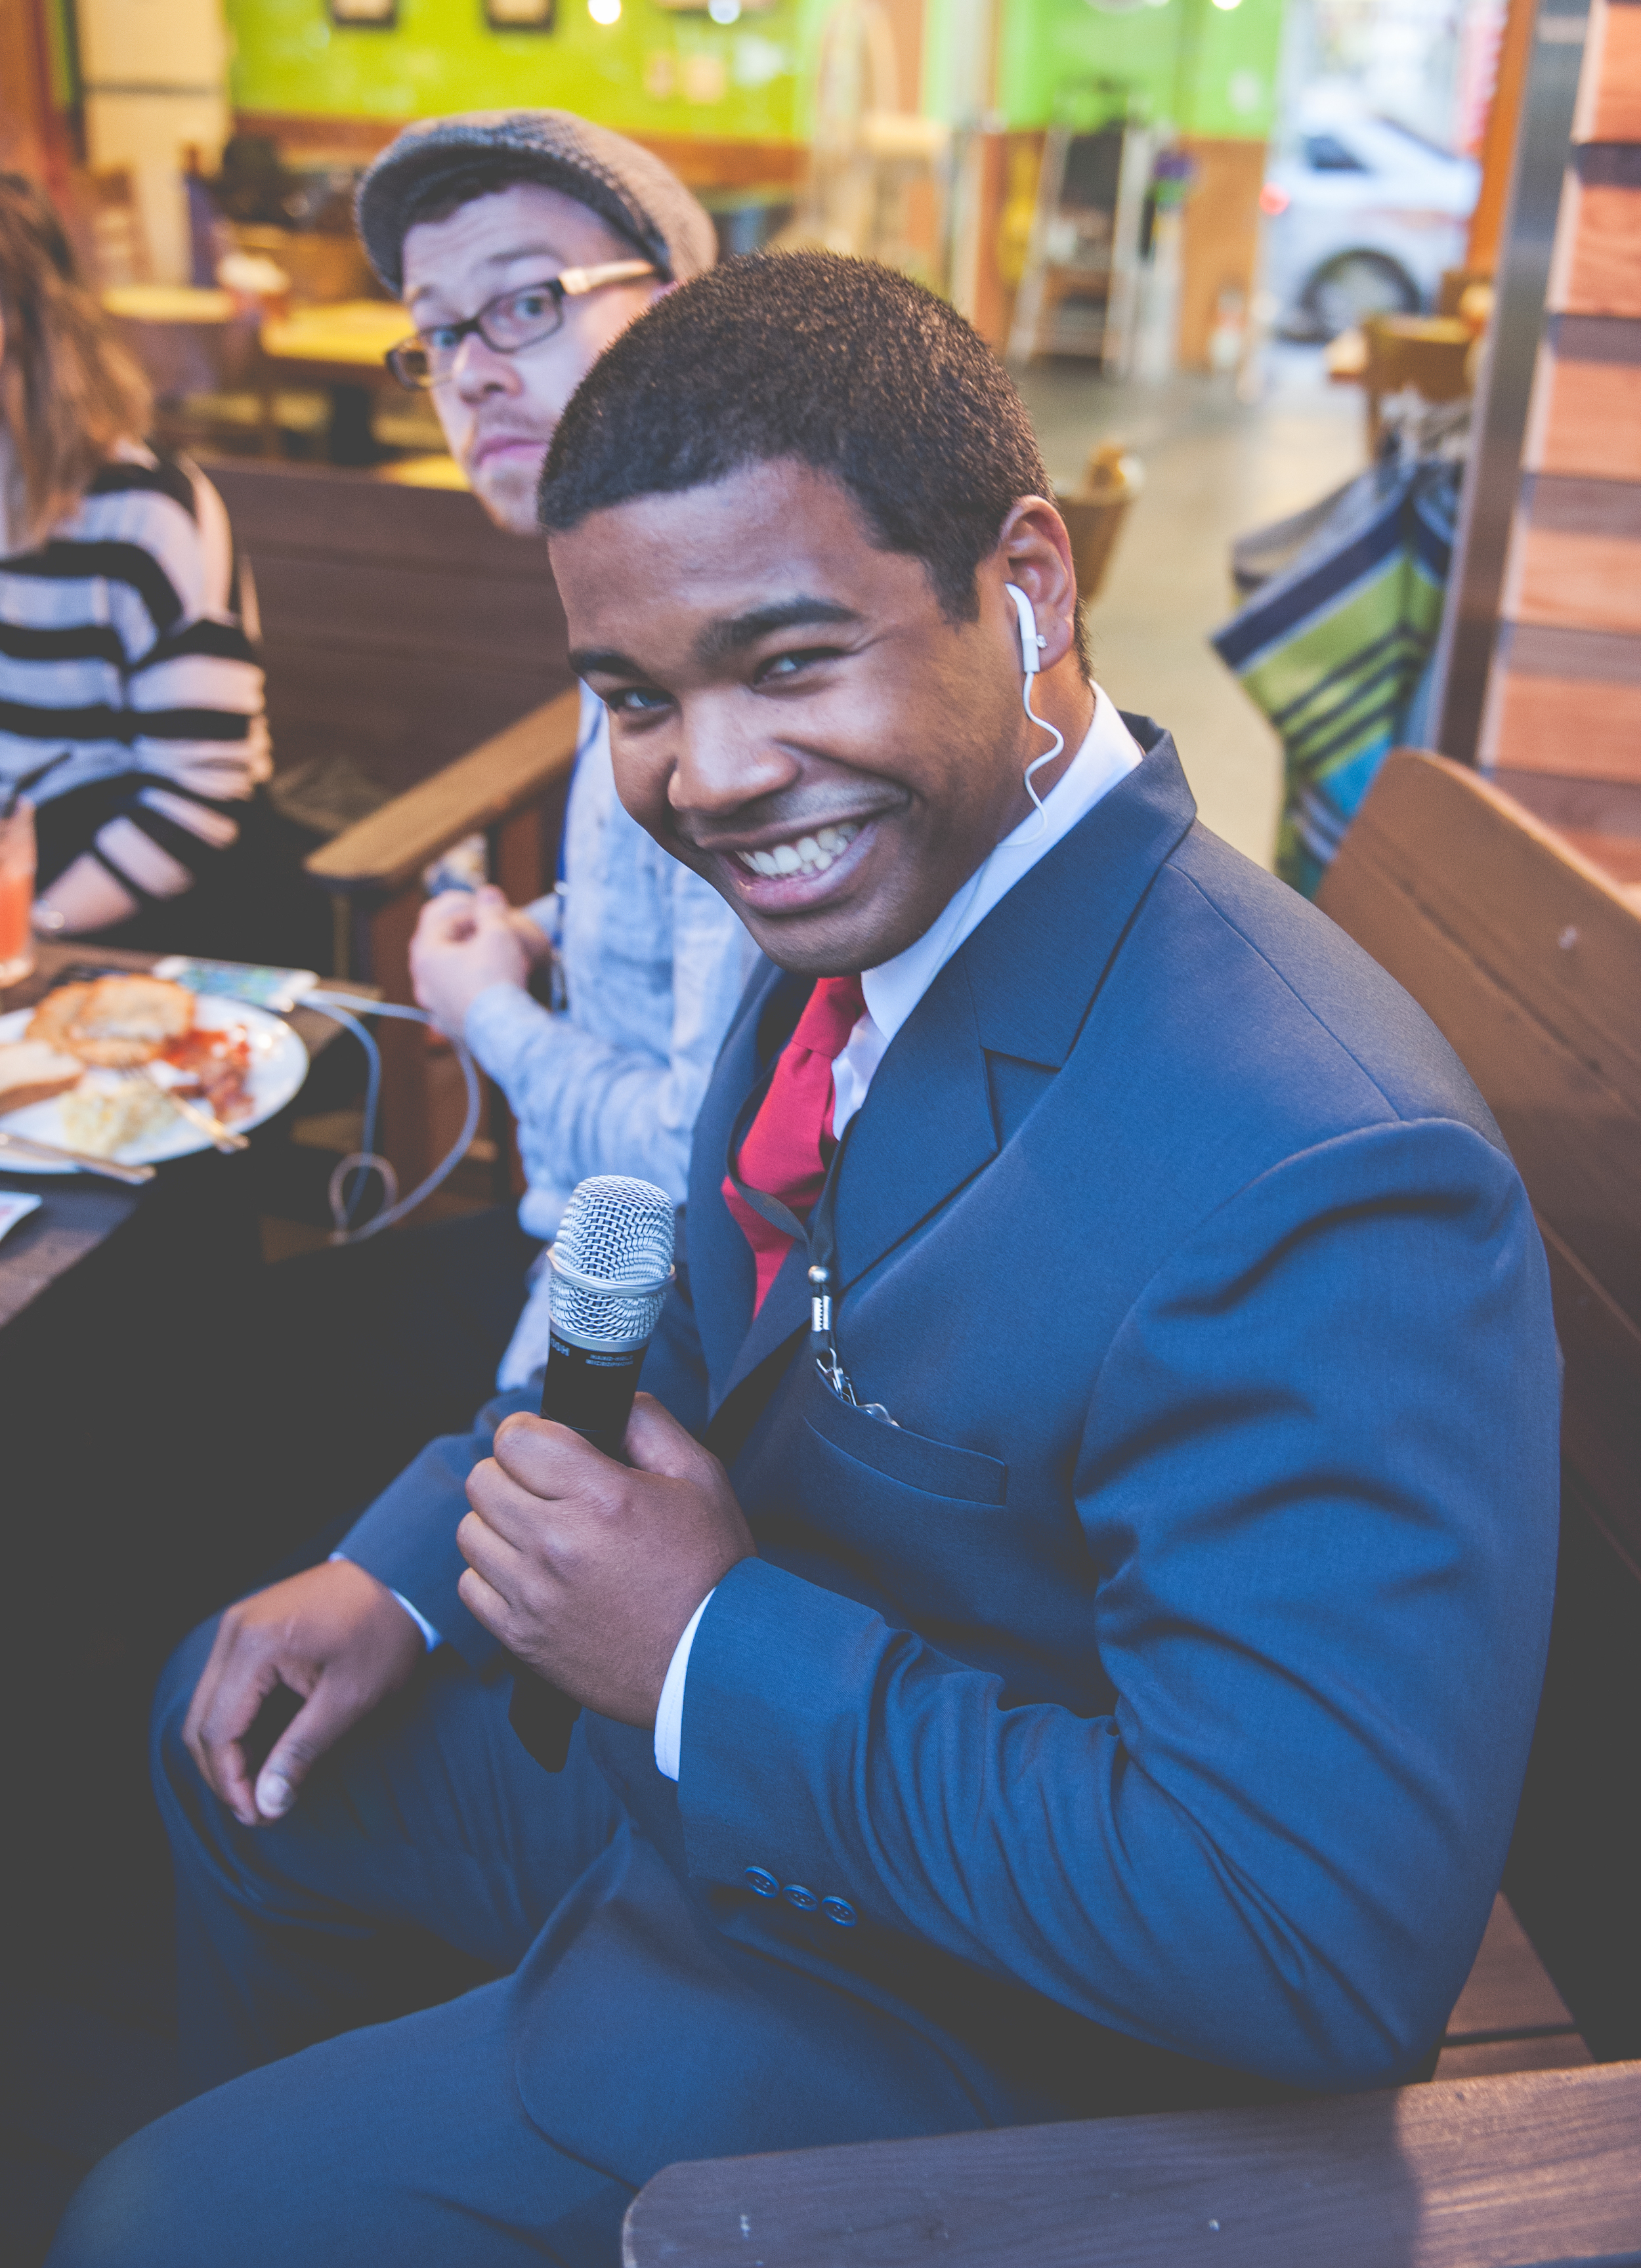
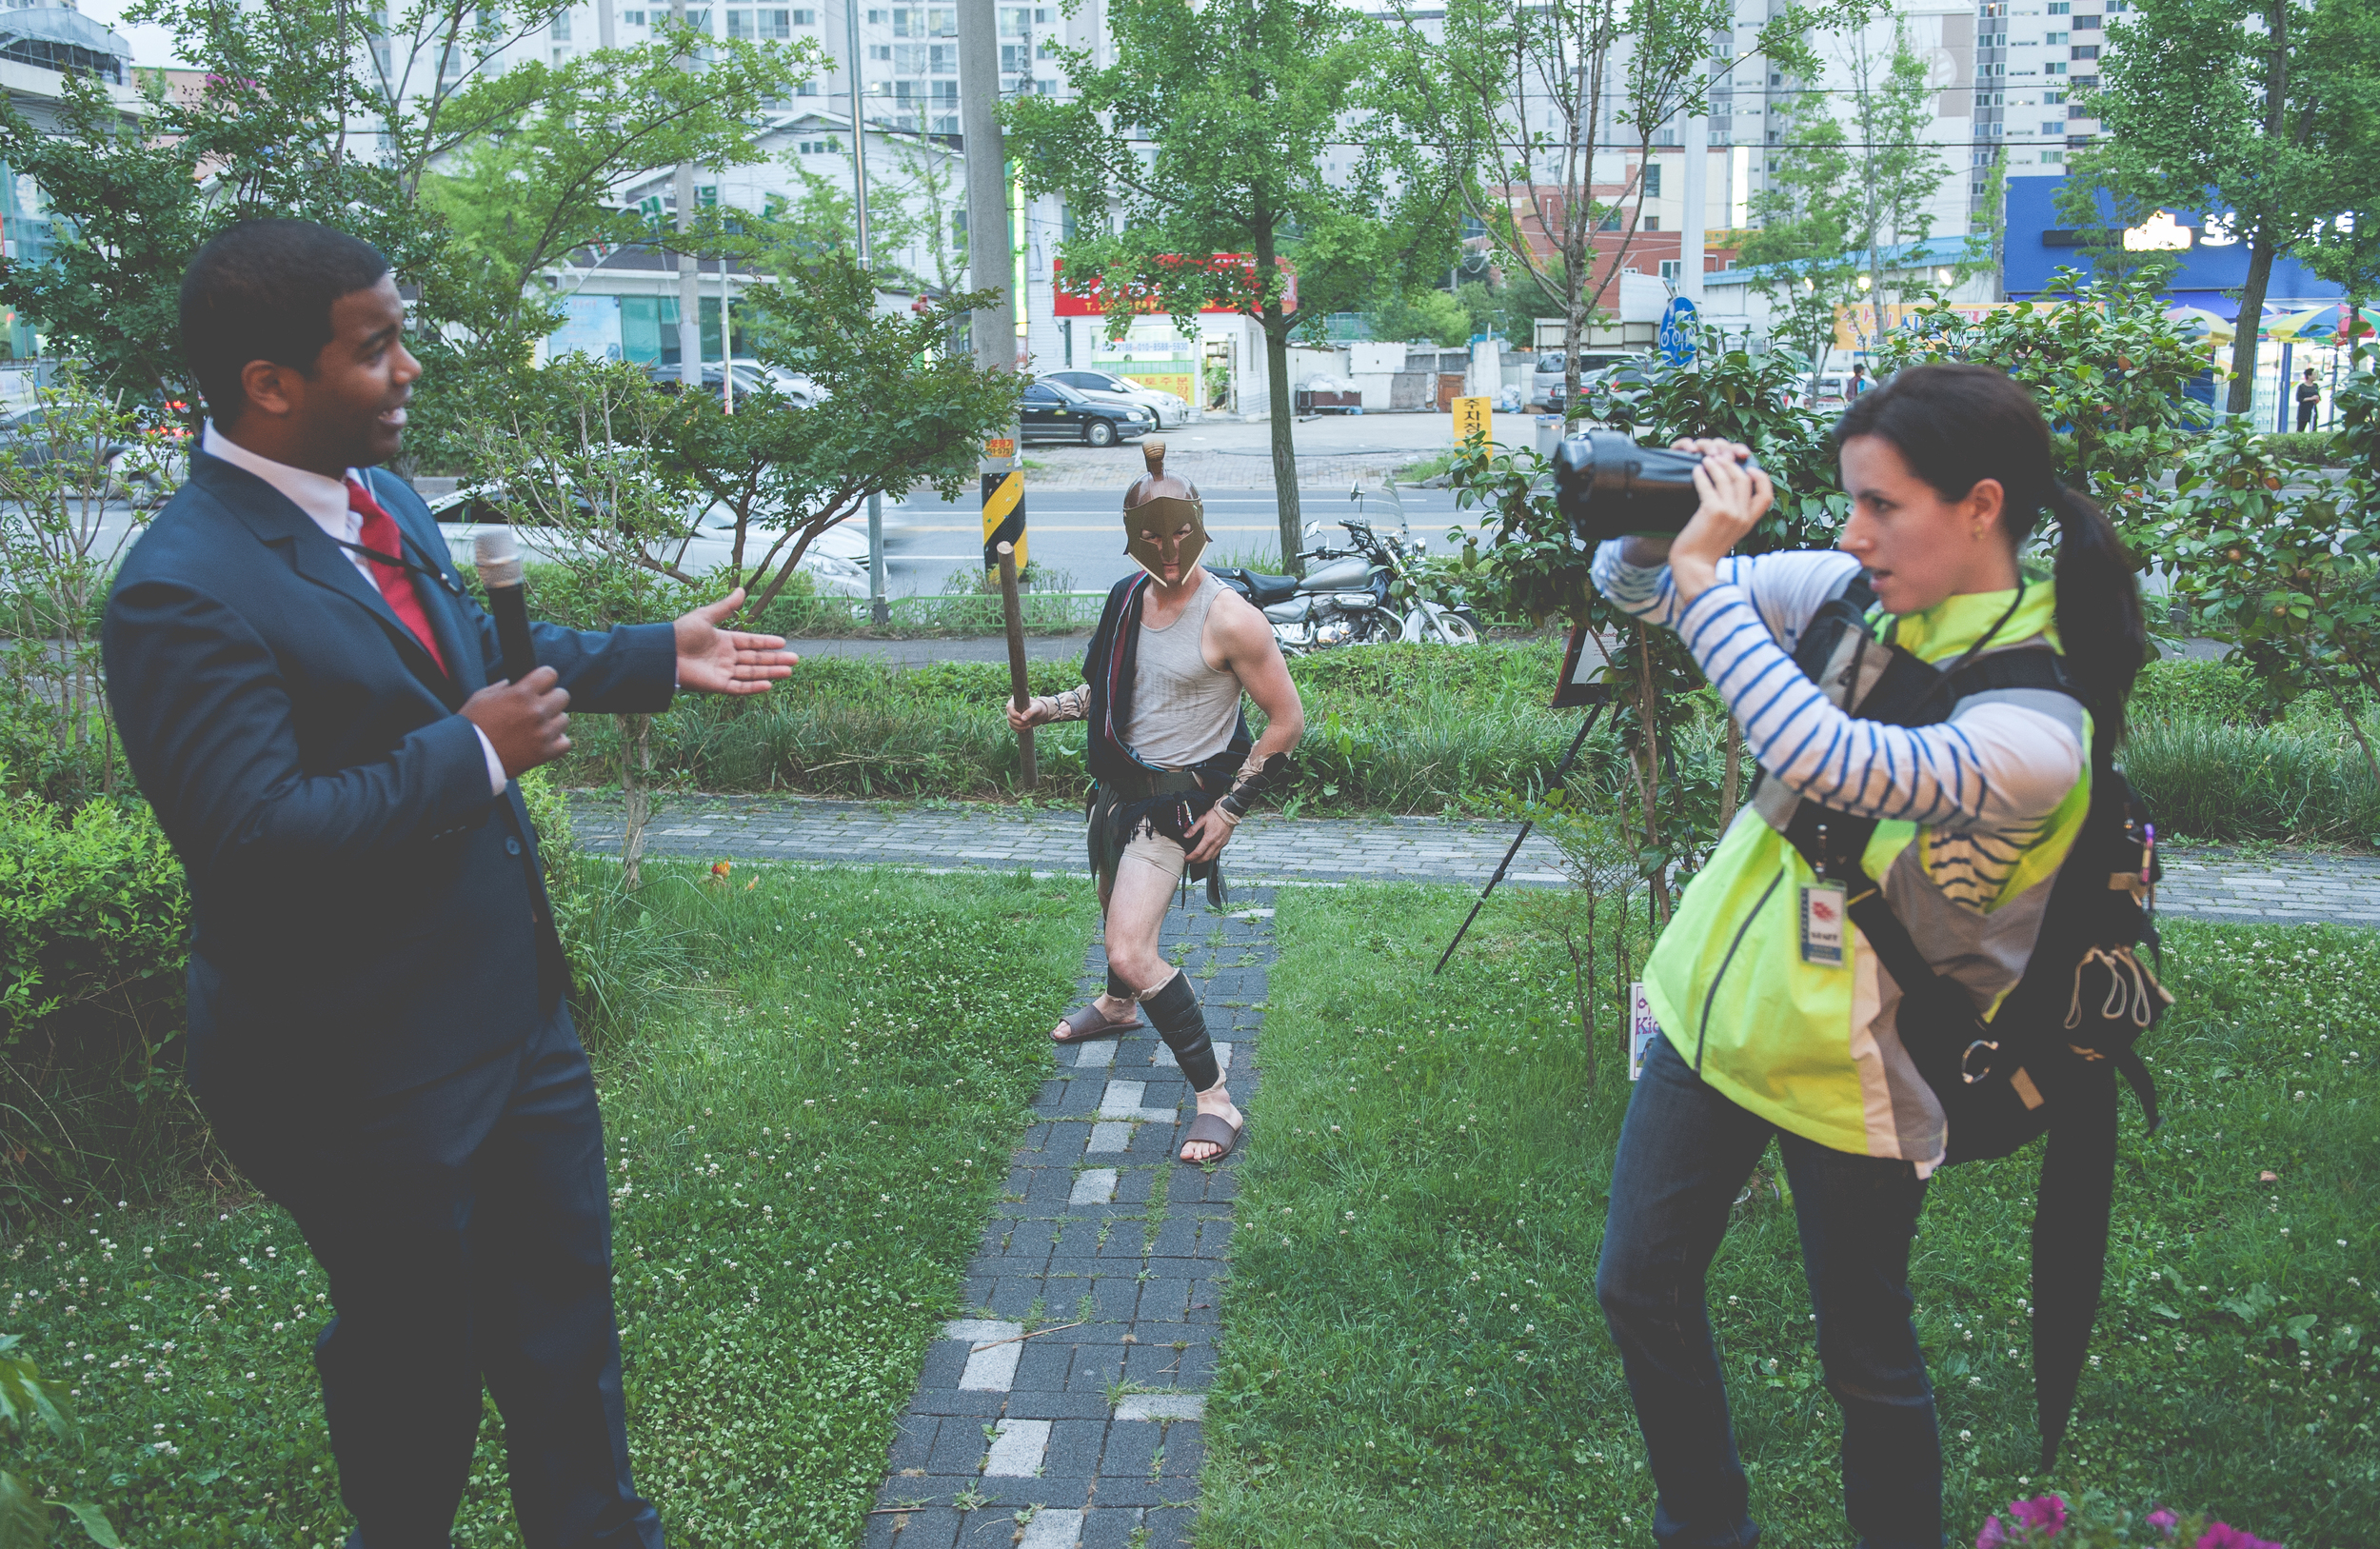
I was thrilled to see that most people really got into character, and their costumes were great. I had asked guests to start arriving at from 7pm with the aim of the game starting at 8. I did this to make sure that everyone had arrived by the start of the event. If you do this, make sure to let people know they should not be in character until the game starts otherwise you will have people guessing and chatting about their characters, and possibly even solving the mystery before all your guests even arrive! On that note, to keep a real air of mystery, remind your guests to keep their characters secret until the actual party.

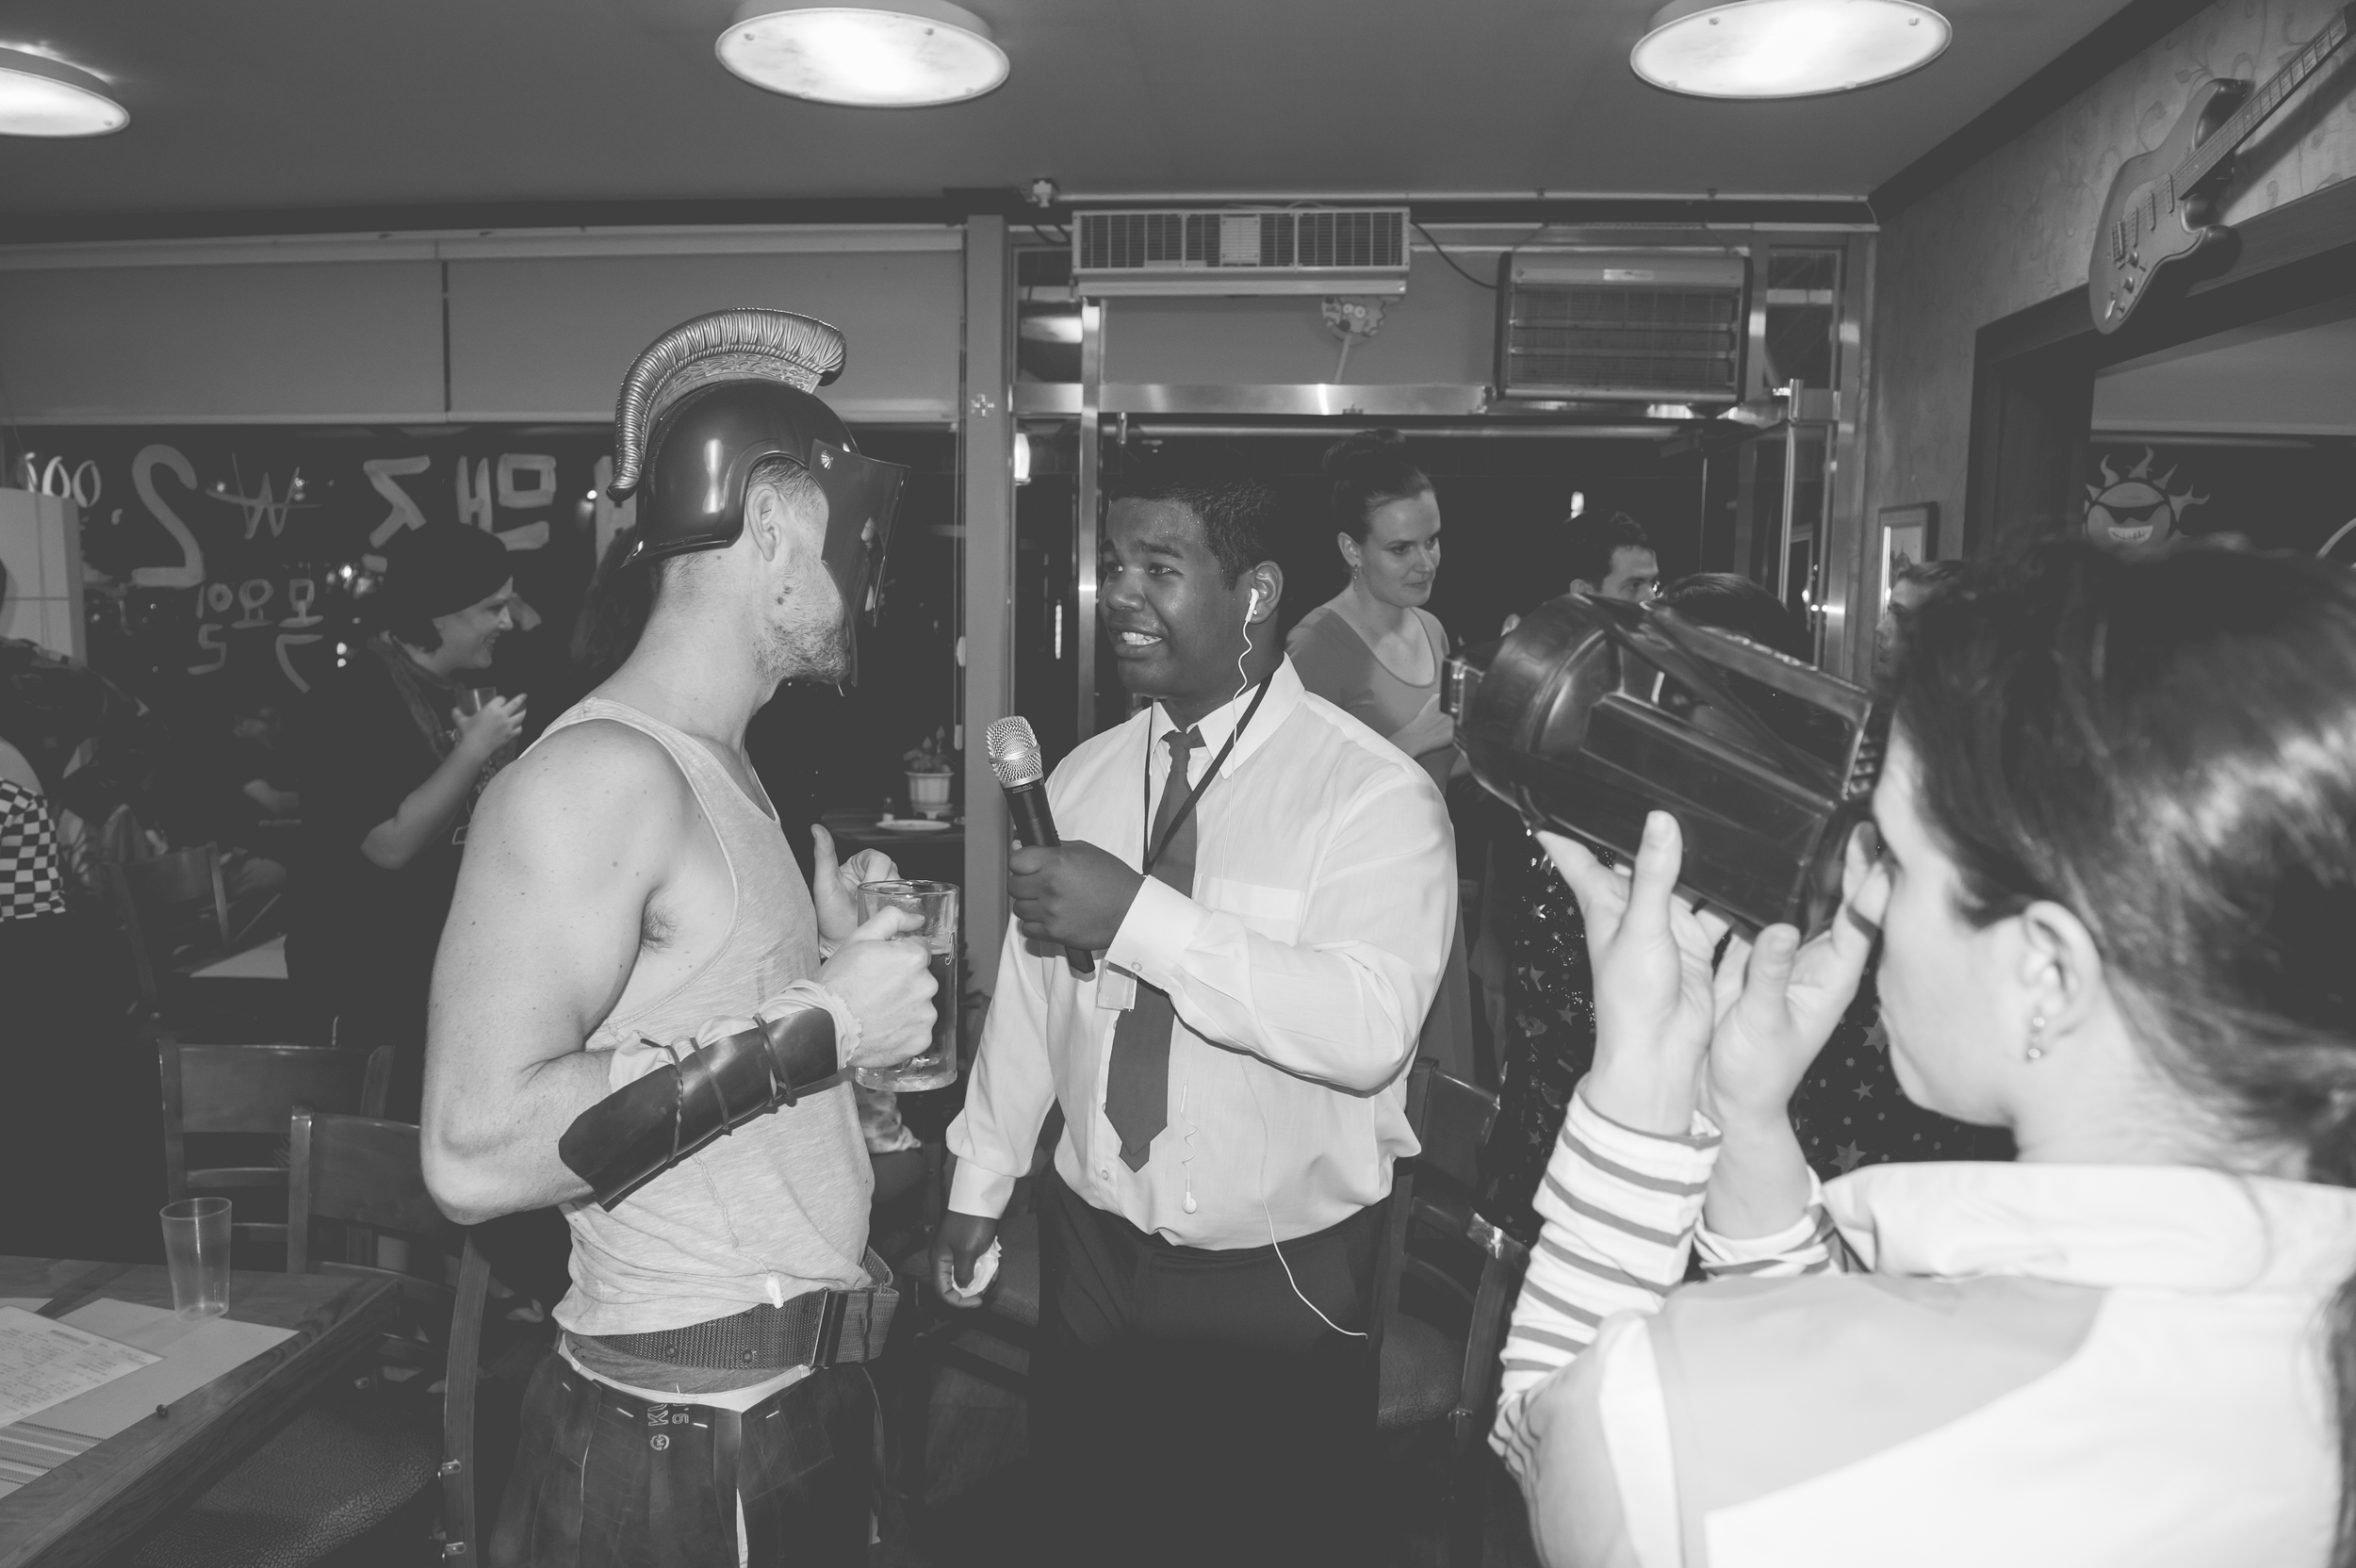
I really had a great time, and I think so did everyone else. It was a wonderful change from the usual dinner and drinks shenanigans, and it was great fun hunting for clues and sending people off onto the wrong trail in their hunt for the murderer. 

Let me know if you host your own Murder Mystery party. I'd love to hear how it goes as well as if you have any tips or advice for making things even better.

Camping with your dog in Korea

Camping With a Dog In Korea - where to camp with a dog in Korea

Owning a dog in Korea isn't easy. Especially if you own one of the larger breeds and you can't carry them in your handbag or in a pet carrier. This is why we spend a lot of time camping (click here to see more posts about camping in Korea), as finding pet friendly accommodation is pretty near impossible. If you live in Seoul you have a much wider selection of places you can easily visit and stay at with your dog, but if you live in the smaller country side towns in Korea, camping is your best bet. It's also the perfect time of the year to head outdoors, and so I hope this post is useful for you if you have a dog here in Korea and want to head out in search of an adventure.

Camping in Yongdam...click here to read more.

Camping in Yongdam...click here to read more.

Camping in Gangwon...click here to read more

Camping in Gangwon...click here to read more

Of course, having a car makes the whole camping experience that much more enjoyable as you can transport all your gear easily, but it's not a pre-requisite. Although, I can imagine carrying/walking your dog and your camping gear would all together be quite a feat!

From what we have gathered, you can camp pretty much anywhere in Korea, as long as you clean up after yourself. We have camped on tennis courts, closed off and abandoned roads, in river beds and in Museum gardens (that last one being a very late night find). Camping with a dog is slightly trickier, as if your pup is anything like our Shadow, he likes to explore his new surroundings and this often finds me running around like a headless chicken trying to catch him.

We have stayed at one actual dog friendly campsite in Yongdam (near Jinan, South Jeolla Province...click here to see a full post on it) and have also stayed with him the National park in Muju (click here to see the post). Dogs are not allowed (legally) to stay or be in National Parks according to the National Park website, but with a lot of smiling and our broken Korean we were told that he would have to be on lead and kept in the car. I think as long as your dog doesn't terrorise the neighbours and you keep them on lead, you shouldn't have any problems. Shadow just sleeps with us in our tent at night and so no one really notices him.

You might have a problem if your dog is very yappy or barks a lot as people will probably complain. Just keep that in mind and just use your common sense. We like to camp off the beaten track and so haven't had any problems so far with anyone complaining about us. We have also just bought a very long roll of rope to create a kind of extension running lead set up so we can keep an eye on him but Shadow can still move around. 

CampingWithADogInKorea

Overall, camping in general is really fun and being able to do that with your canine companion just makes it even more so.

I hope I inspire you to try out camping with your pooch.

If you come across or know of any great camping spots that are dog friendly, please leave me a comment below!

Crate TRaining & How to choose an airline approved crate for international travel

How To Choose IATA Approved Crate for International Travel

If you adopt or rescue a dog here in Korea like we have, chances are you will at some stage or another have to get your pup back home. To do this you are going to have to get a dog crate (or carrier if your dog is small enough to fly in cabin). Crates come in all shapes and sizes and it is so overwhelming trying to decide which is the right one for you and your dog. I hope this post makes your life a little bit easier when choosing a crate or going about crate training.

Crate Training

Whichever crate you buy, you are going to need to spend a lot of time (and patience!) getting your dog used to the crate and hopefully comfortable enough in it that they choose to sleep in it if given a choice. There are loads and loads of great youtube videos on crate training but the best tip I can give you is to start small and work slowly. Give yourself enough time (preferably months) to successfully get your dog used to his or her crate. Ideally, crate training should start the moment you bring your dog home but understandably this is not always possible if you rescue a dog unexpectedly (like we did). Also, we only gave him toys and treats inside his crate (if he took them out we would pick them up and place them back in his crate until he stopped bringing them out). Also feeding your dog in his crate will ensure he associates his crate with positive experiences. Make it rain treats inside the crate, and you will slowly be able to work on a command that goes along him going inside the crate. Pretty soon you'll be able to put your dog to bed with just the command. But remember to start slow and be patient. I'm pretty sure we would also hate being closed off in a small space and left unattended for hours at a time. I highly recommend the following dog training Youtube channels for training:

IATA Airline Approved Dog Crate

Crate training was hard. Listening to my poor pup crying all night because he wanted to be close to us was horrible BUT it has been the best thing we have ever done for him.  We work all day and so Shadow is left at home alone for up to 8 hours a day. To protect him, and to protect the rest of our house, we kept him closed in a spare room with a baby gate on th door from the first night we got him until we got a crate. It took him about 10 days to acclimatise to being left alone at night, and boy oh boy did he cry. It was SO hard hearing him cry and not going to him and picking him up. But, it stopped eventually and he started to sleep through the night. We were also able to quickly pick up whether he was crying for attention or crying to go to the bathroom.

Crate training is also a wonderful tool for housetraining your dog as their crate becomes their home or their 'den' similar to something they may have if they were left out in the wild. Because of this, dogs are really reluctant to dirty their sleeping area, and so housetraining them to either use a pee pad or to go outside is made much easier. We live in an apartment here in South Korea where Shadow is an inside dog. When we go back to South Africa he will be an outside dog and so we trained him right from the start to go to the toilet outside. This was harder for us than for him, and involved lots of late night dashes outside in the snow and the rain when his was only a few months old. He was able to make it throughout the night without needing to go to the bathroom after he was about 5 months old. He only pooped in the house once, the first night we found him at 2 months, and after that he only peed in the house a handful of times. Crate training really works!

Another benefit to crate training is that your dog has  safe space to go to if he feels frightened or stressed. If you have small kids coming over and your dog isn't too fond of being grabbed touched, they can put themselves into their crate until they feel safe again. Having them crate trained also helps if you need to transport them anywhere, be that in a car, train or on an airplane. 

Choosing the right crate

If you have a puppy and you aren't sure what size crate to buy because you're not sure how big your dog will get, buying a wire crate is usually cheapest (unless you can get a regular plastic crate second hand). 

Wire Crate

You can use anything 'crate like' to crate train your dog, but bear in mind that if you plan to travel internationally on a long flight, it will help to give your dog some time to get used to/familiar with his airline crate a few weeks before you make the trip. 

Crates like this wire one pictured above are not allowed on airplanes but work well to help get your dog (or cat) used to being confined. I found Shadow cried more if he could see us when he was locked in his crate. If this happens with your wire crate you can try covering it with a blanket at first so your pup feels less like he is missing out on the fun.

We bought a sturdy airline approved crate (pictured above with Shadow at 6 months) within the first few weeks of finding Shadow, and I had hoped that it would be the crate we sent him home to South Africa in. Unfortunately his ears have grown so big and with another year to go before we leave I have had to buy another crate and and just hope he doesn't out grow this one. Buying crates here in Korea is expensive. The sturdier, airline approved crates cost anywhere rom W100 000 up to W300 000 (-+$100 - $300) new. And so the decision over which crate to buy is one that needs some thought. I'd suggest buying something cheap to begin the crate training with, and then once your dog is used to that, and depending on when you need to travel, but a crate closer to your time of departure. 

Airline Crate Regulations

Crates that are approved to fly have to be IATA (International Air Transport Association) approved. This means they have to fill a number of regulations.

Basically the crate has to have:

  •   ventilation on all four sides
  • be sturdy
  • metal bolt fasteners
  • handles to allow it to be picked up
  • The floor must be solid and leakproof. 
  • The door must form the whole of one end of the container and can be either sliding or hinged.

There are a few more regulations but those are the basics. Here is an easy video showing you how you can easily modify a plastic crate to be airline approved. 

Choosing the Right Sized Crate

Airline Approved IATA Dog Crate

Your crate must have enough space for your pet to turn about normally while standing, to stand and sit erect, and to lie in a natural position.  In the pictures above you can see that the crate is too small for my 1 year old Jindo. The measurements of this crate (the IRIS ATC-870) are 87cm x 62cm x 65 cm and although he isn't a very large dog (he only weighs 17kg's and this crate was designed for labradors apparently), he is quite tall and has large ears. 

IATA Airline Approved Dog Crate

As you can see, his new crate (an Extra Large Vari Kennel) with dimensions 100cm x 67cm x 75cm is much better for him. I just hope he doesn't grow too much in the next year before we go home! I bought this Vari kennel here on gmarket for W170 000. 

For international travel there are a number of other things that you need to prepare (food bows, water container that can be refilled from the outside of the crate, live animal stickers, releasable cable ties etc). That information can be found on the the IATA website by clicking here

Do you have any other questions or advice for crate training or choosing a crate? Please comment below, I'd love to hear from you!

How to Groom a Shedding Jindo Dog - a guide for double coated dogs

KoreanJindoSheddingGrooming

We found Shadow at 2 months old, wondering on a dark road late at night here in South Korea. Because we have no idea who his parents were, we really can't be sure if he is a pure Jindo or a mix (although it is unlikely that he is a pure Jindo's as the pedigrees are incredibly expensive and it's not likely his owner would have been as irresponsible with him if he was a pure Jindo). In any case, the majority of 'Jindo' looking dogs that are in shelters/roaming the streets/abandoned/those that have been rescued from meat farms here in Korea are mixes of some kind. For those who have only seen white Jindos before, the Jindo actually comes in 5 different colours; white, brown, tan, yellow, grey, black & tan, & brindle...Shadow is of the black & tan variety.

ShadowTheJindo

The Korean Jindo is a hunting dog native to South Korea. They are double-coated dogs whose coats consists of an outer layer of guard hairs and an inner layer of undercoat. The undercoat is what keeps these dogs cool in summer and warm in winter. The guard hairs are shiny, stiff, and water-proof while the undercoat hairs are soft, slightly crinkly, and insulating. The guard hairs are lifted somewhat away from the body and can give an overall harsh feel to the coat. These guard hairs are the ones that make up the dogs hackles which usually stand on end when a dog is anxious or nervous.  Double-coated dogs generally shed their soft undercoats twice a year,  although some individual dogs might shed constantly or only every 10-12 months.

From what I have read, shedding can take anywhere from three weeks to two months. This is Shadows first shed and the first experience I have had with a shedding dog. Growing up my mom was always alergic to animals and so we had Standard Poodles (the big, graceful poodles not the small yappy kind) as pets.  Up until we found Shadow I would have said that I was also rather allergic to animals, touching them would always lead me to break out in a rash. I have yet to have a reaction to Shadow, and even now that there is hair ALL OVER our house, I am still allergy free. I'm not sure if this is due to his very course guard hairs, or whether I have simply developed an immunity to his coat. Either way I am rather happy to not be allergic to my dog.

Shedding Jindo How To Groom double coated dog

The amount of hair that is coming off Shadow is pretty frightening. I brush him twice a day, and with each stroke of the brush a small sized dog is produced. At first it was funny, but now it's terrible frustrating as the hair is just everywhere. Whenever I look up I see little puffs of hairballs making their way across my floor in search of the perfect hiding spot. 

Here are the tools I have been using to help keep on top of the shedding. I'm hoping it ends soon and I can go back wearing my light coloured clothing again.

  • ShedKiller (a 'Korean?' knock off of the popular furminator brush) which has a two sides; a thin toothed razor like brush and then a wider toothed comb
  • Slicker Brush (I found this at my local vet)
  • Rubber Grooming brush (bought at my local mart here in Korea)

I have has success with all three of these brushes at different stages of his shedding. When it first started a few weeks ago, the slicker brush worked fine. Then I found the slicker just spread the hairs and made them so static that they just flew around and were impossible to collect. The rubber brush works well when outside. I have been using the wide tooth comb over the last week as it really gets down deep into the undercoat to remove the clumps.

If using a brush like the furminator/shed killer (you can buy the Shedkiller here in Korea online through Gmarket by clicking here), when using the razor like end, be careful not to brush too hard. The razor can remove the guard hairs and end up pulling out too much of the top coat. A lot of husky owners recommend NOT using the furminator for this reason. But I find as long as I'm careful and work slowly, and don't use it more than once week it's been great with Shadow's coat. 

Shadow doesn't enjoy being brushed, in fact he always tries to go after my hand/the brush whenever it's time to groom him. As Jindo's are generally fastidious about their general coat cleanliness (they tend to groom themselves like cats) I have to be very sneaky, and arm myself with lots of treats to keep him occupied while I go to work. I have read that bathing is also recommended for shedding, but as my dog hates bath time I'd rather stick to the brushing for now. Let's hope it ends soon!

Do you have any tips for dog grooming? I'd love to hear from you in the comments below!

How to Get a Korean Drivers License in Korea For South Africans

HowToGetKoreanDrivingLicenseForSouthAfricans

Buying a car in Korea has been one of the best decisions we have ever made as it has freed us up to travel and explore so much more of the country without having to worry about bus schedules. As we live in a small town, we were very much at the mercy of the last (usually very early) bus that returns to our town from all destinations. Having a car means we never have to worry about that anymore and can on a whim decide to make travel plans. Also, as we have a dog here, having a car has made life so much easier especially as he isn't small and can't be popped in my handbag or in a pet carrier. Now that the weather is so mild, camping has been a dream with a car (click here to see more posts on camping in Korea).

OwningaDogInKorea

There are two ways for South Africans to go about getting a Korean drivers license; either doing the whole test like you would have done in South Africa when first getting your drivers license, or exchanging your current license for a Korean one. This post is all about exchanging your current South African License for a Korean license.

You are also able to drive in Korea with an International Driving Permit (we got ours from the AA in South Africa, I was able to write a letter and have my mom apply for it for me in South Africa) but I had read conflicting information on how long it would be valid here and our insurance required us to both possess full Korean licenses in order to be fully covered.

HowToGetAKoreanLicenseInKoreaForSouthAfricans

Getting a Drivers License in Korea

As mentioned above there are two ways to obtain a Korean license. The first is the long and arduous process of taking the actual Korean licensing test. I simply didn't have time during my work hours to go to the nearest station and do the tests. The second, and easiest way of getting a Korean licence is to exchange your South African one for a Korean one.

What this means is you go to your nearest licensing station (click here for a list of all of them in Korea as well as their contact details). You basically hand over your current South African license and they give you a Korean license, which is then valid for 10 years. In this time your SA license will probably expire. If this happens, when you are next in SA take your expired license, copies of your ARC card and Korean license as well as proof of being abroad and you should have no problems renewing it (please note I have no first hand experience with an expired license but this is the information I have found online).

The License Office here in Korea will then keep your South African license on record, until you return to South Africa (either for a holiday or permanently). If you are going back to SA on holiday, you simply go to the same Licensing Office with a copy of your airline ticket and then they will give you back your SA license AND you keep your Korean license. You then will have both licenses.

Getting Started

You need to get your current SA license certified by the South African embassy in Seoul. You can do this in person, or you can send it via express mail. If sending it by post you need to send your original drivers license, as well as a return envelope with paid postage to the following address:

남아프리카공화국대사관 (South African Embassy)

1-37 Hannam-dong, Yongsan-gu, Seoul

Tel: 02-792-4855

I sent both mine and my husbands licences and got back the certified copies within 5 days.

What you need to take to the Licensing Office

  • Original South African Driver’s License
  • Original passport (with the stamp for most recent entry into Korea)
  • Original Foreigner Registration card (ARC card) or equivalent (issued from Korean government)
  • Colour photo x 3 (we had these taken at the Licensing Office for W7000 pp person for a set of 8 photos)
  • Confirmation letter or such from the South African Embassy stating the validity of the Foreign Driver’s License (this is the certified copy of your license)
  • Processing Fee : KRW 12,500

Then simply stand in the queue, look a little lost (this always helps!) but with big smile on your face so someone feels compelled to come up to you and offer you assistance. Then hand over all your documents to the teller. You will need to fill in a few forms and then do a test of sorts. We were only asked to do an eye test (done right there at the office) but I have heard some people being asked to do a written test. It seems to depend on the office. We did our test in Jeonju. I have even heard of people having to do very strange 'physical' tests; squats, jumping, raiding their hands in the air (I am not kidding! So be prepared for a few squats). Click here to find out more information on the aptitude tests sometimes required. 

Cherry even managed the snow without snow tires, what a good girl!

Cherry even managed the snow without snow tires, what a good girl!

Some Useful Info on Buying a Car in Korea

We bought our car second hand from a private seller on Facebook through one of the many Facebook groups for foreigners here in Korea. We paid W1 million (about $1000) and it was the best $1000 we've ever spent. Cherry, or Cheryl when she's struggling up hills, is a very old little Matiz, but she gets us safely from A to B and her fuel consumption is so good that we barely notice the cost of fuel. Also, as she is a small car (under 1000cc's) we are charged half price on all tolls and ferries #cherryforthewin!

Some Useful Info on Car Insurance

Insurance is something else to budget for when getting a car, and ours costs about W650 000 ($650) per year. If you are looking for an insurance agent I highly recommend Sami from Car Insurance in Korea (click here for his Facebook group) who offers a free price comparison of all major Insurance companies in Korea and is always such a pleasure to deal with. He helped us get our car registered in my name and sorted out all the hiccups we came across when it comes to insurance. 

Have you got a Korean license here before? Did you have any problems getting it? I'd love to hear from you in the comments below. If you have any questions, please feel free to leave a comment here and I'll get back to you asap.


How To Start A Blog

Blog Tips How To Start a Blog: a Beginners Guide by CGScreative

A while ago I was part of  Caitlyn DeBeer's Creative Business Series, a really great creative series in which a bunch of us bloggers got together and each wrote about something we specialised in. It's a little out of date and there seem to many broken links as most of us have updated our blogs since then but what I shared about blogging then still holds true! And so today I'm going to re-post my tips for those who want to start a blog but have no idea where to gegin. I hope you enjoy this post and find it helpful. I have a number of other posts on blogging that you might like too, click here to read more.

What is a Blog?

A blog is a 'mini-website' in that you ideally are able to run by yourself, without having to have designers make changes for you. A blog is a space for you to share what you love with the world, to journal, to keep memories and of course as a space for you to market and sell your product.

Here are some of the most popular blogging platforms, all of which cost nothing to set up:

Wordpress (to be clear I am referring to the free version of Wordpress, click here for more info), BloggerTumblr

My blog used to be on "Blogger" and that is why it had the 'blogspot' segment on the end. It is completely free and was my favourite platform due to it being so very user friendly and easy to navigate around. Also, it is implemented with Google so if you use Gmail/Google Plus etc everything works seamlessly.

Wordpress is another favorite in the blogging world, but I find it isn't as user-friendly as Blogger. But, if you have to time to fiddle and play around it can be a lot more powerful!

To go "dot com" and drop the 'blogspot/wordpress" you have to buy a domain name through a site like GoDaddy for Blogger, and through Wordpress.com for Wordpress (to learn more about the difference between Wordpress & Wordpress.org click here).

I launched my new website (this one) last year on a relatively new platform called SquareSpace (see image above). It doesn't have a free version (only a 14 day trial for users to test to see if they like it) but with the paid for package it includes a domain name, so you don't have to worry about going through an external site like GoDaddy. And the templates are just gorgeous! Have a look for yourself...click here. Their target markets are artists (photographers, designers, small business owners and bloggers) and their platform is built on providing users with a media rich experience. Think clean lines, and beautiful design. I am so happy with them! My blog looks a lot more professional with SquareSpace and I am able to change all the design myself without any coding!

At the end of the day, what platform you choose is all about personal preference. I know people are often very interested in Wix as their marketing is very good and you often see their adverts all over Facebook, but I found Wix was to hard to make changes an their free platform is very limiting. I would stick with bloggger or make the move straight away to Squarespace if you want to be taken seriously. 

HowToStartABlog

Why Blog?

This is a really important question to ask yourself before you even think about starting as it will form the building blocks of your business/brand. This is different for everyone. Some people enjoy seeing their words and thoughts come alive on the page, others enjoy the feeling of affirmation that comes from gaining another follower or like on Facebook. I have loved meeting new friends through my blog, as well as the outlet it has given me to be creative, something I never dreamed was possible.

Whatever your reasons are for first wanting to start your blog, write them down (I've created a fun brainstorm printable for you to download and print out to help you along your way), so when you start to feel guilty for not having written a post in months don't beat yourself up about it. Instead, go back to your list and remind yourself of the real reasons you wanted to blog in the first place, I'm sure you will feel inspired to get started again. You will go through times of frustration with your blog, and sometimes all thats needed is a little time off to feel inspired again.

BUT if the main motivation behind why you want to start a blog is to make money or to get sent items to review, then I am terribly sorry to bust your bubble but this only happens to a tiny amount of bloggers. If your main goal is to make money, your readers will very quickly pick up on this and stop reading. Your readers want to be entertained, inspired and motivated, so give them that. If you are passionate about your content your readers will be too!

Your Blog Name & Branding

As important as the why is behind your blog, your branding is what differentiates you from everyone else and makes your blog special. If you take your blog seriously, so will everyone who reads it. One way to make that leap into the realm of 'seriousness' is by building a brand around your blog. To help you with this, you need to create a consistent message, and have everything you do, on and off the blog, send the same message. Think email signatures, blog headers, blog side bars, business cards, stamps, personalized stationery...the list is endless. And all of this needn't cost a fortune. The simplest way to build the foundation for your brand is with choosing a particular colour scheme, fonts and a basic design. You can get the help of a graphic designer if you really want to go that extra step, but the majority of the basic blogging platforms like Blogger, offer loads of customization options built into them. Think about your target audience (are they young and funky, in which case bright colours would work well. Or are they slightly older and more conventional in their thinking? Then a modern, clean and classic design and layout would probably work better).

By filling in the free mind map printable found below, you will be able to build your brand around the 'What do you love' section. If you love nature and the outdoors, your chosen colour scheme might revolve around earthy colours like khaki and emerald. Here is a great website to get your mind around colour combinations...Design Seeds. Here are a few more tips for the basic design of your blog to help you formulate your brand {click here}

After you've given some thought to your branding, now here comes the hard part. Picking a name for your blog. Your blogs' name sets the tone for your brand (and of course will have implications for showing up in google searches) so pick carefully. See who already has your name, or anything similar to it with a basic google search. Choose something that won't be outdated in a few years (and you should definitely be seeing your blog in terms of the future and "In a few years time" kind of way. 

Don't let this overwhelm you. We all have to start somewhere (click here to see my first few blog posts, eek...I'm glad I have them to look back on!) we learn by experience and our tastes change as we get older. Embrace that and let your blog grow with you into something you are proud of. 

HowToStartABlog

How to Find or Create Content

I find I am at my least creative when I stare at other peoples awesome blogs all day. I find I am unable to think of anything new or original to write about. How I deal with this (and I have my incredibly creative husband to thank for most of my ideas) is to go for a walk, camera in hand, and snap away at anything and everything that takes my fancy. Sometimes I take a notebook and jot down notes about my day, about the people I see around me, about the things I want to do with my life. Pretty soon I have a messy jumble of potential content for my blog. Look around your world, your office, your family, your community for idea's. Do you work with some strange and fascinating people, what about interviewing them on your blog? What about doing a post about a day in your life (with photo's of everything that makes your day unique)? The world around us is so rich with colour and life, its an endless supply of idea's if we just take the time to look.

Your Blog Photographs

I used to think that my blog would become popular by just reposting great content I found on sites like We Heart It and Pinterest. I've now come to realise that there are too many mediocre blogs out there that just repost other peoples creative content. That's why I try to post original content on my blog. That doesn't mean I don't 'borrow' idea's from other bloggers, but it does mean that if I want to showcase an awesome DIY lampshade, I will try to make that lampshade myself, take my own photo's and write in my own words how to go about making one yourself. And I always make sure to link back to the original source of the idea, as a way of saying thank you for the idea.

But now I'm getting distracted...the title of this tip is to take your own photographs. You really don't have to have an amazing camera to take incredible photo's. You just need to play, and fiddle with your camera and the angles to get your photograph just right. This is how I started getting into photography. Etsy has a great article on taking better product photographs, click here to have a read. And I also wrote a post on styling photographs for your blog using just your phone. Click here to read more. 

Don't Over think things

Most bloggers would probably think I'm crazy for saying this, but for me it works. I am a very organised person, I love to plan EVERYTHING and my favourite past time is making lists (can you say *nerd*). But I find that if I spend too long planning a blog post, I lose interest in it and it stays in my draft box for weeks, even months without ever seeing the light of day. If an idea comes to mind, I straight away log onto my blog, start a new post, and I just roll with it. I try not to leave it till the next day to finish it, as I often get distracted by the next post. In some ways I find this helps me stay inspired as I am always putting new content up, and my readers know that they can come back every day or so for something new. This pressure helps me to stay motivated to continue putting posts out there!

HowToStartABlog

Always Be Yourself

Your readers want to know about you, so be true to yourself. This doesn't mean gushing about each and every last detail of your day and how depressed you feel after finding out that your local Woolies Food was out of fresh basil. But rather, this means writing in your own voice and letting your personality shine through the page. Don't be scared to put yourself/your business/your idea's out there, your readers will respond to your 'genuineness'.

Gaining Followers

This is the question I get asked the most by my readers, and it's what I still ask myself! But, I'm afraid there is not secret. There is no hard and fast way to gain 100 new followers on twitter, or to get 1000 new page views in minutes. 

You just have to be patient. You have to provide content that your readers will enjoy, and you have to do so constantly. There is nothing worse than stumbling onto an awesome blog only to see they haven't updated since last year January. A good way to share the blog love is to leave comments on other blogs that you enjoy reading. It's a wonderful feeling getting just one comment on my blog (I am speaking from my own experience here) and if that is the case with you too, then why not take some time to leave thoughtful and meaningful comments on some of your favourite blogs. Don't feel that your one comment may mean nothing if there are 999 others on the blog, as a blogger I can tell you that each and every single comment leaves me with a warm and fuzzy feeling.

Take some time to connect with your favourite bloggers on Twitter and Instagram, reply to each and every tweet your receive, as well as to each comment you may get on Instagram. This helps to build meaningful and long lasting relationships with your readers and followers.

Find your niche, whatever that may be, and stick with it. I have had a real hard time in narrowing down my focus here on CityGirlSearching, I was trying to do too much and was scared to commit myself to one box. I'm not a beauty blogger, but I like writing beauty reviews, I am not a travel blogger, but I do go to some amazing places and I want to share the photographs with my readers, I'm not an expert in fashion but I do like sharing the odd outfit post. All of these different elements led me to define myself as a 'lifestyle blogger' but I still don't let that term fully define who I am here on the blog. This blog is a space for me to share pretty-ness...be it in fashion, beauty, in the home or in another country.

HowToStartABlog

Inspiring Blogs

Here are some of my favourite bloggers (some are local South African ladies, and others are International). Use this list as a guide & to learn from what these ladies are doing right. Focus on their blog design, their photographs, their content, see how they engage with their followers, and then apply it to your own blog:

Nadia vd Mescht beautifully crafted blog by Durban (South Africa) creative Nadia

EmmaJaneNation one of the first blogs I ever started following by lovely local SA blogger Emma (her photography is gorgeous!

Vivianna Does Makeup one of my all time favourite beauty blogs written by Vivianna

A Beautiful Mess a funky and fresh lifestyle blog by Emma & Elsie

MilkTeef lovely beauty and lifestyle blog by the sweet Emma

WishWishWish fashion done right! A gorgeous blog by Carrie

SuperficialGirls another local SA lady; Carlinn, who focuses on fashion & beauty

PinkPeonies lovely Luzanne writes this beautiful beauty blog

PuglyPixel design tips and tutorials from the fabulous Katrina

Lost in Travels a travel blog to inspire your wonderlust (and lots of tips for traveling with your hubby, as well as keeping on a budget!) by Chelsea

I also recently shared a post on my favourite Creative Business inspiration bloggers, click here to see it. 

I could go on for days about starting up your first blog, but the biggest piece of advice I can leave you with today is don't ever give up. I {often} have days where I feel like no one reads this blog, and that I put so much time and effort into it and I get so little back. Other days I want to high five ever person I see because I got more than 3 likes on a photograph on Facebook. So keep at it!

HowToStartABlog

Above is a freebie printable I've created to help you in your blogging journey.

Try to fill it in before you start your blog, to give you more focus and direction. Here is mine, filled out and taped onto the wall, to help remind me of where I am and where I want go. Below is more detail to help you fill in the blog brainstorm printable.

  • Why blog: jot down all the reasons you want to blog, from wanting to be a superstar celebrity to wanting to create a place to journal your thoughts and dreams. Nothing is too small or insignificant.
  • What do you Love: write down all the things you love (eg family, friends, God, nature, fashion, beauty, design, interiors, photography...) then cross off those that are too personal, or those you wouldn't want to publish all over the interweb. What you are left with is a list of elements that make up you! This will help you with later on with your branding.
  • Sharing your Love: list the ways in which you want to blog (through photographs, by writing, by drawing and illustrating, by creating cartoons and other graphic based content). This is how you will express yourself on your blog.
  • Creating Content: List some of the ways I have outlined above here, and any others you can think of (reading other blogs, going for walks, photographing random events and elements, journaling...etc)
  • Growing Readers: List some of the ways I have outlined above (networking, leaving comments on other blogs, tweeting, Facebook mentions, emailing potential clients/others in your industry) and add your own ideas too.
  • Your branding: create a board on Pinterest (you can make it secret if you don't want anyone to see it just yet) and start pining every thing that takes your fancy from colours to fonts, to design, to blog layouts. Have a look at this board for some inspiration. You need to choose a maximum of 3 or 4 colours, then 2 fonts that you want to use to help keep your brand cohesive.

I hope you have enjoyed my post on blogging, and I hope that some of it has been useful to you. If you have any questions, please drop me a comment below and I'll get back to you as soon as I can.

Happy blogging everyone

x

Camping in Korea - Hwacheon, Gangwon Province

Camping in Korea, Hwacheon Gangwon-do, RIver bed camping in Korea

After a very successful camping trip with our pooch to Yongdam (click here to read more about this dog friendly camp site near Jinan) Farmboy and I, #ShadowTheJindo & our fellow SA friend and blogger Jenna (who blogs over at Komodoness) set off in search of adventure in Gangwon-do. It was a rather long, 8 hour drive to get there and so we broke up the trip with our first stop on a random gold course near Wonju. We left on the thursday after school and arrived at 10pm, and so we just set up camp in a very random place. It has been our experience that you can camp anywhere in Korea (we have camped on abandoned tennis courts, closed off roads and museum gardens) as long as you clean up after yourself. We did feel rather nervous about the golf course though, as it seemed very fancy, needless to say we packed up at first light and beetled out of Wonju and further up north to Hwacheon in search of a better site for the next 2 nights.

Before we set out we had looked on google and Naver maps and had found a load of great looking camp sites. We drove to a lot of them but didn't stay at them as they were very much the Korean set up on either gravel roads, or with tents right ontop of each other. We had something very particular in mind; a river/stream, shade and a whole lot of nothing else. After another 5 ours of driving we finally came across a stream and river bed with a very friendly looking farmer overlooking his crops. As it looked like he was the closest authority in the area, Farmboy used his Korean skills and asked the farmer is it was okay to camp on his stretch of the river. He was so friendly! With a big smile we told us that we could camp there for as long we wanted to. I wish I had gotten a photograph of him (note to self...take more photographs of the delightful people we encounter along our travels).

Bear in mind when looking for a camping spot, those neglected gravel roads are usually where the best spots are. Don't be afraid to go off-road a little. Our car has done some serious off-roading and hasn't failed us yet! 

Camping is never complete without a roaring fire. Luckily I married a farm boy who knows exactly how to make the perfect fire.

And then there's the food. Camping for 1 day is easy, but when you camp for 2 or more days there's lots to prepare and of course you have to figure out a way to keep everything cool. For this trip, we went to our local Baskins & Robbins ice cream shop and asked very nicely if we could buy some dry ice (our town is so small we know the manager by name and he was very kind to give us a huge chunk free of charge). The dry ice kept everything cold for 3 and a half days!

We are still working on the perfect menu, but here is a rough idea for 3.5 days worth of meals, from the thursday night dinner (it was a long weekend and we had dinner at one of the rest stops along the way) to the Sunday afternoon:

Day 1

  • Breakfast: homemade granola bars, coffee, tea and digestive biscuits
  • Lunch: tuna wraps with salad
  • Snacks: store bought popcorn
  • Dinner: pre-cooked sausages/viennas, samgyupsal cooked on the fire with a grill plate with kimchi, garlic, lettuce & onion
  • Dessert: s'mores!

Day 2

  • Breakfast: homemade granola bars, coffee, tea and digestive biscuits
  • Lunch: pre-cooked bolognaise wraps with salad
  • Dinner: pre-cooked sausages and fire roasted sweet potatoes
  • Dessert: S'mores!

Day 3

  • Breakfast: coffee, tea and digestive biscuits
  • Lunch: left over Bolognaise mince, wraps & salad

If you make it all the way up to Gangwon Province, the east coast isn't too far a drive for the day and is incredible beautiful. The ocean at Gangneung was incredible blue, and the sand was like powder. It was still a rather windy day with a quite a cold breeze as summer has yet to hit Korea, but it was a great way to spend a few hours.

Can you recommend any great places to camp in Korea? I'd love to hear from you in the comments section below.

Setting up NH Internet Banking in Korea

NHInternetBankinginKorea

If you are with the Public School program here in South Korea, you will have to set up a bank account with NH (Nonghyup). This is the standard bank the government/education department uses to pay your salary. You can open another account at a later stage for sending money home (we have an Easy One Account with KEB which we use to send money home easily to South Africa as KEB changes KRW straight into ZAR without having to first convert to US dollars).

Please Note: Internet Explorer & NH are best friends. I often have problems trying to use my Mac to do internet banking. Some days it works and some days it doesn't. But it always works with Internet Explorer on my school computer.

NHInternetBanking

To set up internet banking with NH you need to visit a branch. Do this straight away when you first go set up your bank account (hopefully you have a friendly co-teacher/friend to help you). Farmboy and I both have check cards that we can use for paying for goodies online (some internet sites accept these check cards and some don't so it's a bit of a luck of the draw). A check card is basically a debit card which acts as a credit card without any overdraft. You can use it to pay online but the money is automatically debited from your account. As far as I know, I can only use my check card here in Korea. I tried to use it to pay for flights online like I used to be able to use my South African check card, but no luck so far.

When you set up internet banking at the bank, you need to give them your passport (they will make a copy for you), you also need your ARC card (if you don't have this yet you need to show them your ARC certificate which you get from your nearest education office when you apply for your ARC card. It acts as a temporary ARC card until yours arrives). There is also a charge, it was a whopping W1000 when I opened mine.


What to Bring:

-passport
-ARC card/temporary certificate
-cash 
-address (of your apartment or school)

They will give you:

-an Internet banking registration form
-a banking password card (this looks like a credit card with a load of different number combinations)

The following will be given to you if you are setting your bank account up for the first time (ie you don't get a separate card & bank book for Internet Banking)
-a bank card 
-an account book (which is actually pretty important in Korea, and you can use it to withdraw money without your bank card, and to print out statements)

NHINternetBankingInKorea

Once you are all set up you will have to create an internet banking pin (usually 10 - 15 numbers and letters) to make transactions & another pin called a User ID to log onto internet banking. Keep those all somewhere safe. And you will need to have your card/ATM pin handy (4 letters).

You will then be given a OTP (one time pin) to use to set up internet banking for the first time. You usually one have 2 -3 days to use it before it expires.

To use internet banking you also need to have a digital certificate which gets loaded onto a USB. You use this every time you log onto internet banking so make sure you keep this on you all the time. If you lose it, its pretty easy to re-issue. You issue it for the first time through NH (click here) on the top menu bar = Certificate Centre. Keep this on a USB so that you can access Internet Banking from any computer in Korea. Whenever you do internet banking you will need this certificate so keep that USB safe!

Here are some wonderful step by step instructions from Asrune at TeachTravelLearn. Once you have been given the One Time Pin from the bank, you can set up Internet Banking at home/at school.

On a computer with Internet Explorer:

1. Go to http://banking.nonghyup.com/nhbank.html

2. In the bottom right hand corner, select "Global Banking" and "English"

3. You will see this page. It is prompting you to download a keyboard protection program. Click the left hand option to download and continue:

NHInternetBanking

4. Go to the "Certificate Center" and click "Issue a Certificate"

5. Enter your ID, which you created at the bank. It is listed on your registration form under "이용지명 ID:" on the second line of text.

NHInternetBanking

6. Enter your foreign number (National Identification Number), or passport number. Select the free certificate, and confirm

7. Accept the terms of Service

8. Register. Have your registration form (given to you at the bank) and password card ready.

NHInternetBanking

9. Create your banking password.

A pop up message will appear and ask you to create a Banking password. It must be 8 digits with both letters and numbers. You use this with your USB digital certificate every time you do Internet Banking 

10. Save your Certificate to a USB device.

You can use a USB so that you can log on any computer, or save it directly to your computer. You have to have a certificate to access Internet banking in Korea. A USB is recommended. After you have Internet banking set up, you can also add it to your phone, but that's a whole other blog post waiting to be written.

11. Log on! A pop up window like this will show up. Find where you saved your certificate, select your name, and enter your 8 digit banking password at the bottom (created in Step 9 above).

If you have any other problems, call the NH English customer service at 1588-2100 *730 for English Help.

Now that you have your digital certificate set up you can log in and start doing banking transfers. As the NH site is all in English it should be easy enough to follow. Good Luck!

The #Hashtags you should be using on Instagram to get your photos noticed + FREE Printable Guide

When I first started using Instagram I was very afraid of the hashtag. I thought using them made me sound cheesy, like I was trying to be cool. But, having been an avid Instagram user for a while now I feel confident in saying that using hashtags will get you more likes and more followers and increase your engagement.

Why?

Well hashtags are a way of categorising your photographs so they are grouped together. This means you can look for things really easily. If you're a beauty blogger and you want to connect with and find other beauty bloggers you might use the following hashtags: #bblogger #beautyblogger #fotd (Face Of The Day)

By tagging your photographs with these hashtags you are ensuring your photo appears in anyones search for that particular subject. If you don't use hashtags, then the only people that can see your photos will be your followers. If you want to keep your photos private then you might deliberately choose not to use hashtags, but if you want to grow your blog/brand using hashtags will help your photographs be seen by more people. 

TIP: create a note on your phone with the hashtags you use most often (for me these are the hashtags under the 'lifestyle' heading below) and save it. That way you don't have to wrack your brains trying to remember all the hashtags and you can simply copy and paste them into the description box or comment below your photo.

There are hundreds of thousands of hashtags out there, and you can also make up your own like I did with #ShadowTheJindo & #WhatILoveMostAboutMarriage (although a few random people have popped on that one and started tagging their photographs with it so be open to the the idea that you can't 'own' a hashtag and anyone can tag their photographs with that particular tag and their photo will appear under it).

If you have a blog and want to create more of awareness for your brand as a blogger, why don't you consider starting a hashtag? It's not pretentious at all, see it rather as a way to connect with more people and to keep your ideas/photos categorised and easy to find. 

Here are some lists of the Hashtags I use when I post different things to Instagram. Some of them may seem obvious, but these are usually the tags that are widely used. Others I have found via searches and my own network of followers.

Beauty Products/Make up

  • #bblogger
  • #beautyblogger
  • #beautyjunkie
  • #beautyinkorea (if posting about a Korean product)
  • #southkoreanbeautyproducts
  • #skincare
  • #motd (makeup of the day)
  • #fotd (face of the day)
  • #beauty
  • #makeupaddict
  • #makeupjunkie

Nails

  • #notd (nails of the day)
  • #manimonday (when posting on a monday)
  • #manicure
  • #nailstagram
  • #instanail
  • #nailswag
  • #nailsofinstagram
  • #nailinspo

Dog

I had no idea that so many people had Jindos as pets until I started using hashtags! I found so many wonderful new friends to follow who share the same passion as I do for this unusual breed of dog. If you'd like to read more about our rescue pup, #ShadowTheJindo click here

  • #instajindo (or insta-  insert your dogs breed here)
  • #instapuppy
  • #dogsofinstagram
  • #woofwoof
  • #ilovemydog
  • #dogoftheday
  • #dogsagram 
  • #petsagram
What hashtags to use on Instagram

General Blog/Lifestyle Content

I have been using the following hashtags on all my photographs for the last 2 weeks and have noticed a general increase in engagement. These tags are really popular and are suited for lifestyle bloggers (those of use who post all sorts of content that doesn't always fit into one category).

  • #thatsdarling
  • #thehappynow
  • #petitejoys
  • #livecolorfully
  • #howyouglow
  • #myunicornlife
  • #abmlifeissweet (From the awesome blog A Beautiful Mess...there are a number of different hashtags you could use from A Beautiful Mess to connect with likeminded people)

The great thing about Instagram is that you can add new hashtags to your photographs after they have been posted and that way you can make sure to categorise even your older photographs. There are no hard and fast rules to Instagram so play around and have fun with your hashtags!

If you don't want to look like you are spamming Instagram with your hashtags you can post a few in the image description of your photo, and then post the rest of them in a comment under your photo. That way once people start commenting on your photo, your own comment with the hashtags will be pushed up to the top and hidden by the other comments. Its a little sneaky way to seem a little less brash while still getting your photos seen. 


To help you remember all of the hashtags mentioned in this post, I created a free cheat sheet just for you! This cheat sheet was created exclusively for members of my #CGScreative community. By joining this community of over 900 creatives you'll gain exclusive access to the CGScreative resource library. The resource library is filled with loads of worksheets, printables and what has made this community famous, beautiful stock photoraphs. Best of all, it's free to join! Simply click the image below to find out more:


What hashtags do you use when posting on Instagram? If you're on Instagram come by and say hello (@roxyhutton) I love making new friends there!

How To Take Better Photos For your Blog Using Your Phone + Free Checklist!

How to Take Better Photographs for your blog using your phone

You don’t have to have a fancy camera to take beautiful photographs for your blog. You can use your phone’s built-in camera, and with a few tips, you too can produce pretty photos to take your blog to the next level. Even though I own professional photography gear, sometimes I just want the ease of snapping a shot right in the moment. And a lot of the time when inspiration strikes, I don’t want to be fiddling around with settings and then end up missing the perfect shot. A lot of the images I produce for my blog are styled and I don’t have the time to get my camera, set it up, export the images to my computer, edit and then finally upload them to my blog. I find that using my iPhone and a few, easy-to-use (and free!) apps, I am able to produce pretty pictures that only take a few minutes to put together. Today I want to share with you how you can do the same.

All the images below were taken on my iPhone 4S and edited with VSCOCam to give them a grainy, film-like texture.

1. Clean your Lens


As with any camera, if your lens is dirty, your photographs aren’t going to come out very clear. It’s such a simple tip and yet has made the biggest change on images taken with my phone. Think about where you phone goes, and now think about the last time you wiped your camera lens clean. If this gives you the shivers, like it did to me, then whip out a piece of cloth and get wiping!

2. Natural Light


Wherever possible, use natural light. I take the majority of my photographs (using both my DSLR & my iPhone) during the day and try as much as possible to maximise the soft, natural light that comes through a window. Harsh midday light is just as hard to work with as a flash, whereas natural light, the kind that streams through a window, produces soft, clean images.

3. Click to Focus


On the iPhone camera app (the standard camera app that comes with the iPhone), there is a yellow square that automatically appears when you want to take a photo. This is your focus setting. You can allow the phone to automatically adjust the focus, or you can over-ride this by clicking where you want to focus when you take a photograph. This is especially useful when you want to create a slightly blurry background, with something in the picture in focus. I often use click-to-focus when I am photographing macro-type shots of make-up and stationery.

4. Self-Timer


I only found out about the self-timer feature on my iPhone when I updated my IOS to the latest version. This is especially handy when you want to take a ‘selfie’. Don’t forget to click to focus before you take the shot to ensure that your face is perfectly in focus and not blurry. 

5. Use a Tripod

Using a tripod (or any home-made version of a tripod) will stabilize your camera and help to avoid camera shake. It can be so frustrating when you set up the perfect shot, click to focus, and then bump the phone by accident and the photograph ends up coming out blurry. I often just use a book and wedge a drinks coaster underneath the phone to adjust the angle (and then set up the self-timer to get the perfect shot).

6. Avoid the Zoom


Especially on the iPhone built-in camera, when you use the zoom it decreases the quality of the photograph. Rather use your own built-in zoom (ie. your feet!) and position yourself to be nearer, or further away from your subject. Unless you have a snazzy new phone, like the Samsung Galaxy S4 or the iPhone 6, I would suggest avoiding all use of the zoom.

7. Background


Using a white background when shooting any product produces beautiful, professional looking shots. The white offsets all other colors and is always complimentary. It looks crisp and clear and really helps to make your subject stand out. Textured backgrounds also work well for product photography, but I find they can also distract from your subject. I have yet to take a photograph on a plain, white background that I didn’t like. 

How to take better photographs for your blog using your phone

8. Angles


Play around with angles. Have fun and go crazy with high and low, close up and far away shots. Use your body to zoom in on particular items if you are styling photographs for you blog. It’s okay to cut off parts of items, and this works particularly well when I shoot make-up or stationery. Consider the two photographs below. The one on the left is the full image, and the one on the right has been cropped therefore removing parts of the image. Can you see the difference? None of the props have been changed and the lighting is the same. The only difference is the angle.

How to take better photos for your blog using your phone

9. Apps


There are so many amazing apps you can use to really make your images pop, from overlaying text to added film effects or textures. My favourite go-to apps are:
– VSCOCam for editing the colour, brightness, cropping, straightening and adding film-like overlays.
– Studio for adding text and graphics.
– ABeautifulMess for hand-drawn overlays and creating collages
– Instagram for connecting with other creatives and sharing my images.
*All of the above apps come in Android and IOS versions.

10. Delete


There really is no point in having 10 of the same image. Be thorough and delete any and all of the ‘extra’ photographs so as to avoid wasting storage space and also to avoid having duplicates. The amount of times I upload the ‘not quite perfect’ image into a blog post and then realise I have to go back and search for the right photo is just annoying. And then I realise I often delete the perfect one and end up having to re-create my images again. Deleting all the nonsense saves you time and will make your life that much easier when it comes to blogging.

How to take better photographs for your blog using your phone

Most importantly, HAVE FUN! Taking photographs should be fun, and with all the great apps out there that are free and easy to use, blogging no longer has to be boring. With just a few minutes of practicing and playing around with your phone, your photographs can look just as good as the pros, and will take your blogging to the next level. I hope you found these tips useful. If you’d like to find out more about the apps I’ve mentioned above you can pop on over to my blog where I have reviewed the Studio App {Click Here} and the ABeautifulMess App {Click Here}.

To help you remember all these tips I've created a FREE printable checklist. It's in my FREE resource library, along with a whole bunch more resources AND free stock photographs just for you. Join the library by clicking the image below:

Rescuing a puppy in Korea

RescuePuppyInSouthKorea what you need to know

While out on an early morning walk on Monday this week, my Korean rescue pup Shadow (the black & tan one above), found a tiny crying ball of fluff, discarded in a drain alongside a forest road. I took a closer look and saw a terrified little puppy, huddled under a pile of leaves and branches. I also saw that there was another white ball of fluff further up the drain that wasn't moving and was covered in flies. I had no idea what to do. We already have our own rescue dog, who is going to cost us a lot of money to take back to South Africa (we are talking $1000's, so please think carefully before deciding to adopt a dog here in Korea!) but at the same time I couldn't just leave here her. In Korea, if you find an animal and take it to the vet, legally the vet has to keep it for 10 days to allow time for their owner to claim them. As it was clear this little one had been abandoned, my very kind vet didn't ask too many questions.  You can imagine what happens to them if they aren't claimed after 10 days. 

After much deliberation, Farmboy and I both decided we couldn't just leave her there to die and went back to get her. Knowing we couldn't keep her I jumped on Facebook in search of a foster/forever home for the shaking puppy. We took her straight to the vet and apart from a flea and mange infestation and a bacterial infection she is fighting fit and ready to live. 

Regardless of your view of social media, it does one thing better than anything else, and that is network and connect people. Within a few hours I had so many people offer to foster her and a number of people willing to take her permanently. Thanks to each and every person who shared my Facebook posts this little puppy has a loving home to go to next week. 

Here are a few photographs of where we found her, and what she looks like now, a couple of days after finding her. Shadow just adores her and he won't be the only one misses her when she's goes next week. 

As we have been through this whole process before, I have written a couple of blog posts on owning a dog here in Korea. If you have been thinking of it you might find these posts useful:

-OWNING A DOG IN KOREA {PART 1} WHAT YOU NEED TO KEEP YOU AND YOUR PUP HAPPY.

-OWNING A DOG IN KOREA {PART 2} HEALTH CHECK UPS & VACCINATIONS

From all my Facebook & Instagram posts it may seem like owning a dog in Korea is the easiest thing in the world. Please remember that I, just like most other people on social media, showcase the highlights. Owning a dog here in Korea is hard work, and you need to be prepared for not just the expenses of owning a dog (the vaccinations, neutering, dog food which is sooo much more expensive than back home & of the course the final cost of taking the dog back to your home country) but also what daily life with a dog is like here. We have a 'large' dog for Korean standards and deal with terrified neighbours and kids running away screaming on a daily basis. Koreans just aren't used to keeping dogs as pets, especially big dogs and are always horrified when they hear that Shadow lives in our apartment with us. Also, Korea isn't built for pets, so finding a place to exercise him is always an issue, finding a place for him to go to the bathroom without Koreans chasing us away from their beloved veggie patches is always a nightmare, finding places to stay that will accept dogs here in near impossible (we camp A LOT) and of course taking your dog around if you don't have a car is a huge challenge if they aren't small and able to fit in a little carrier. We wouldn't change our experience with Shadow for anything in the world, but I do wish we had known from the beginning exactly what we were in for when we found him. If you have any questions about owning a dog here, please feel free to email me or leave me a comment below. Also, there are sooooo many dogs and puppies needing homes here in Korea, if you have been wanting to get a dog please consider adopting rather than buying from the pet stores.

Below is a website that lists all the dogs (and cats & other animals!) available for adoption, as well as Facebook groups where animals that have been rescued are also posted. There is also a group called Everything Paws which is a fantastic resource for pet owners here in Korea. I've also included the links for buying and selling second hand pet items and information on traveling abroad ie. back to your home country with your pet. 

-Everything Paws: Tips & DIY Ideas for pet owners in South Korea  

-Rescue Korea adoption website

-Buy & Sell Pet Related Items in Korea

-Airborne Animals

Do you have a pet here in Korea? What has been your biggest challenge so far? I'd love to hear from you!

How To Clean your DSLR camera lens

How To Clean Your Camera Lens

The last time I was editing my photographs I realised I had a few funny small blotches on parts of my photos. After wiping my computer screen I realised with horror that the marks must have been from my camera. I have since gone about finding the best way to clean my lenses at home, without having to send them in. Here are few tips I've picked up as well as a few basic things to keep your camera in tip top condition.

HowToCleanYourCameraLens

Use an air blower, like the one pictured above to remove loose dust particles. Simply press the bulb end and air will be forced out of the spout. This is the easiest and safest thing to try first with your lens.

When dust and/or smudges are on your lens glass, use a microfiber cloth designed for optical lenses to wipe it off. Make sure to use a clean microfiber cloth, as those cloths can hold dust, dirt and oil from your fingertips which can then be transferred to your lens. Be careful when cleaning the glass. If you do get something like sand on your lens and you rub it with a cloth, you may scratch your lens. Use a soft brush to brush off dirt or sand. Do not rub those away as they may cause scratches.

Change your lenses indoors (or in your car if you are out and about) if you can manage it. If you are outdoors, try and block the wind with your body as it can blow dust, dirt and other nasties into your camera and lenses.

Once you change lenses, quickly place the end cap on the removed lens, to prevent dirt and dust from setting into it. Also, quickly attach the new lens to the camera, to prevent dust and dirt getting into your camera sensor. And, while changing lenses, point them downward so dust and dirt don’t settle in.

HowToCleanYourCameraLens

Keep the lens cap on the front glass when you're not using your lens. Even better, place the lens in the protective cover that comes with it, or put it away in your camera bag.

Use a filter or lens hood to protect the lens glass from getting scratched or broken. 

Do you have any other tips for cleaning your lenses and keeping them in tip top condition?

5 Quick Blog Makeover Tips

Blog Makeover Tips for the perfect blog by citygirlsearching

Is your blog feeling a little stale? Are you in need of a bit of a refresh when it comes to your blog design and layout? Here are 5 quick tips to help you breathe new life into your blog, quickly and easily without the need to hire a graphic designer. I found making these quick changes with my own blog really helped me to feel inspired again and I'm sure would do the same for you.

1. Change your Social Media Icons.

This could be something as simple as changing the colour of your social media icons or could even extend to changing the design of them completely. There are so many wonderful blogs offering free icons for download that you don't have to be stuck with boring icons ever again. Here is a quick list of some of my favourite ones. Just click on the images below to be redirected to the website:


2. Change your Blog Sidebar Labels.

A similar move to the tip above, but changing the design of your category/page labels can really give your blog a lift. Think about changing the font, the size of the font, the background colour, adding a photo as the background or going minimalist and just using a font. 

You can make new sidebar labels yourself using the following free online programs; Canva and PicMonkey.  When you do make your own labels just keep in mind the sizing of each one. Try and keep the size (and the design) the same to create uniformity on your blog. 

For me, I changed my image based labels to graphic based labels as I thought the images were distracting from the main content of my blog. I still like the image based labels on the left, but felt like I needed a bit of a change. Remember, it's your blog and if you make changes you don't like, you can easily go back and change them again:

3. Change your profile picture.

Update your profile picture every once in a while to keep your blog fresh. Or if you don't have one, add one! Your readers want to know who it is they are connecting with when they read your blog. Try to keep your colours in the same palette as your design theme to avoid distracting from your blog too much. I styled a few new photographs recently using items that show what it is I blog about. Be creative and most of all be you!

BlogTips

4. Remove the clutter.

Take some time to really look at your blog. Are there pages, widgets, buttons and other things in your side bar or header that you don't really need? Remove them and just keep the essentials. A great tip to implement is to include a search bar somewhere obvious on your blog. That way if people get a little lost (or if they are looking for something specific they can quickly search your blog instead of spending time getting frustrated and then ultimately leaving). Make your blog a pleasant and easy to navigate place for your readers.

5. Add a Landing page

A landing page (or home page) is the first thing people see when they get to you blog.  You may have multiple pages on your website (for example an About Page, Store Page, Contact Page, Press Page) or you might also have your blog set up as a separate page too as is the case with my blog. This can be very confusing for people who stumble across your website as they may have no idea what it is that you blog about. To make it easy for them to navigate, add a 'Home' page to your site. If you click on my logo at the top of my blog, or if you click on my actual 'Home' page you will be directed to a space that is clean and free of clutter. Your Home or Landing page needs to be very clear in stating what your webiste or blog is all about, as well as providing easy to see and use links to the different parts of your site.

BlogTips

As you can see my Home page has links to my About page, my Stationery Store, my Photography portfolio and my Contact page while also providing a sign up form for people to subscribe to my blog. Another thing to remember to include is your social media links so people can connect with you on all the platforms you use.

My site is run on SquareSpace and so setting up a landing page (or cover page as SquareSpace calls it) was super easy to do. If you blog using Wordpress or Blogger you can set up a new 'Static Page' which can act as your landing page. 

Remember at the end of the day you want your site to be easy to navigate and easy for people to find what they are looking for. You don't want people to get frustrated and end up leaving your site because they found another one that is better to navigate. People are also very visual, so try to include high quality photographs on your home page that add to the overall branding and aesthetic that you want to convey to your readers. 

Do you have any other tips for a blog makeover that you'd like to share? I'd love to hear from you in the comments below!

You might like these posts too:

Owning a Dog in Korea {Part 2} Health Check Ups & Vaccinations

Owning A Dog In Korea Health Check Ups Vaccinations

This is a follow on post from Part 1 in this series Owning A Dog in Korea.

In Part 1 I talked about all the things you need to have to make sure you and your pup are happy. Nothing in the guide is compulsory by any means, but rather is is written from my experience. Keeping a dog in an apartment here in South Korea is hard, and so that blog post is filled with ideas of items you may want to buy, as well as links to places you can get hold of them. Things like where to buy collars, harnesses, crates & toys for larger dogs. I hope you find it helpful!

ShadowTheJindoHuskyPuppy (6 of 7).jpg

We have had our rescue pup, Shadow, for just over 6 months (click here to read more about how he came into our lives) and had no idea what needed to be done in terms of health check ups. This post will hopefully provide you with enough information about what your pup needs to be healthy and happy.

The first thing you need to do with your new pup/dog is to take him to the vet to have a thorough health check. This basic check up will determine whether your dog has any diseases. Depending on whether your pup had a previous owner, you may or may not need to have vaccinations. We rescued Shadow from the side of the road when he was tiny, and so he needed to have every test done as well as all his vaccinations.  You also need to ask your vet to check for Heartworm which is a very nasty disease very prevalent here in Korea.

If you have rescued a puppy you need to be very mindful of Parvo virus which is incredibly contagious and deadly to young dogs. Parvo is spread through the feces and vomit of infected dogs and puppies. This virus can live in feces for about two weeks and can survive in the environment (areas on floors and cages) for many months. This survival rate allows it to be passed along by hands, clothing or shoes of anyone who comes in contact with it. We were warned by many dog owners not to let our puppy go outside until he had had all his shots, but this just wasn't practical for us. When we go home to South Africa, Shadow will be an outside dog and so we needed to toilet train him outdoors. I know many people here in Korea who use pee pads, and it works for them but is a personal and situational preference (if you live on the 20th floor of a sky rise building, it might not be practical to take out a young puppy every 3 hours). Getting up at all hours in the freezing cold to go outside was hard, but it was something we decided and have just put up with. 

DogCheckUpVaccinationsSouthKorea

What to Do if your dog Tests Positive for Heartworm

I don't have any experience with treating heart worm and so I asked the local dog owning community here in Korea for some advice. I just want to say thank you to each of these ladies for taking the time to respond to me and offer help and advice to dog owners who may have to go through heartworm treatment.

"Finding out your new foster or adopted pup has heartworm is awful. This happened to me in January 2013. All dogs in Korea need to be given monthly heartworm preventatives as heartworm is rampant in Korea.
At first the vet will just do a quick blood test to determine if your dog is heartworm positive or negative. If it is positive, the most important thing is that you ACT QUICKLY!
You do not have time to save up for a month or so! Find a vet that will do a payment plan if money is an issue. Heartworm is more difficult to treat the longer it progresses. There are 4 stages of heartworm - you will find out which stage your dog is by having scans done. If it's stage 1 or 2 - it's treatable. Stage 3 and 4 treatment options are not as successful and will depend on your dogs health.
I have experience with treating stage 2 heart worm. My dog was given two rounds of injections 24 hours apart. After the first injection, she cried for a solid 8 hours. It was agonising to watch. The second one was a little better but still awful.
The dog must be kept calm during the few weeks following treatment - their heart rate needs to stay steady.
About 4 months later we retested my dog and she tested negative! We were really lucky! I have heard it can take up to 9 months for a negative test result. Or worse, the treatment may need to be repeated" Julie


"Our dog, Sue, had to have 2 rounds of Immiticide before she tested negative for HW. For Close to 4 weeks each time, she had to be quite still and not have too many walks.  She was a bit lethargic and tired after the injections. Each round of treatment was 400,000won.  I did not check around as I wanted her to have the treatment right away.  My vet also kept her over night on an IV to give her fluids and monitor her.

She was rescued from a shelter, nearly dead, from malnutrition and she had just given birth. The initial injection causes them to be in quite a bit of pain and sometimes they writhe around on the floor and you feel completely helpless as you watch.  they don't understand what is causing the pain and you can't help them at all. It is usually 1 injection and then you wait for the medicine, which is essentially poison to kill the worms near the heart and hope it does not kill the dog in the process.  We had to get Sue to a good weight and moderate healthy before she could even have the injection. One round just did not kill all the worms and we had to go back and do it again" Erin

ErinSueDogInKorea


"From my experience, once my dog tested positive, we did blood test to find out if he had any worm eggs in his blood. My vet also did an ultrasound of the heart and he was able to see the condition of his heart and adult worms in his heart.
Next, he staged his heartworm given his symptoms. This is an indication of how advanced the heartworm is. It goes from Stage 1 through 4 (1 being the mildest and 4 being the most serious).
It is important that dogs are at a normal weight and try to maintain their weight during the treatment. My dog was underweight. So, we had to wait some time for him to gain weight before starting actual heartworm shots. Being arsenic based, these shots take a lot from a dog’s body.
While we were waiting for him to gain weight, he was on antibiotics (2 rounds). My vet also put him on puppy food for a month as puppy food is higher in protein and calories to help with his weight gain. He had poor appetite, which is one of the symptoms of heartworm disease. I bought him My Beau nutritional supplement, salmon oil for dogs and some wet food to mix in his dry food alternatively to encourage him to eat more. I also offered him a hard-boiled egg once or twice a day.

I tried to offer 3 or 4 mini meals when I was around over the weekends to help with his weight gain. I weighed him every other day so that I could see my progress.
We gave him pills with Greenies pill pockets as he didn’t want to swallow them otherwise. I have heard people mix them with a bit of jam/peanut butter/bread as well.
Some of the other symptoms of heartworm disease include: cough, shortness of breath, labored breathing, lethargy, swollen/distended abdomen, and edema of the legs.
Once heartworm shots are initiated, the most important thing is to restrict exercise. Dogs should only be brought out for the toilet and always on a leash. We have to restrict things which increase heart rate such as running, jumping, playing ball, climbing steps/stairs/hills, barking a lot and mating.

Also, it is important that the day dogs get an injection not to rub/massage the area even if they may be in pain. It is very important to do everything possible to keep them calm" Dee Dee

DeeDeeTomi

As heartworm is such a problem here in Korea, Vets advise giving dogs heartworm preventatives. These are given once a month and come in tablet form. You can take your dog in once or month to your vet or buy a couple of months supply to give your dog at home. The tablets aren't that expensive and most definitely worth doing. 

DogVaccinationsSouthKorea

Vaccinations

Here in South Korea vets give dogs the following vaccinations:

  •  DHLLP (Distemper, Hepatitis, Parvovirus, Papainfluenza & Leptospirosis (x5 shots)
  •  Corona Virus (x2 shots) 
  • Kennel Cough (x2 shots)
  • It's also a good idea to get the rabies vaccination done too.

Some people feel very strongly about not over vaccinating their dogs, and lots of websites suggest having a Titer Test (anti body test) after about the 3rd or 4th round of DHLLP. I trusted my vet, and as Shadow is a larger breed than most dogs here in Korea I took my Vet's advice to have all 5 rounds of DHLLP.

Vets usually administer 2 shots together, 2 - 4 weeks apart. In my case Shadow had the following:

  • Round 1: DHLLP & Corona
  • Round 2: DHLLP & Corona
  • Round 3: DHLLP & Kennel Cough
  • Round 4: DHLLP & Kennel Cough
  • Round 5: DHLLP & Rabies

Each visit to the vet cost W22 000 (I do live in a small town so I think the prices are slightly less than in bigger cities). The rabies shot was a little more and was more painful for him than the others.

After the initial vaccinations, you are advised to take your dog in for yearly booster shots.

All of the above is very important to bear in mind before you get a dog. There are so many abandoned pups on the streets here in Korea, but before you just pick them up make sure you know what you're getting into financially.

A few numbers to chew on:

Heart worm treatment: +-W400 000 a shot (often times you may need 2 or even 3 rounds) basic Basic Vaccinations: +-W150 000

Neutering: -+W200 000 (male) can be as much as W400 000 for a female

Spaying: +-W400 000

And thats before the food and toys and bedding and treats. And of course the final cost of transporting your pet home.

Even with all of the above, we can't imagine our lives without Shadow. He has brought so much joy to our lives and we don't regret picking him up off the streets one bit.

VaccinationsDogsSouthKorea

Do you have anything you want to add, or is there something I've left off here? Please drop me a comment below or email me and I will update this post. Thank you!

How to share Instagram photos to your Blog Facebook Page

HowToShareInstagramPhotosToBlogFacebookPage

Have you ever wondered where all those annoying hashtags on people's photographs on Facebook come from? The majority of the time those images have come from Instagram where those hashtags help you to get more followers and build a bigger audience. It can be a little annoying when people post the same thing on all their personal social media platforms but, what if you want to be able to do this for your blog or business Facebook page? It's super easy and I'm going to show you how.

Once you set this up on Instagram don't worry about flooding your Facebook feeds, you will still be given the option to share it onto Facebook/Twitter etc each time you upload a photo. 

Step 1 Click on the options wheel (on Android it will be 3 vertical dots, on a Windows phone it will be 3 horizontal dots in the top right hand corner) on your Instagram Page Feed

HowToShareInstagramPhotosToFacebook

Step 2: Scroll down your options page (or preferences page for a Windows phone) until you find Linked Accounts/Share Settings.

Step 3: Tap Facebook and then link your accounts by providing your Facebook login info

HowToSaveInstagramPhotosToFacebook

Step 4: Choose either your personal Facebook Timeline or one of your Blog/Business pages to link to

HowToSaveInstagramPhotosToFacebook

Step 5 Get Sharing! Now when you share your image, if you click 'Facebook' your image will be sent straight to your Blog Facebook Page.

HowToShareInstagramPhotosToFacebookBlogPage

And you're all done, easy peasy.

Happy posting!

Video: How to make your Nail Polish Last Longer & a *GIVEAWAY*

HowoMakeYourNailPolishLastLonger

Hello everyone and welcome to my first Youtube nail tutorial. In this video I will be showing you how to make your nail polish last longer.

All you need is

-a base coat

-a colour polish

-a top coat

 I'll be using Innisfree's Eco Base Coat, Innisfree's #108 colour polish, The Face Shop's gold glitter colour polish & The Face Shop's Gel Touch Nails top coat. 

Click on the video below to start watching.

*Make sure to watch till the end for the GIVEAWAY!!

You can enter the giveaway by either commenting on the video above (you might need to open the video up in Youtube itself to comment under it) or you can leave your comments here on my blog in the comments section below.

Rules:

-Giveaway is open internationally!

-Giveaway closes at midnight on Thursday February 12th & the Winner will be announced on Friday February 13th!

-Share this post on Facebook/Twitter/Instagram for more entries (please make sure to use the #citygirlsearching hashtag and tag me in your posts so I can keep track of all your entries).

GOOD LUCK!

How to save photos from Instagram

HowToSavePhotographsFromInstagram

If you're on Instagram, chances are you've tried at some time or another to save either your own photographs, or someones else's. And realised you can't. Instagram has done this deliberately (possible to help people maintain copy write of their work?) but whatever the reasons it's terribly frustrating when you want to use a picture you've uploaded and then realise you've deleted it off your phone and computer (note to self...BACKUP ALL your devices regularly!).

CityGirlSearchingInstagram

But have no fear, there is a way to download your photographs directly off Instagram. I know of two methods, one of them is online and you can do it straight from your computer (Instagrabbr) and this is the one I am talking about today. The other method I know about that seems really popular right now is the iPhone app Instagrab. Both platforms are free and super easy to use.  There are I'm sure lost of other ways that you but these two are the ones I have used. If you know of any other good apps or good ways to download your photographs please leave a comment below. 

Instagrabbr

1. Paste your Instagram username into the Instagrabbr box:

HowToSavePhotographsfromInstagramInstagrabbr

Your profile of images will pop up:

InstagrabbrHowToSavePhotogrpaphsfromInstagram

2. Click on an image you want to save. When it opens up, right click and 'Save As/Save Image As'. Or click the green 'save image' button underneath your photograph.

InstagrabbrhowTOSavePhotographsfromInstagrm

A super easy way to download photographs from Instagram. You can use the same method for different Instagram accounts, simply pop the username of the account you want to download photographs from into the Instrabbr box and bombs away!

Have you ever used Instagrabbr before? I'd love to hear from you in the comments below.

Owning a Dog in Korea {Part 1} What you need to keep you and your pup happy.

OWningADogInKoreaWhatYouNeed.jpg

Our lives changed in September 2014 when we rescued Shadow, then a tiny black and brown ball of fluff. We had no plans on having any pets while living here in Korea, but we have very little control over who and what God places in our lives.

We spent 3 weeks deliberating over what to do with him, mainly because it costs thousands of dollars to take a dog back home to South Africa, and also because we had no idea what owning a puppy really meant.

This post will hopefully help you with the basics of what you need to keep both you and your pup happy while living in an apartment here in Korea. I am by no means a dog expert, but I have spent countless hours watching youtube tutorials for training dogs, and have had the past 3 months (not a huge amount of time but a LOT of time when you get a puppy) to learn a few things.

These things will also be useful for anyone getting a dog (not just a puppy) but there will be a few things you won't have to worry about if you live in a house with a garden. Here in Korea we live in relatively small apartments and so choosing to have a dog needs to be well thought out and planned process to ensure minimal stress for everyone. 

*I will be doing another post on getting a health check for your dog here, heart worm medication as well as all the vaccinations they need*

Sleeping:

OwningDoginKoreaWhatyouNeed

Farmboy and I live in a relatively large apartment, and so have converted one of the rooms we have into the dog den. Not everyone will have this luxury, so I suggest getting a 'play pen' of sorts to contain your puppy/dog while you are out the house or can't keep an eye on him. This has been the most important thing we have done, and has really helped us relax when we are gone to work 8 hours of the day. We bought this dog gate off Gmarket (W45 000 or $45 click here for the link) which means he can see us, but he can't escape. He cried a lot the first few days we locked him up, but now he is happy to be in there and just sleeps when we aren't at home. This keeps him safe, as well as protecting the rest of our house from puppy mayhem. This also helps with housebreaking your puppy, as they tend not to mess where the sleep (the same is said for crate training...see below). 

His crate goes in his room as well as a cheap little bed we found at Daiso. He doesn't like blankets or anything that most dogs like to snuggle in. Even now with it snowing outside, he doesn't like the underfloor heating and chooses to sleep on the cold stone floor by the front door when he isn't in his room....strange pup.

I had never heard of crate training before, but as we will one day leave Korea, Shadow will have to travel in a crate for over 20 hours and so getting him used to it as soon as possible was very important for us. The sooner your pup gets used to the crate (and hopefully to see it as a happy and safe place to be) the easier it will be when they really have to be in it. There are lost of great videos on crate training (just google it and you'll find hundreds of great resources) and it took Shadow a while to be comfortable being inside it. He still doesn't like being locked in it for hours at a time, but he is getting used to it and it's only to help him in the end. We feed him in his crate, and put him inside it with some treats while we watch TV. He will eventually fall asleep in it and then we leave him in it over night. With crate training it's important to start off slowly, and progress gradually. Don't rush it or your poor pup will start to hate it. Also, never 'banish' your pup to his crate when he is naughty. You want the crate to always be a safe and welcoming place for him to be in.

Finding the right size crate can also be difficult. We had no idea how big Shadow would be and so had to make a guess. Crates are also super expensive here (this is one of the largest sizes and cost W165 000 or $165 on Gmarket. Click here for the link). If your pup is going to be traveling by air, the crate needs to be sturdy, IATA approved, and your dog needs to be able to stand up and turn around comfortably. Our crate is still a little too big for Shadow, but he is probably going to grow into it and we would want his journey home to be as comfortable as possible. 

Food

This has been a tough one as there are soooo many different opinions and different kinds of foods. I had done a lot of research and decided that I wanted to feed Shadow grain free food (a lot of the super market brands use grains as fillers, leaving far fewer nutrients in the food and leading to huge poos). We were feeding him Taste of The Wild grain free puppy food until the stockist ran out on Gmarket and have resorted to Kirkland Nature's Domain food for all life stages until we can order more Taste of The Wild.  Click here for a great comparison of dog foods as well as star ratings for quality and nutritional value. 

We buy in bulk and store the food in large kimchi containers to keep it fresh. I got this 13litre containers from Daiso. 

Toys

OwningADogInKoreaToys

You can go wild with all the fun things you can buy for your dog here in Korea. Shadow loves his homemade toys the most (the tennis ball alien thingy that Farmboy made using old rope and a drill) and the grey t-shirt. We bought lots of toys that have rough edges on so he can chew away and help relive his itchy gums now that he is teething. 

Here are the links for the toys above:

Blue Ball thrower, Green squeaky ball, rope

Red Fireball Bento Treat Chew Toy

Black Squeaky Food/Treat Dispenser (this makes dinner time fun and keeps them occupied and their brain stimulated as they have to work out how to get the food out).

Ball Thrower

Purple food dispenser: bought at a pet shop in Gwangju

White nylabone

Treats

I mainly use treats for training (I follow Clicker Training which is based on positive reinforcement). You can find treats online through Gmarket, or at most marts and all pet stores here in Korea. When we leave the house for the day we also always make sure we give Shadow a Kong (the red toy pictured above) which will save your lives and keep your pup entertained for a good amount of time while you are gone. You fill the kong with treats, peanut butter, cheese, meat, carrots, bananas apples etc and the pop it in the freezer over night and voila! One very happy pooch! Click here for a link to them on gmarket. 

Grooming

I found all of these things at my local DC mart. The orange brush helps to really scrub and remove the dirt from Shadows thick fur. I also have a bunch of old small towels for drying him off after baths and for putting over his bed when we give him frozen bones. That just stops the yucky bits of blood and tissue from the bones messing everything. 

Training

I have been very strict with Shadow from the moment we got him and it has led to us having a very calm, well behaved dog. He doesn't jump on people, he has good manner, waits to be let in and out of doors and most importantly doesn't snap or grab things from people. It hasn't been easy but it has been worth it, and using a clicker (pictured above) has been life changing. This being said, we have only had him for 3 months and it's important to stick with your training, especially when you feel like your dogs knows all the tricks you have taught them. It's especially important to keep changing up the environment in which you ask your dog to do things for you, thereby helping to cement their learning.   I can highly recommend Kiko Pup on youtube & Training Positive.  Clicker training used food based rewards, but these videos give lots of advice for weaning your pup off the treats and ensuring your dog continues to do what you want him to do even without the treats. 

Walking

One of our biggest challenges has been to train Shadow to walk nicely on the lead. Using a harness instead of his just his collar has helped a lot but he still pulls and is a bit of a pain to take on walks. We do have a car, so luckily we can drive off to a field to give him his exercise but lead walking is a very important skill your dog needs to know how to do, and to do well. Click here for the link to where we bought this harness. It's soft and padded and doesn't cut into him like other harnesses have. They also have all sizes and colours and so you should be able to find one to fit your dog.

We only use the extension lead when we take him out to go to the bathroom.

Bathroom

Deciding where or how you want your dog to use the bathroom is another big decision to make. A lot of people use pee pads for their dogs, but we don't want our dog to get used to those and then have to be re-trained to go outside when we move back home. It's not easy having to wake up in the middle of the night in the freezing cold and take your dog out for a walk in the snow but it's a decision we have made. Shadow was pretty much housetrained from the moment we got him (something that is a common trait of Korean Jindos) and only pooed in the house on the first night we got him. Since then he has only had a handful off weeing accidents, mostly due to us not taking him out after he has eaten, slept  or been playing. Puppies should be taken out to the bathroom after each meal, ,nap, or play time until they are about 4 months old. 

Collar

Shadow is growing like a weed and has outgrown two collars already. This is one I found on Gmarket (click here) for him that included laser engraving for his name and for my number in case he gets lost. It comes in a variety of colours and sizes (it can be very hard to find a collar for larger dogs and this company were super easy to deal with!).

There is alot more I am still to learn about having a dog, but these are the basics that have helped us over the past 3 months. Do you have any other suggestions of tips for having a dog here in Korea? 

The Banting Diet...What can you eat?

BantingDietWhatCanIEat

I have been following the Banting Diet (a form of low carb high fat eating lifestyle...click here for more info on the basics of Banting) for the past 3 months now, and have lost a total of 5kg's. I wasn't planning on losing any weight when I started, but I had been hearing so many great things about the Banting lifestyle that I thought I'd try it for myself. And I must say I was incredibly intrigued by the claims that I could eat cream cheese and still lose weight! 

My body has adjusted and gotten used to this way of eating (this doesn't mean I don't fall off the bandwagon every now and again) but as there are still loads of delicious things you can can eat and make it's pretty easy to stay on the right track (click the following for two yummy recipes; Broccoli & Cheese burgers and Cream Cheese Pancakes). Following the Banting lifestyle does require more thought and effort than eating regular meals, but is is possible to do, even right here in South Korea. Farmboy and I have actually found that we spend less money now on groceries, even though we are buying things like bacon and cream cheese on a regular basis.

Please do bear in mind that everyone's body is different. Banting doesn't work for some people who are very sensitive to dairy, which then can lead to weight  (this is where you can try the Paleo diet which follows similar principles to Banting but without the dairy). But for me the results have been incredible. For the past year I have been exercising consistently 5 times a week and eating healthy meals and had yet to loose any weight. With Banting I am trimmer than I have ever been and I am doing less exercise than before. Granted I am not as toned or strong as I was before and some of the weight will be muscle, but my body looks and feels so different. 

Here are the food lists of what you can and can't eat as set out by Tim Noakes, the author of the book The Real Meal Revolution. You can find out more about the book and get yourself a copy by clicking here. If you want to see results you have to start off being very strict with yourself. Not cheating. Trust me, once you start seeing results that bagel is going to look less and less appealing. And the great thing is, you can still bake! I bake all the time and am still able to satisfy my sweet tooth without sacrificing my hips. Some people will say that the gluten free, sugar free baked goods aren't as good as the real thing. Well, of course they're not, but they come pretty close and eating them isn't harmful to your body like the original recipes.

Also, my favourite Banters, The Banting Blondes have just launched a brand new Ebook full of all of their delicious recipes. Click here to get yourself a copy. By buying their book you are supporting the 'Breadline Africa' Charity Fund which does work to help impoverished communities become self-sustainable . 

Green List

Green is an all-you-can-eat list. You choose anything you like without worrying about the carbohydrate content as all the foods will be between 0 to 5g/100g.

ANIMAL PROTEIN (unless these have a rating, they are all 0g/100g)

  • All eggs
  • All meats, poultry and game
  • All natural and cured meats (pancetta, parma ham, coppa etc)
  • All natural and cured sausages (salami, chorizo etc)
  • All offal
  • All seafood (except swordfish and tilefish - high mercury content)
  • Broths

DAIRY (Please refer to "What is the deal with dairy?" on FAQ page)

  • Cottage cheese
  • Cream
  • Cream cheese
  • Full-cream Greek yoghurt
  • Full-cream milk
  • Hard cheeses
  • Soft cheeses

FATS

  • Any rendered animal fat
  • Avocado oil
  • Butter
  • Cheese - firm, natural, full-fat, aged cheeses (not processed)
  • Coconut oil
  • Duck fat
  • Ghee
  • Lard
  • Macadamia oil
  • Mayonnaise, full fat only (not from seeds oils)
  • Olive oil

FLAVOURINGS AND CONDIMENTS

All flavourings and condiments are okay, provided they do not contain sugars and preservatives or vegetable (seed) oils.

NUTS AND SEEDS

  • Almonds
  • Flaxseeds (watch out for pre-ground flaxseeds, they go rancid quickly and become toxic)
  • Macadamia nuts
  • Pecan nuts
  • Pine nuts
  • Pumpkin seeds
  • Sunflower seeds
  • Walnuts

SWEETENERS

  • Erythritol granules
  • Stevia powder
  • Xylitol granules

VEGETABLES

  • All green leafy vegetables (spinach, cabbage, lettuces etc)
  • Any other vegetables grown above the ground (not butternut though)
  • Artichoke hearts
  • Asparagus
  • Aubergines
  • Avocados
  • Broccoli
  • Brussel sprouts
  • Cabbage
  • Cauliflower
  • Celery
  • Courgettes
  • Leeks
  • Mushrooms
  • Olives
  • Onions
  • Peppers
  • Pumpkin
  • Radishes
  • Sauerkraut
  • Spring onions
  • Tomatoes

Orange List

Orange is made up of ingredients containing between 6g and 25g of carbs per 100g (6% - 25%). 

Chart your carbohydrates without getting obsessive and still obtain an excellent outcome. If you are endeavoring to go into ketosis, this list will assist you to stay under a total of 50g carbs for the day. These are all net carbs and they are all 23 to 25g per indicated amount. Ingredients are all fresh unless otherwise indicated.

KEY

C = cups per day
T = tablespoons per day
t = teaspoons per day
g = grams per day
For example: 1.5 apples are all the carbs you can have off the orange list for the day (if you want to go into ketosis and make sure you are under 50g total carbs for the day).

FRUITS

  • Apples 1.5
  • Bananas 1 small
  • Blackberries 3.5 C
  • Blueberries 1.5 C
  • Cherries (sweet) 1 C
  • Clementines 3
  • Figs 3 small
  • Gooseberries 1.5 C
  • Grapes (green) under 1 C
  • Guavas 2
  • Kiwi fruits 3
  • Litchis 18
  • Mangos, sliced, under 1 C
  • Nectarines 2
  • Oranges 2
  • Pawpaw 1
  • Peaches 2
  • Pears (Bartlett)
  • Pineapple, sliced, 1 C
  • Plums 4
  • Pomegranate ½
  • Prickly pears 4
  • Quinces 2
  • Raspberries 2 C
  • Strawberries 25
  • Watermelon 2 C

NUTS

  • Cashews, raw, 6 T
  • Chestnuts, raw, 1 C

SWEETENERS

  • Honey 1 t

VEGETABLES

  • Butternut 1.5 C
  • Carrots 5

Red List

Red will contain all the foods to avoid as they will be either toxic (e.g. seed oils, soya) or high-carbohydrate foods (e.g. potatoes, rice). We strongly suggest you avoid all the items on this list, or, at best, eat them very occasionally and restrict the amount when you do. They will do nothing to help you in your attempt to reach your goal.

BAKED GOODS

  • All flours from grains - wheat flour, cornflour, rye flour, barley flour, pea flour, rice flour etc
  • All forms of bread
  • All grains - wheat, oats, barley, rye, amaranth, quinoa, teff etc
  • Beans (dried)
  • "Breaded" or battered foods
  • Brans
  • Breakfast cereals, muesli, granola of any kind
  • Buckwheat
  • Cakes, biscuits, confectionary
  • Corn products - popcorn, polenta, corn thins, maize
  • Couscous
  • Crackers, cracker breads
  • Millet
  • Pastas, noodles
  • Rice
  • Rice cakes
  • Sorghum
  • Spelt
  • Thickening agents such as gravy powder, maize starch or stock cubes

BEVERAGES

  • Beer, cider
  • Fizzy drinks (sodas) of any description other than carbonated water
  • Lite, zero, diet drinks of any description

DAIRY / DAIRY-RELATED

  • Cheese spreads, commercial spreads
  • Coffee creamers
  • Commercial almond milk
  • Condensed milk
  • Fat-free anything
  • Ice cream
  • Puddings
  • Reduced-fat cow's milk
  • Rice milk
  • Soy milk

FATS

  • All seed oils (safflower, sunflower, canola, grapeseed, cottonseed, corn)
  • Chocolate
  • Commercial sauces, marinades and salad dressings
  • Hydrogenated or partially hydrogenated oils including margarine, vegetable oils, vegetable fats

FRUITS AND VEGETABLES

  • Fruit juice of any kind
  • Vegetable juices (other than home-made with Green list vegetables)

GENERAL

  • All fast food
  • All processed food
  • Any food with added sugar such as glucose, dextrose etc

MEAT

  • All unfermented soya (vegetarian "protein")
  • Meats cured with excessive sugar
  • Vienna sausages, luncheon meats

STARCHY VEGETABLES

  • Beetroots
  • Legumes
  • Parsnips
  • Peanuts
  • Peas
  • Potatoes (regular)

SWEETENERS

  • Agave anything
  • Artificial sweeteners (aspartame, acusulfame K, saccharin, sucralose, splenda)
  • Cordials
  • Dried fruit
  • Fructose
  • Honey (except for 1 t on orange list)
  • Malt
  • Sugar
  • Sugared or commercially pickled foods with sugar
  • Sweets
  • Syrups of any kind

#16Days2014 16 Days of Activism for No Violence against Women & Children

November 25th marked the start of 16 days of Activism for No violence Against Women & Children in South Africa.

The 16 Days of Activism for No Violence Against Women and Children is an international awareness-raising campaign that takes place every year from 25 November (International Day for the Elimination of Violence Against Women) to 10 December (International Human Rights Day). The period includes Universal Children’s Day and World AIDS DaySouth African Government

I am posting this today with the single aim of raising awareness for something that is on my heart. Human trafficking is another evil form of violence against women and children and something that we often feel we are completely unequipped to help do anything about. One thing that each of us is able to do is to raise awareness.

1371ca511eaeeaa5d60a39d9984e45b3.jpg

You can use Facebook to share this post, you can share inspiring images of women who have overcome violence on Pinterest. You can show those around you that you care enough to interrupt your Facebook feed of images of yourself and friends and show the world things that may be uncomfortable to see but that are happening around us all the time. The first step in making a difference is simply to be aware and make others aware of what is going on around us.

Source: Neha Rawat Battish / Via Facebook: shilosuleman

Source: Neha Rawat Battish / Via Facebook: shilosuleman

This year’s 16 Days of Activism for No Violence Against Women and Children Campaign (16 Days campaign) is important because it commemoratse a number of milestones. The year 2014 marks 60 years since the signing of the Women’s Charter on 17 April 1954 in Johannesburg; 20 years of freedom and democracy in South Africa and 16 years of the 16 Days of Activism Campaign. South African Government

Source: Abhishek Choudhury / Via Facebook: shilosuleman

Source: Abhishek Choudhury / Via Facebook: shilosuleman

South Africa adopted the campaign in 1998 as one of the intervention strategies towards creating a society free of violence. The campaign continues to raise  awareness amongst South Africans about the negative impact of violence against women and children (VAW&C) on all members of the community. South African Government

Source: RedDot.de

Source: RedDot.de

What is violence against women and children?

Violence takes many forms, for example:

  • Physical violence in the form of domestic violence, terrible violent crime such as murder, robbery, rape and assault.

  • Emotional violence and trauma at many levels caused by many factors. Women and children in their homes, at work, at schools, on our streets, in our communities suffer this form of violence for various reasons.

  • Another terrible blight of our democracy is the violence of poverty, starvation, humiliation and degradation, especially against women and children. Poverty, inequality and unemployment are conditions under which violence thrives. South African Government

 Here are a few ways that the South African government have outlined as ways to help during these days of Activism.

*Please note the numbers listed below are for South Africa.

What can you do?

  • Support the campaign by wearing a white ribbon during the 16-day period: A white ribbon is a symbol of peace and symbolises the commitment of the wearer to never commit or condone violence against women and children.
  • Participate in the various 16 Days of Activism events and activities: See the calendar outlining events taking place around the country over the period of the 16 days.
  • Volunteer in support of NGOs and community groups who support abused women and children: Many organisations need assistance from the public. You can volunteer your time and make a contribution to the work of institutions. Help plant a garden at a shelter, sponsor plastic tables and chairs for kids at a clinic or join an organisation as a counsellor. Use your skills and knowledge to help the victims of abuse.
  • Speak out against woman and child abuse.
    • Encourage silent female victims to talk about abuse and ensure that they get help.
    • Report child abuse to the police.
    • Encourage children to report bully behaviour to school authorities.
    • Men and boys are encouraged to talk about abuse and actively discourage abusive behaviour.
    • Seek help if you are emotionally, physically or sexually abusive to your partner and/or children. Call the Stop Gender Based Violence helpline (0800 150 150).
    • Talk to friends, relatives and colleagues to take a stand against abuse of women and children.
    • Try and understand how your own attitudes and actions might perpetuate sexism and violence.
    • Spread the message on social media using #16Days2014
  • Join community policing forums (CPFs): The community and the local police stations are active partners in ensuring local safety and security. The goal is to bring about effective crime prevention by launching intelligence-driven crime-prevention projects in partnership with the local community.You may want to also become a  reservist, a member of the community who volunteers his/her services and time to support local policing efforts to fight crime. For  more information on how to join, contact your local police station. South African Government

Below I want to share the story of Leslie Morgan Steiner. Leslie was in “crazy love” — that is, madly in love with a man who routinely abused her and threatened her life. Steiner tells the dark story of her relationship, correcting misconceptions many people hold about victims of domestic violence, and explaining how we can all help break the silence. 

Where to get help

  • What if you are abused [PDF]
  • Service contacts [PDF]
    • SAPS Crime Stop
      08600 10111
    • Gender-Based Violence Command Centre
      0800 428428/0800 GBV GBV
    • STOP Gender Violence Helpline
      0800 150 150/ *120*7867# from any cell phone
    • Childline- Report child abuse
      0800 055 555
    • Elderly people helpline
      0800 003 081
    • Family and Marriage Society of South Africa – Advice on family relationships
      011 975 7107
    • Thuthuzela Care Centres-
      012 8456136
    • Suicide Crisis Line
      0800 567 567
    • Alcoholics Anonymous SA
      0861 435 722 Substance Abuse Helpline 0800 121 314
    • Narcotics Anonymous SA
      0839 00 69 62
    • Mental Health Information Line
      0800 567 567
    • AIDS Helpline
      0800 012 322 / 011 725 6710
    • National Anti-Corruption Hotline
      0800 701 701
    • Disaster Operations Centre
      080 911 4357
    • Crisis Line
      0861 574747
    • National Crisis Line- Counselling Service
      086 132 2322
    • Human Trafficking
      08000 737 283 (08000 rescue) / 082 455 3664
    • SASSA- Grants enquiries
      0800 60 10 11 or CPS 0800 60 01 60
    • SA National Council for Child Welfare
      011 339 5741
    • Legal Aid
      0800 1110 110
    • Presidential hotline - Unresolved service delivery complaints
      17737 (1 PRES)
    • National Anti-corruption Forum
      0800 701 701
    • Cancer Association of South Africa
      0800 22 66 22

South African Government