Rescuing a puppy in Korea

RescuePuppyInSouthKorea what you need to know

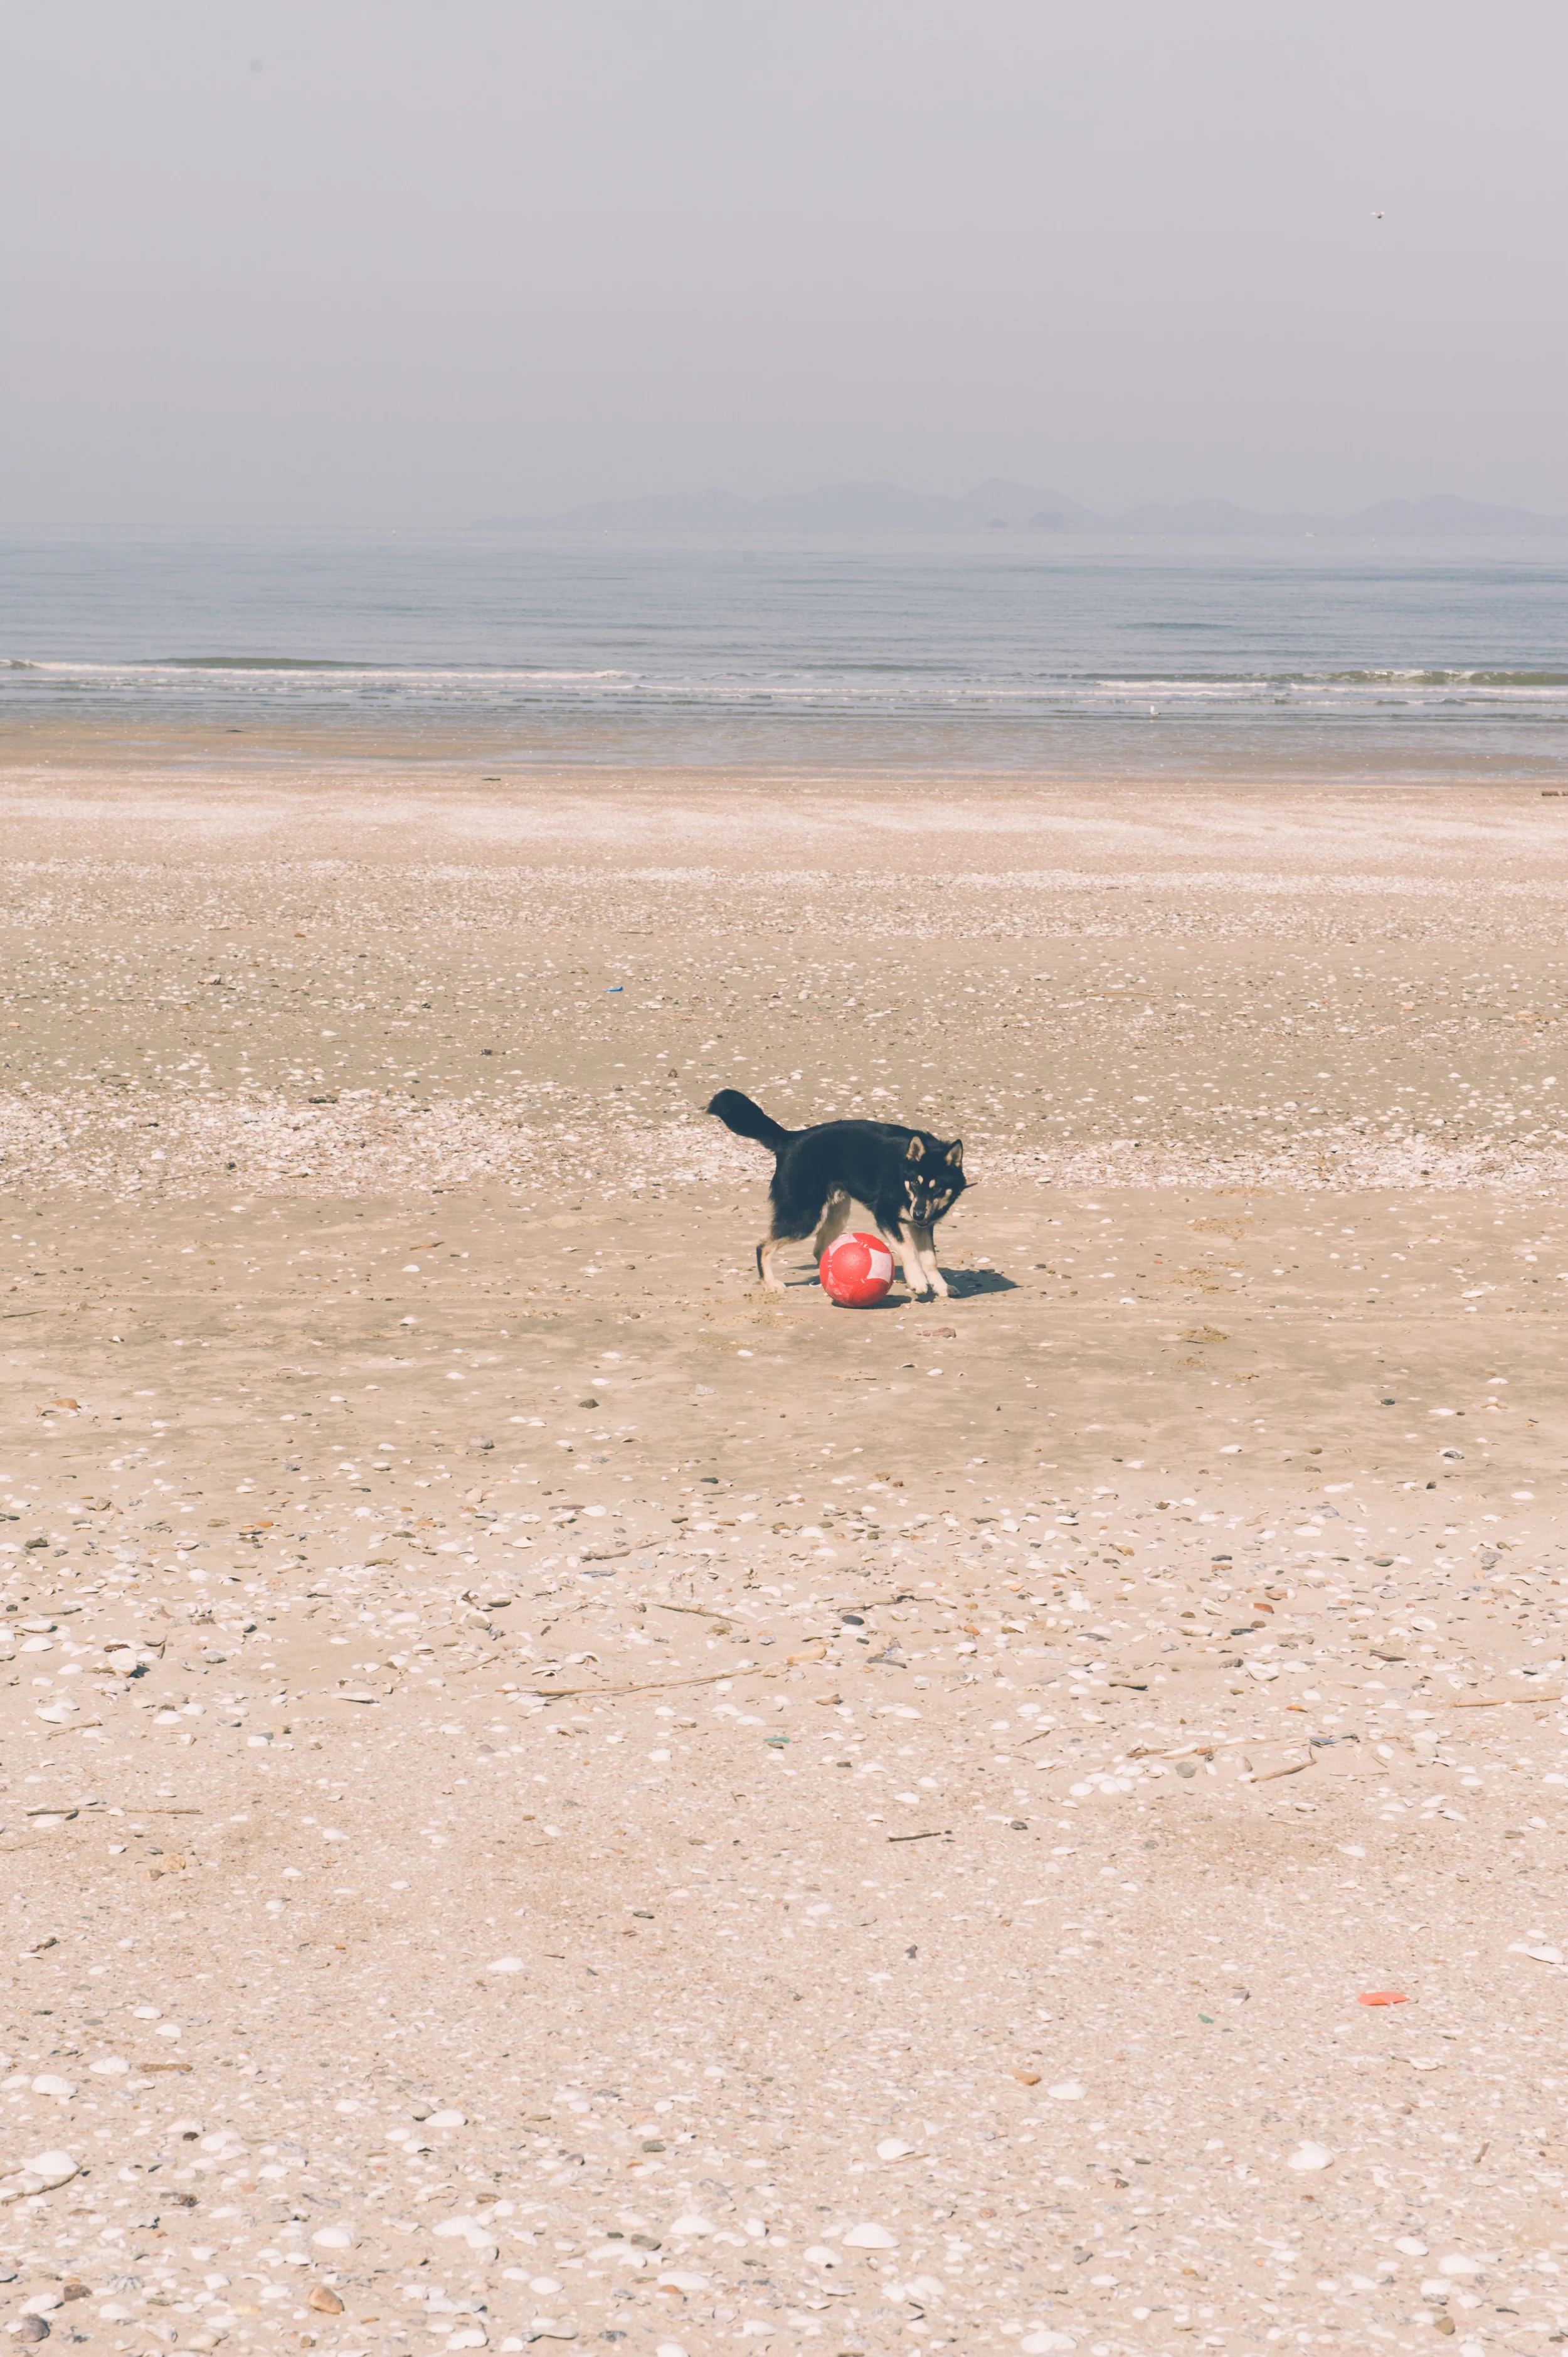
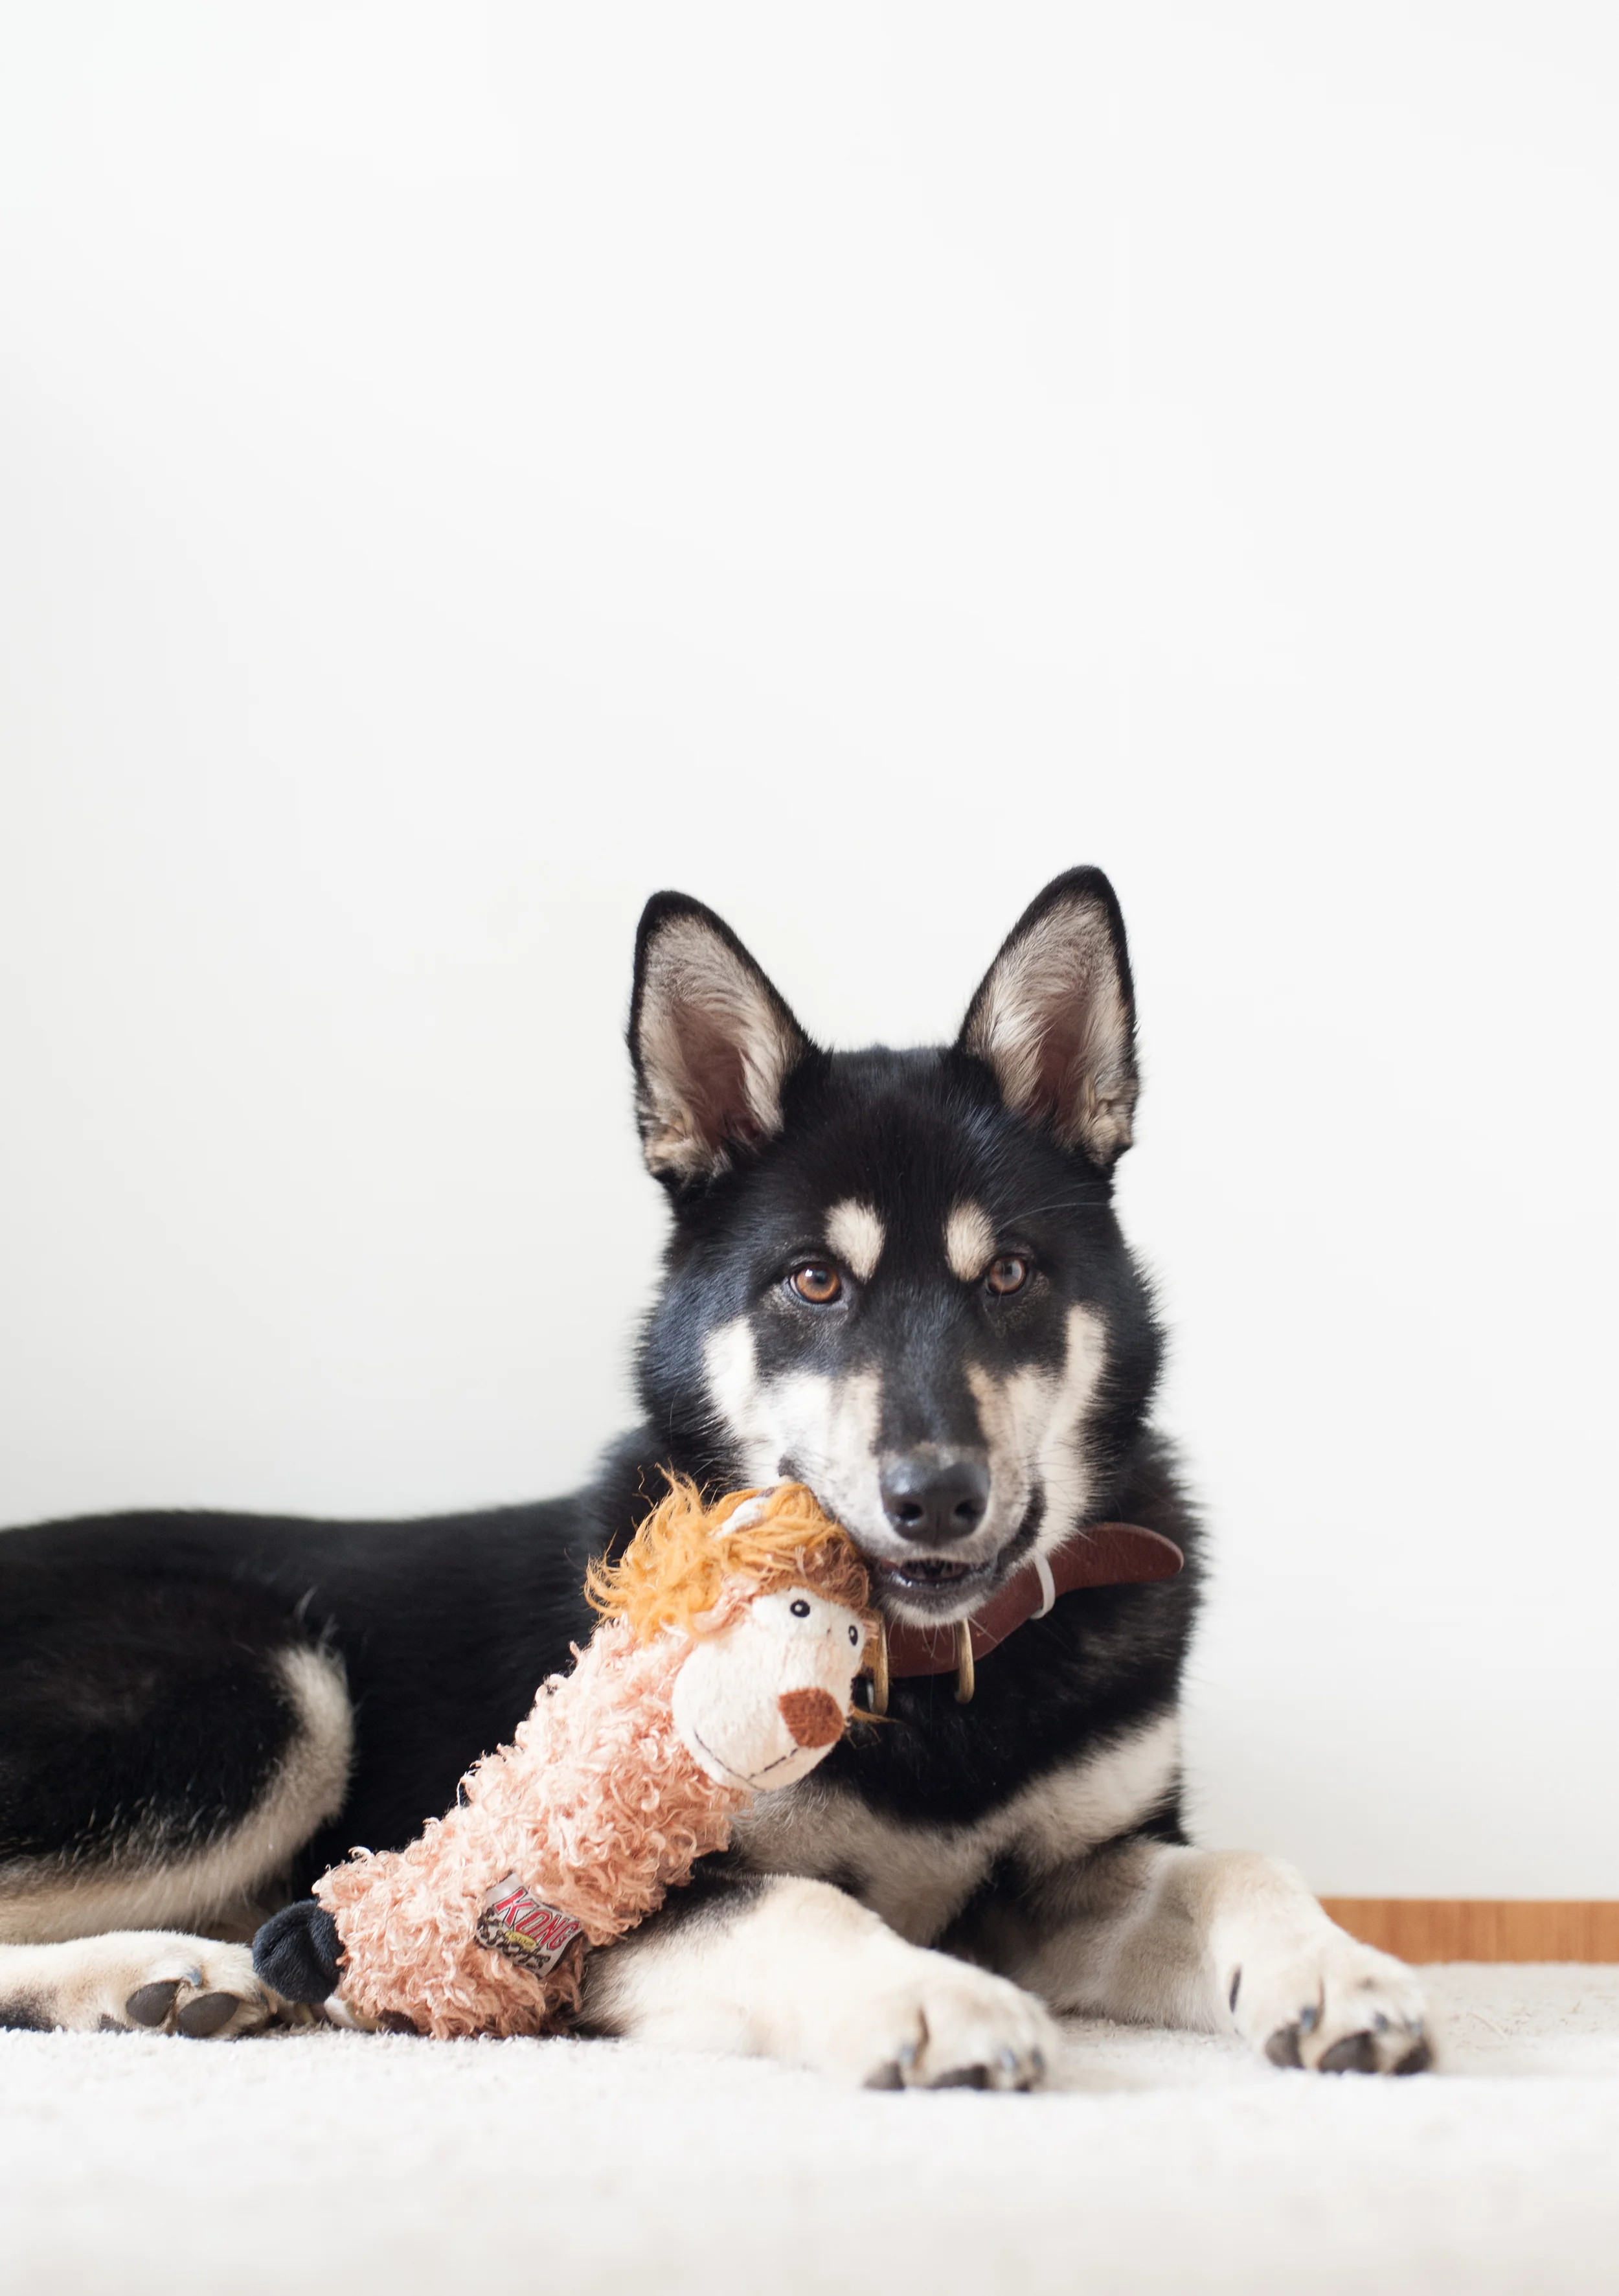
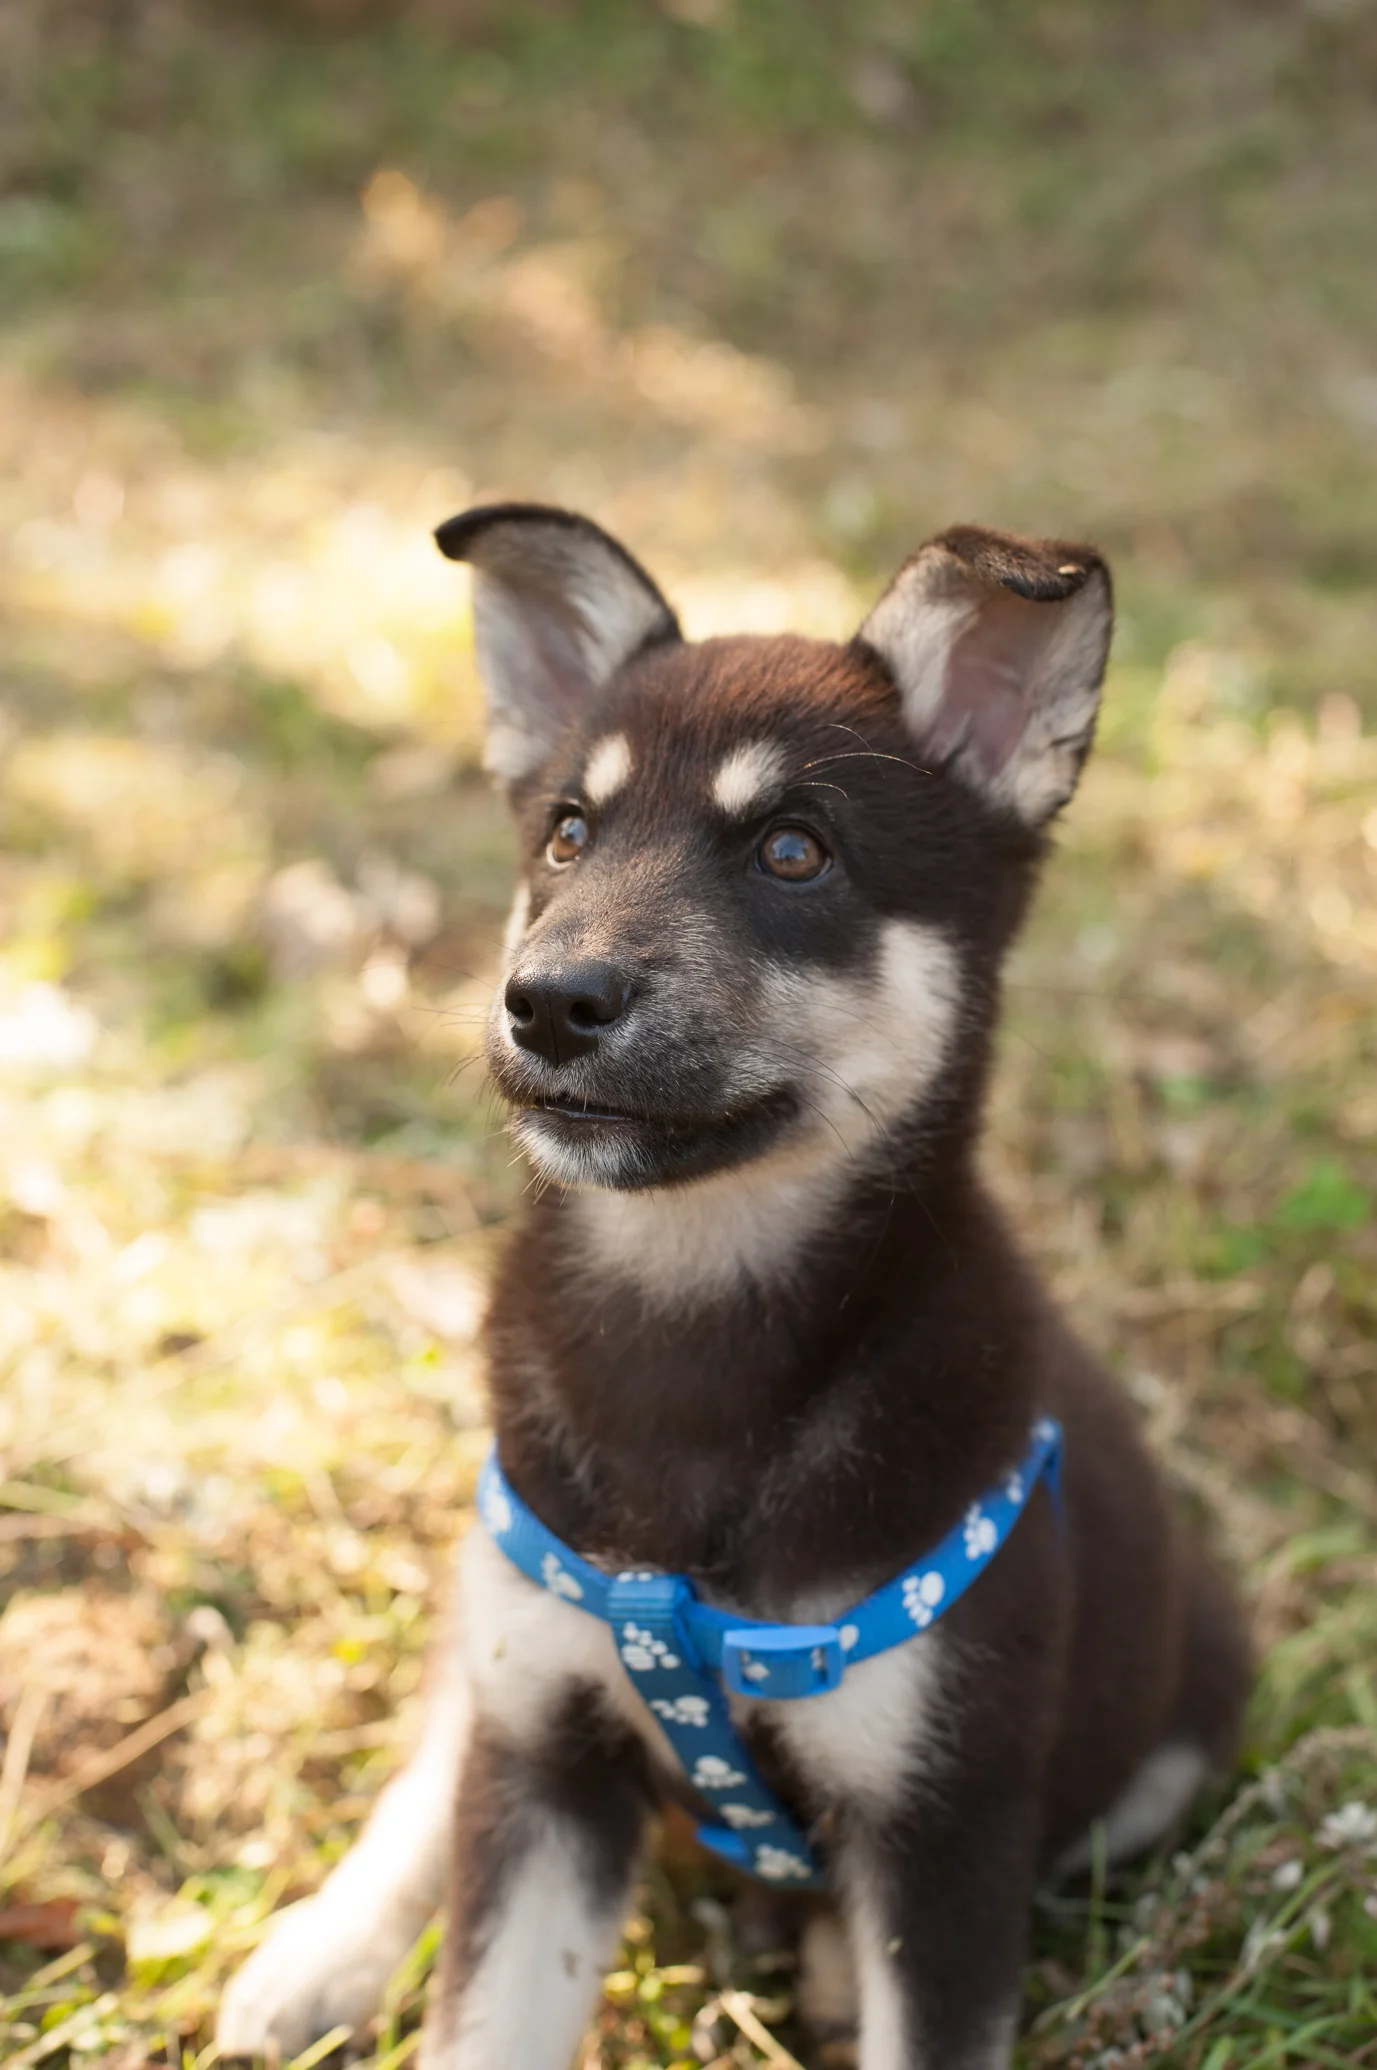
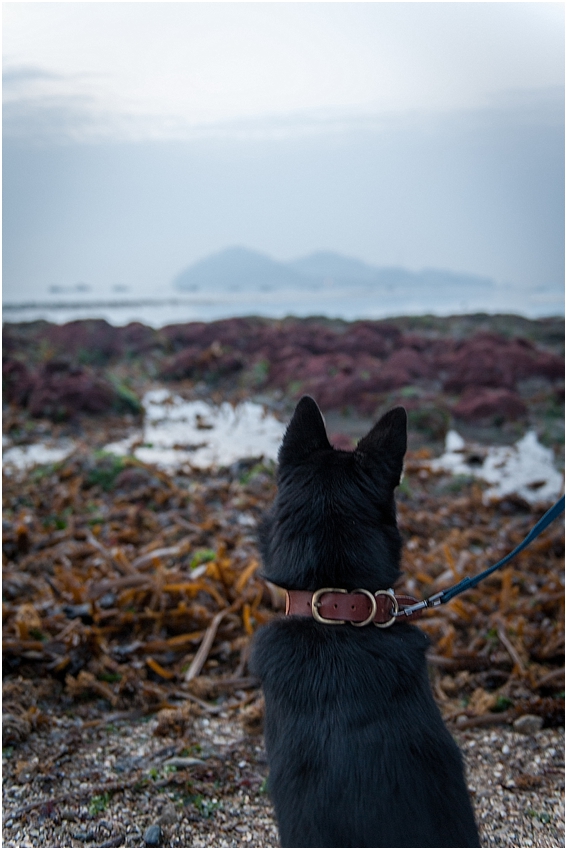
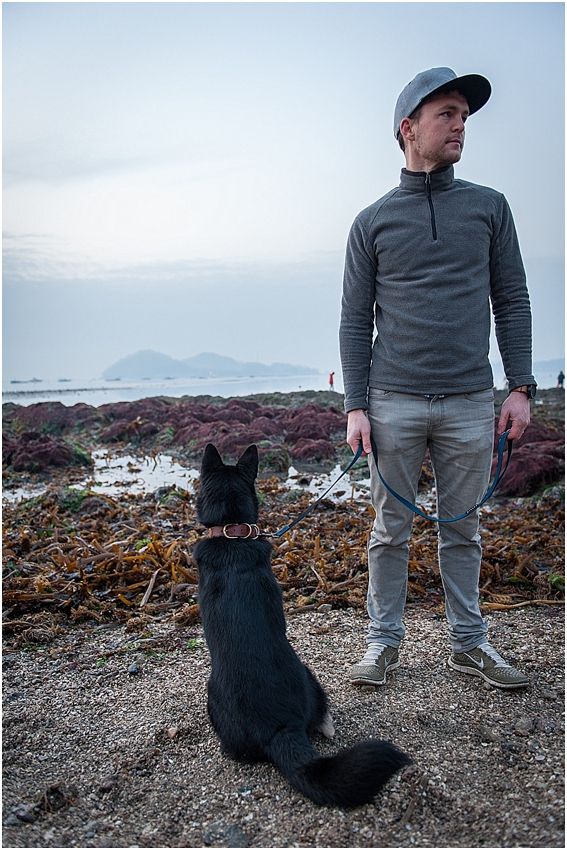
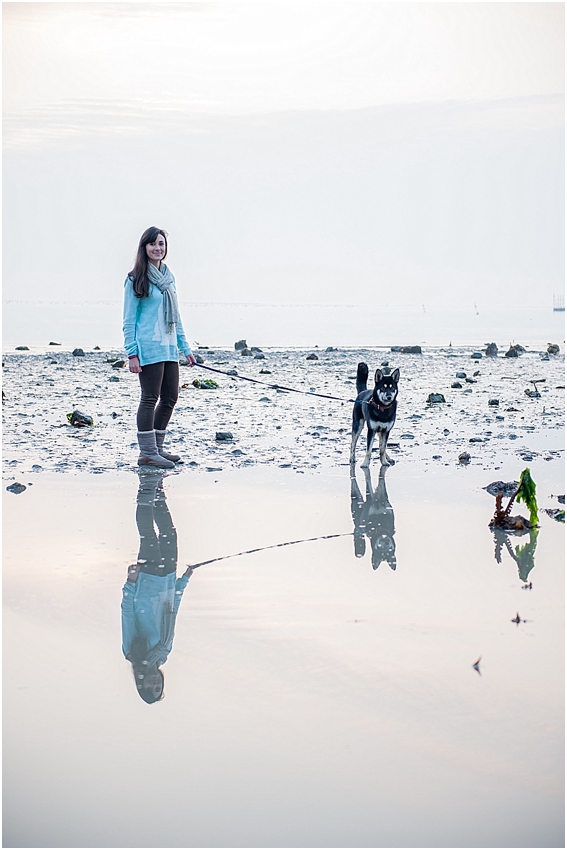
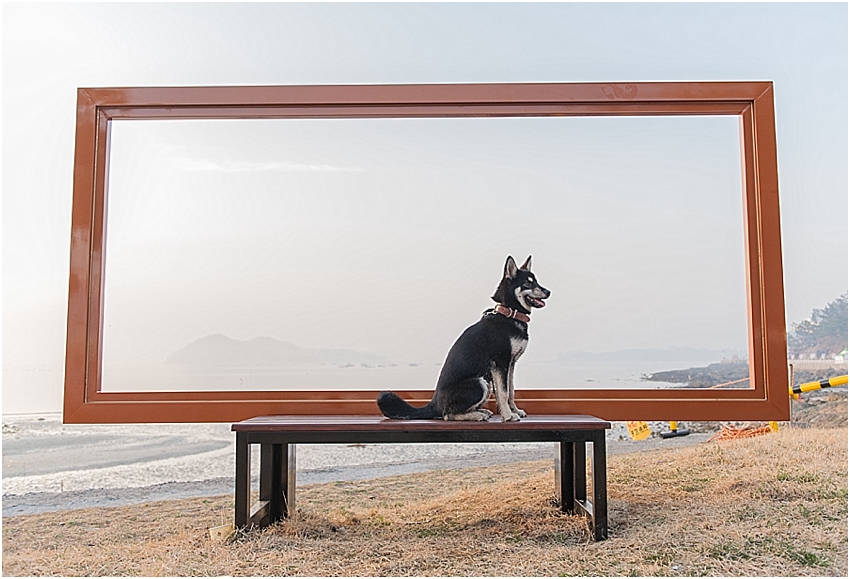
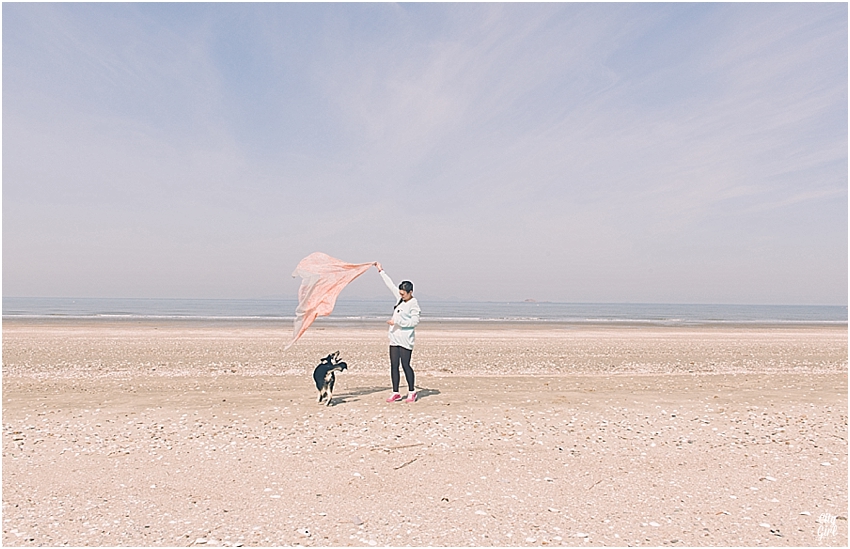
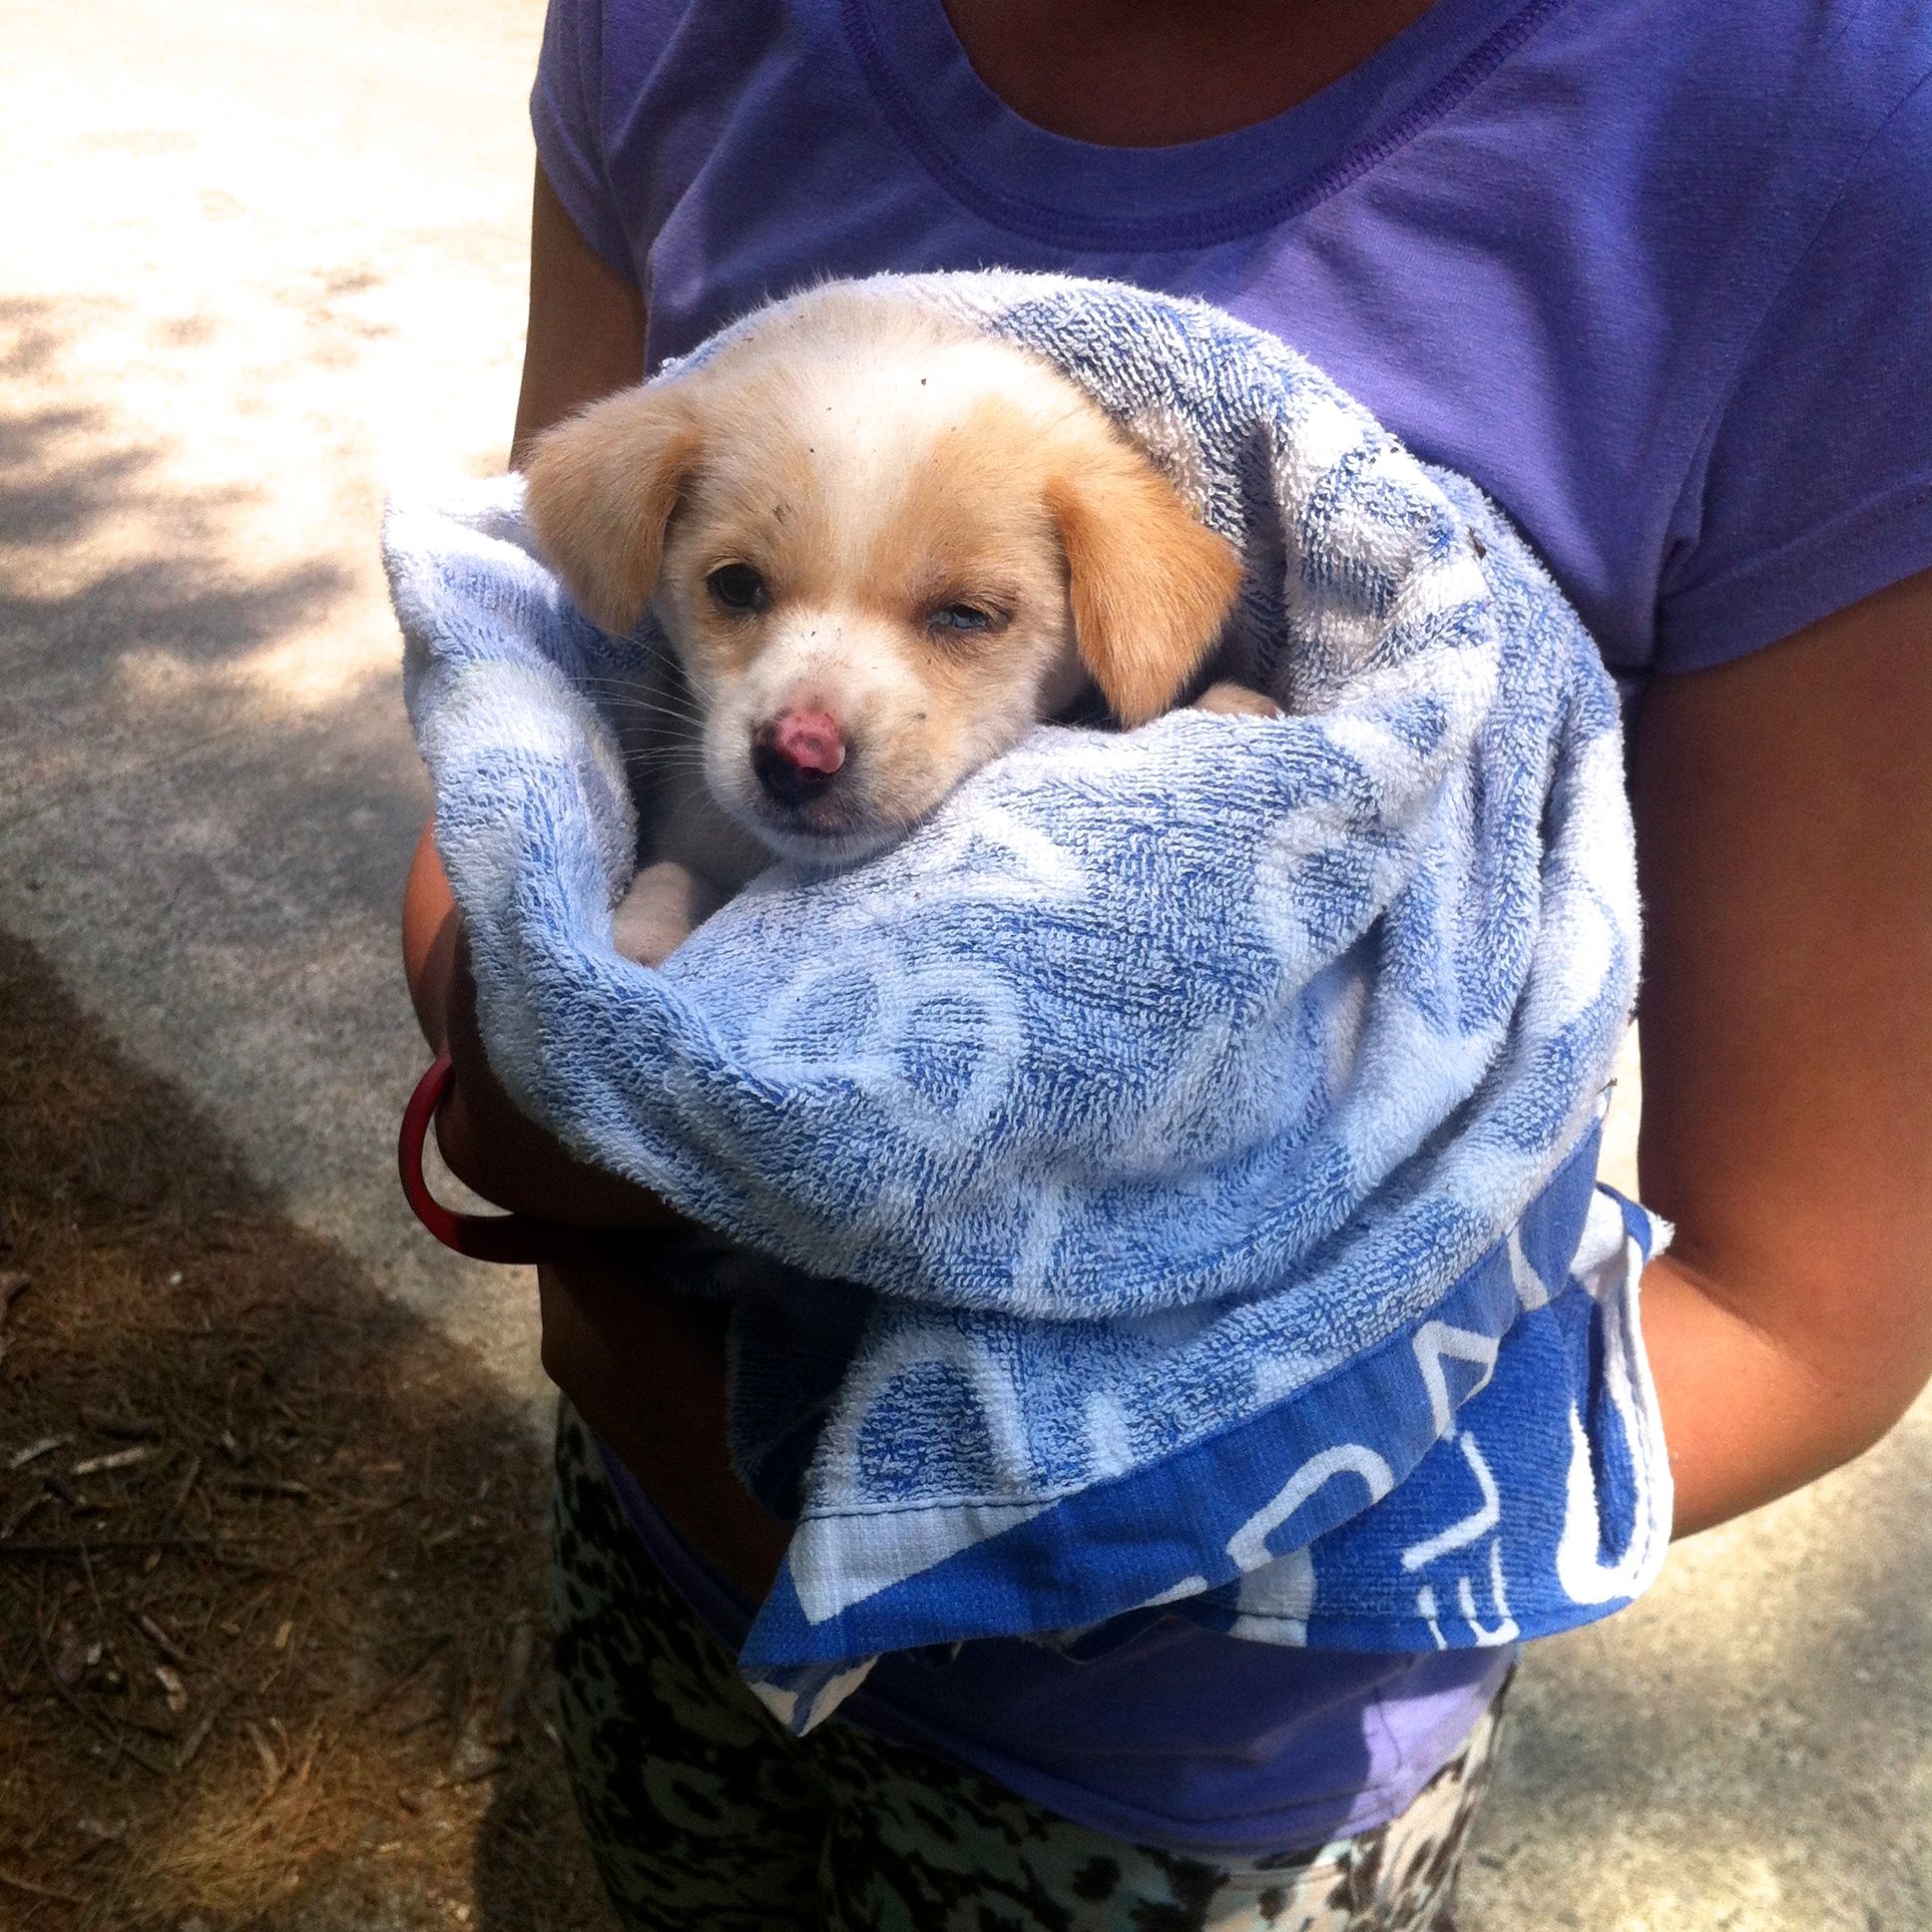
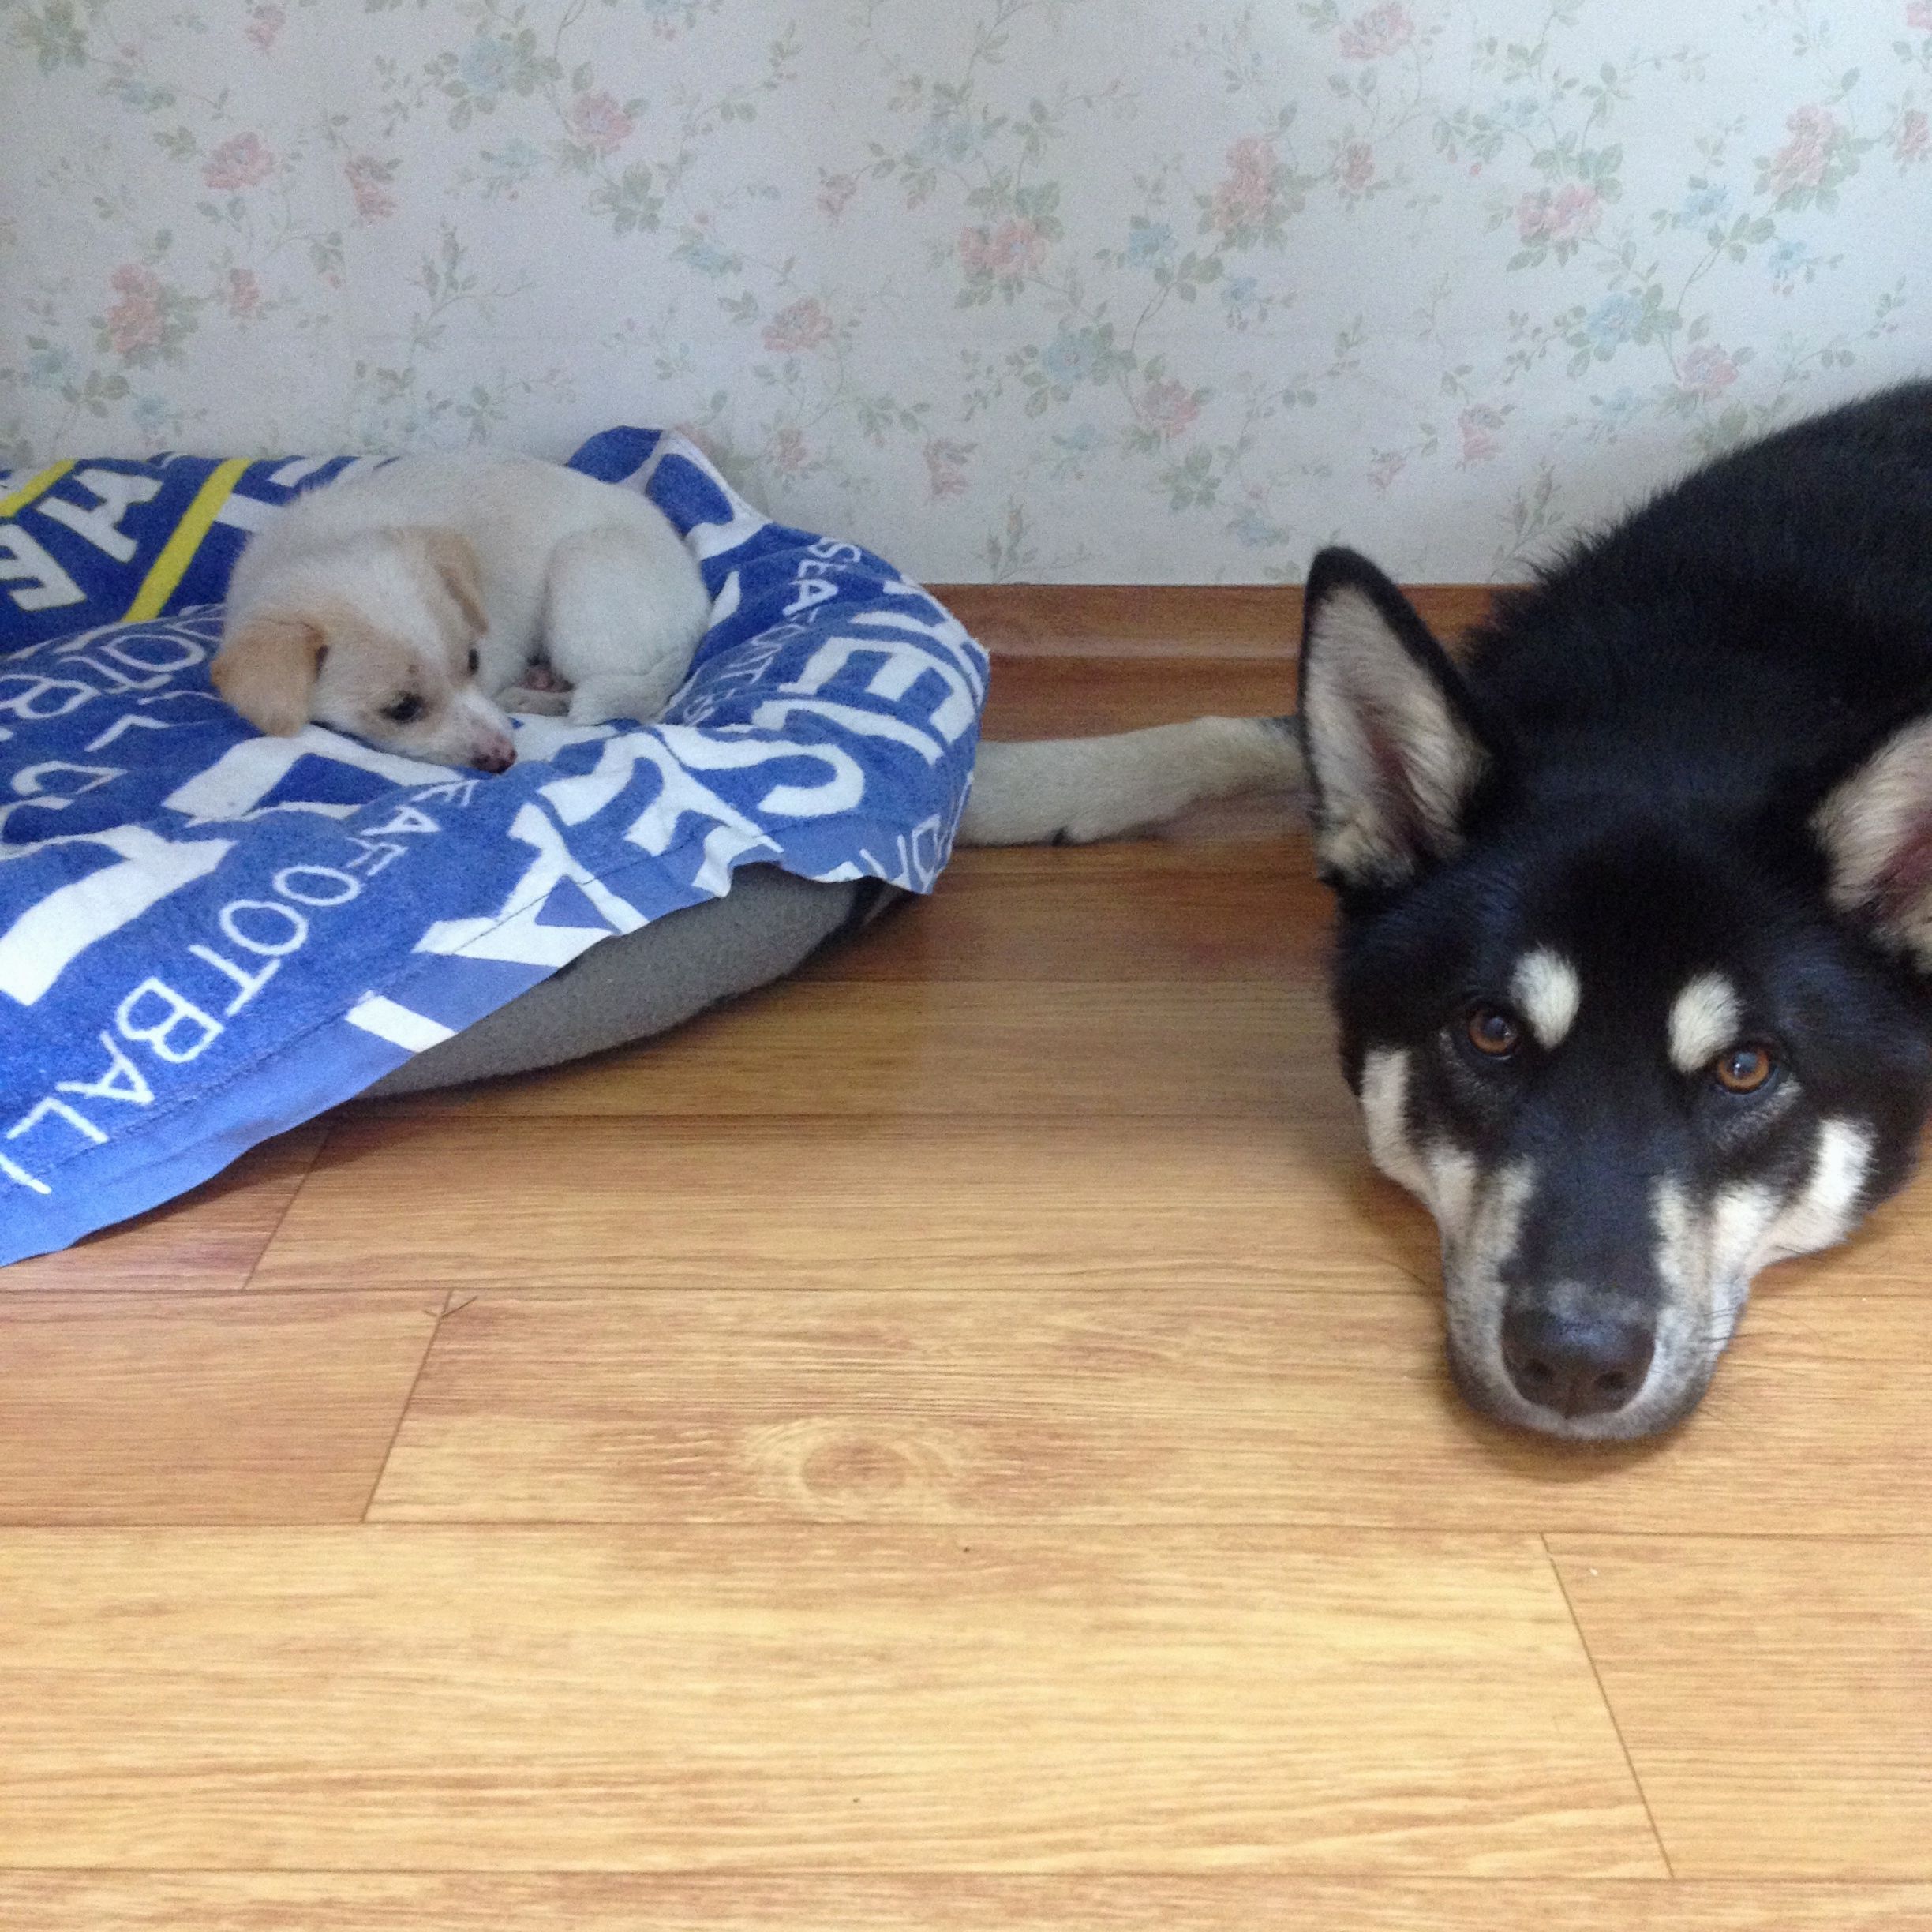
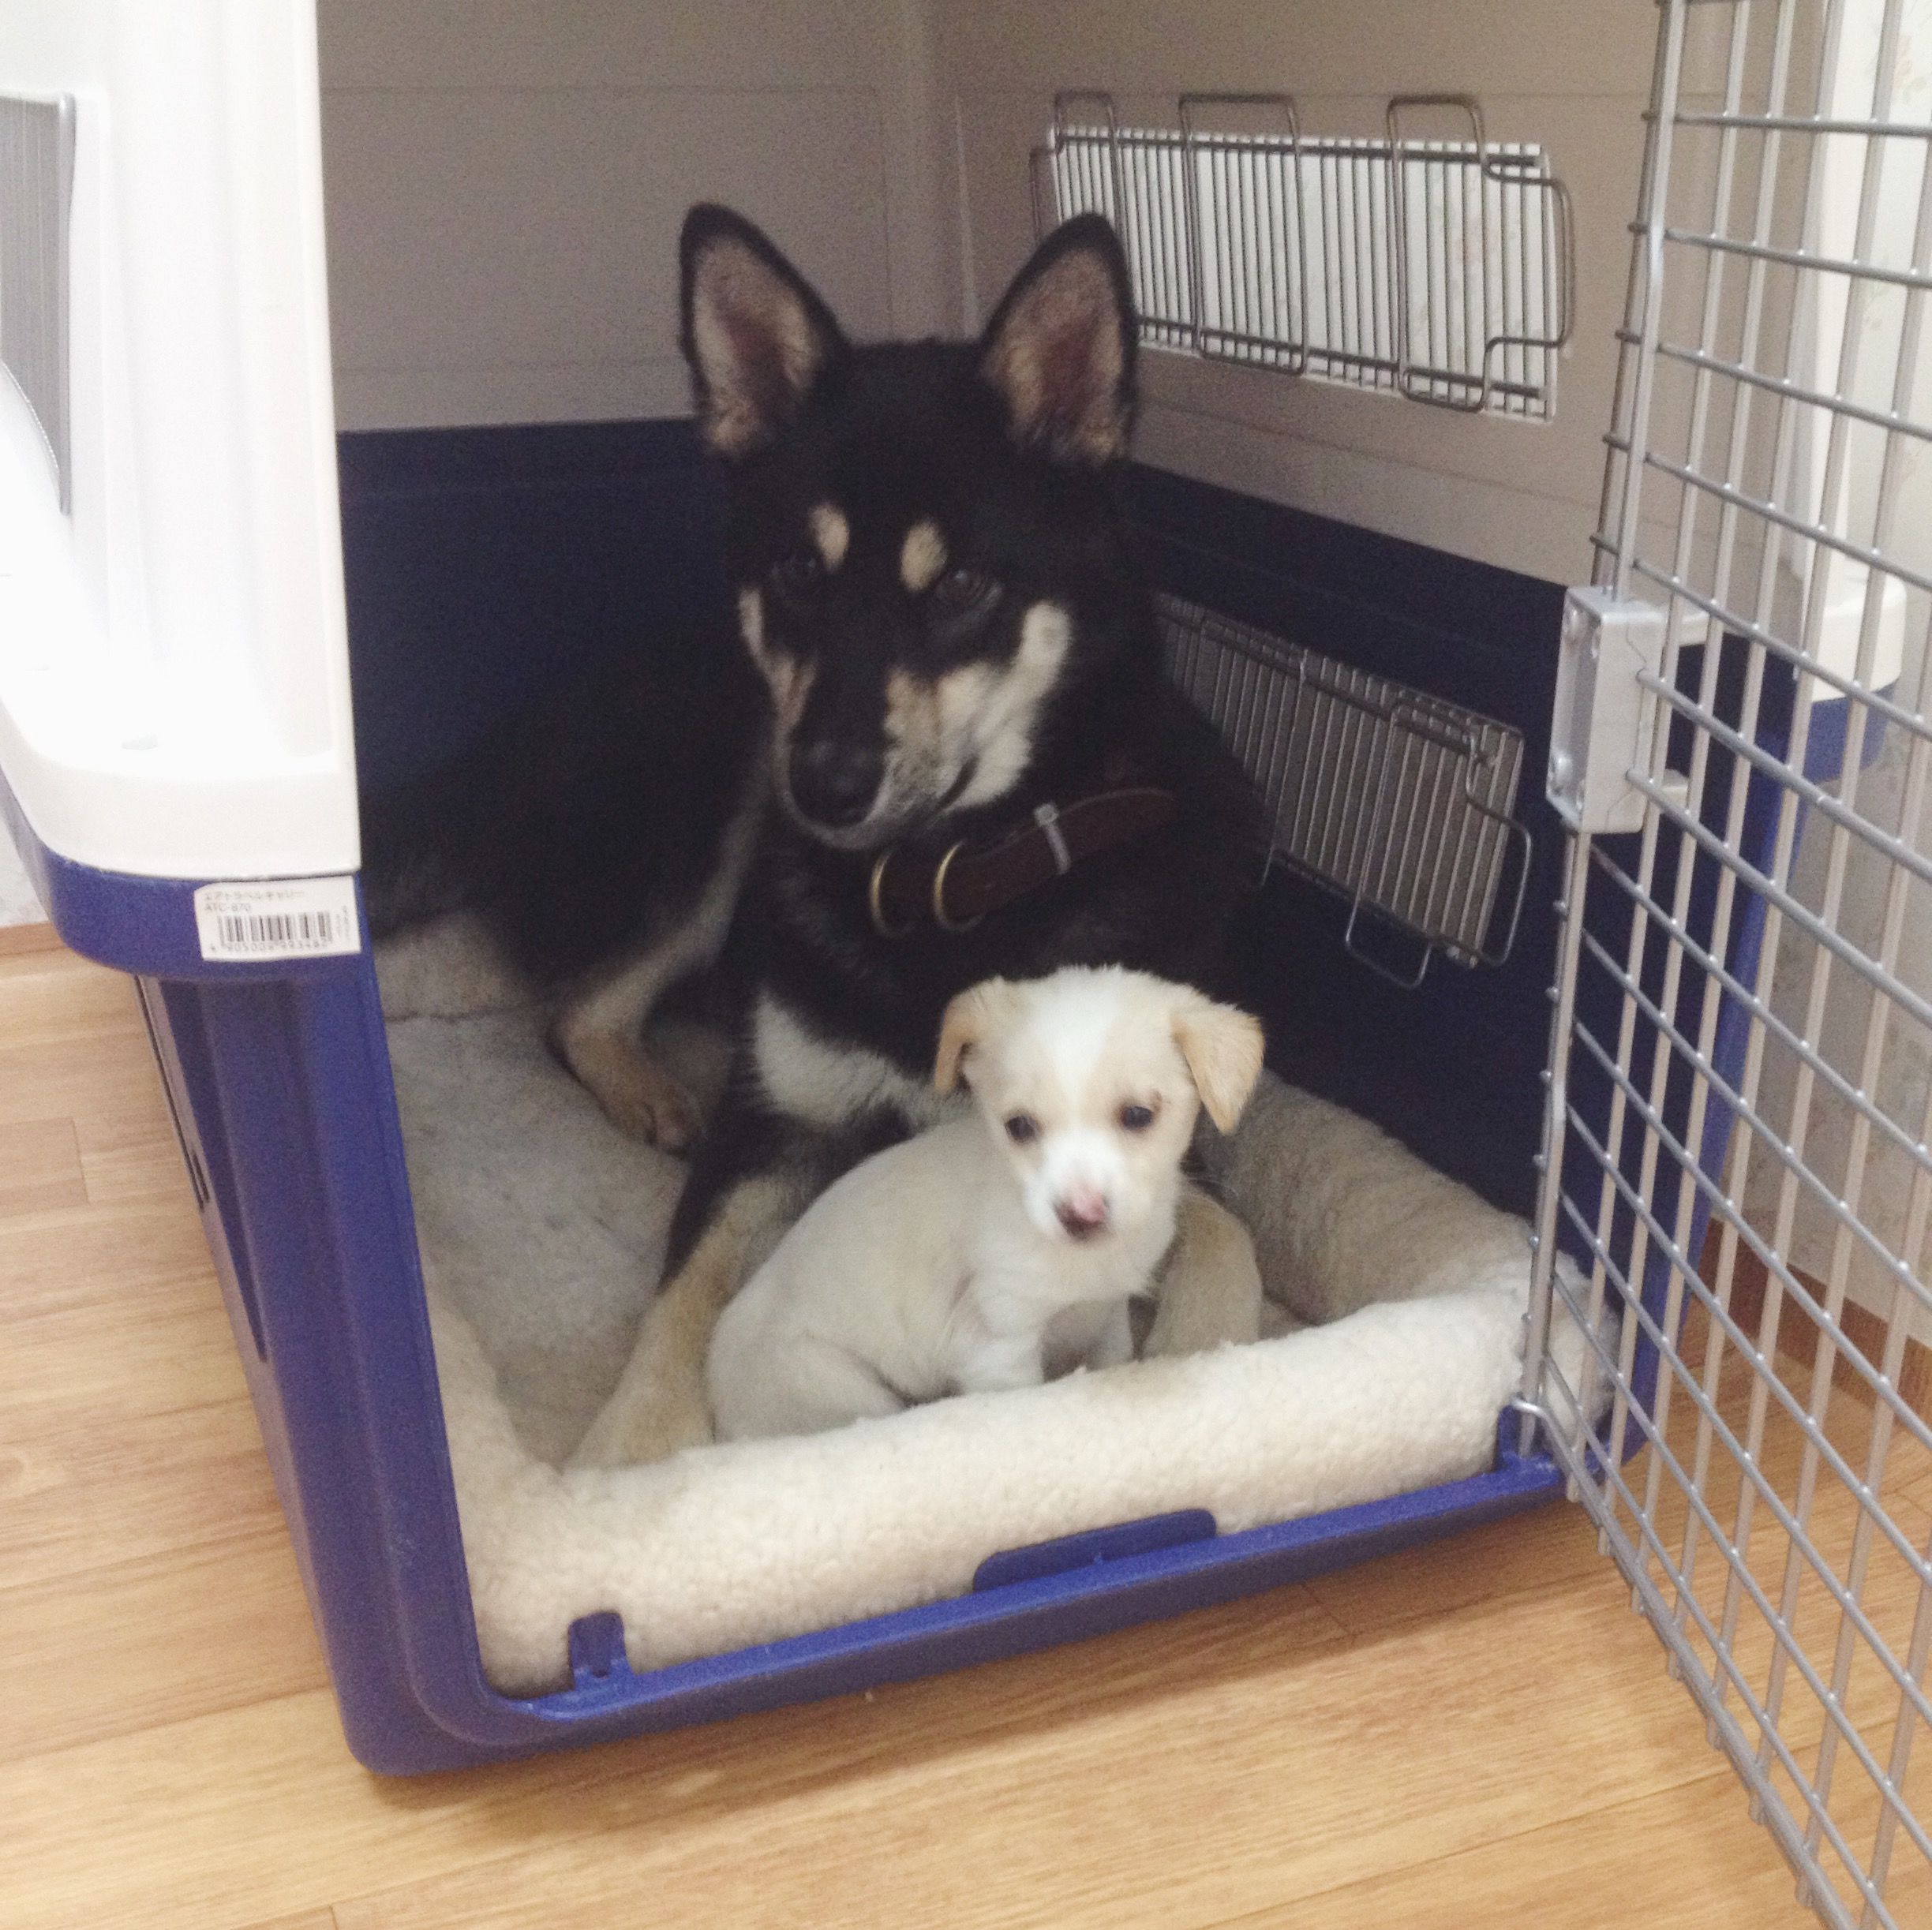
While out on an early morning walk on Monday this week, my Korean rescue pup Shadow (the black & tan one above), found a tiny crying ball of fluff, discarded in a drain alongside a forest road. I took a closer look and saw a terrified little puppy, huddled under a pile of leaves and branches. I also saw that there was another white ball of fluff further up the drain that wasn't moving and was covered in flies. I had no idea what to do. We already have our own rescue dog, who is going to cost us a lot of money to take back to South Africa (we are talking $1000's, so please think carefully before deciding to adopt a dog here in Korea!) but at the same time I couldn't just leave here her. In Korea, if you find an animal and take it to the vet, legally the vet has to keep it for 10 days to allow time for their owner to claim them. As it was clear this little one had been abandoned, my very kind vet didn't ask too many questions.  You can imagine what happens to them if they aren't claimed after 10 days. 

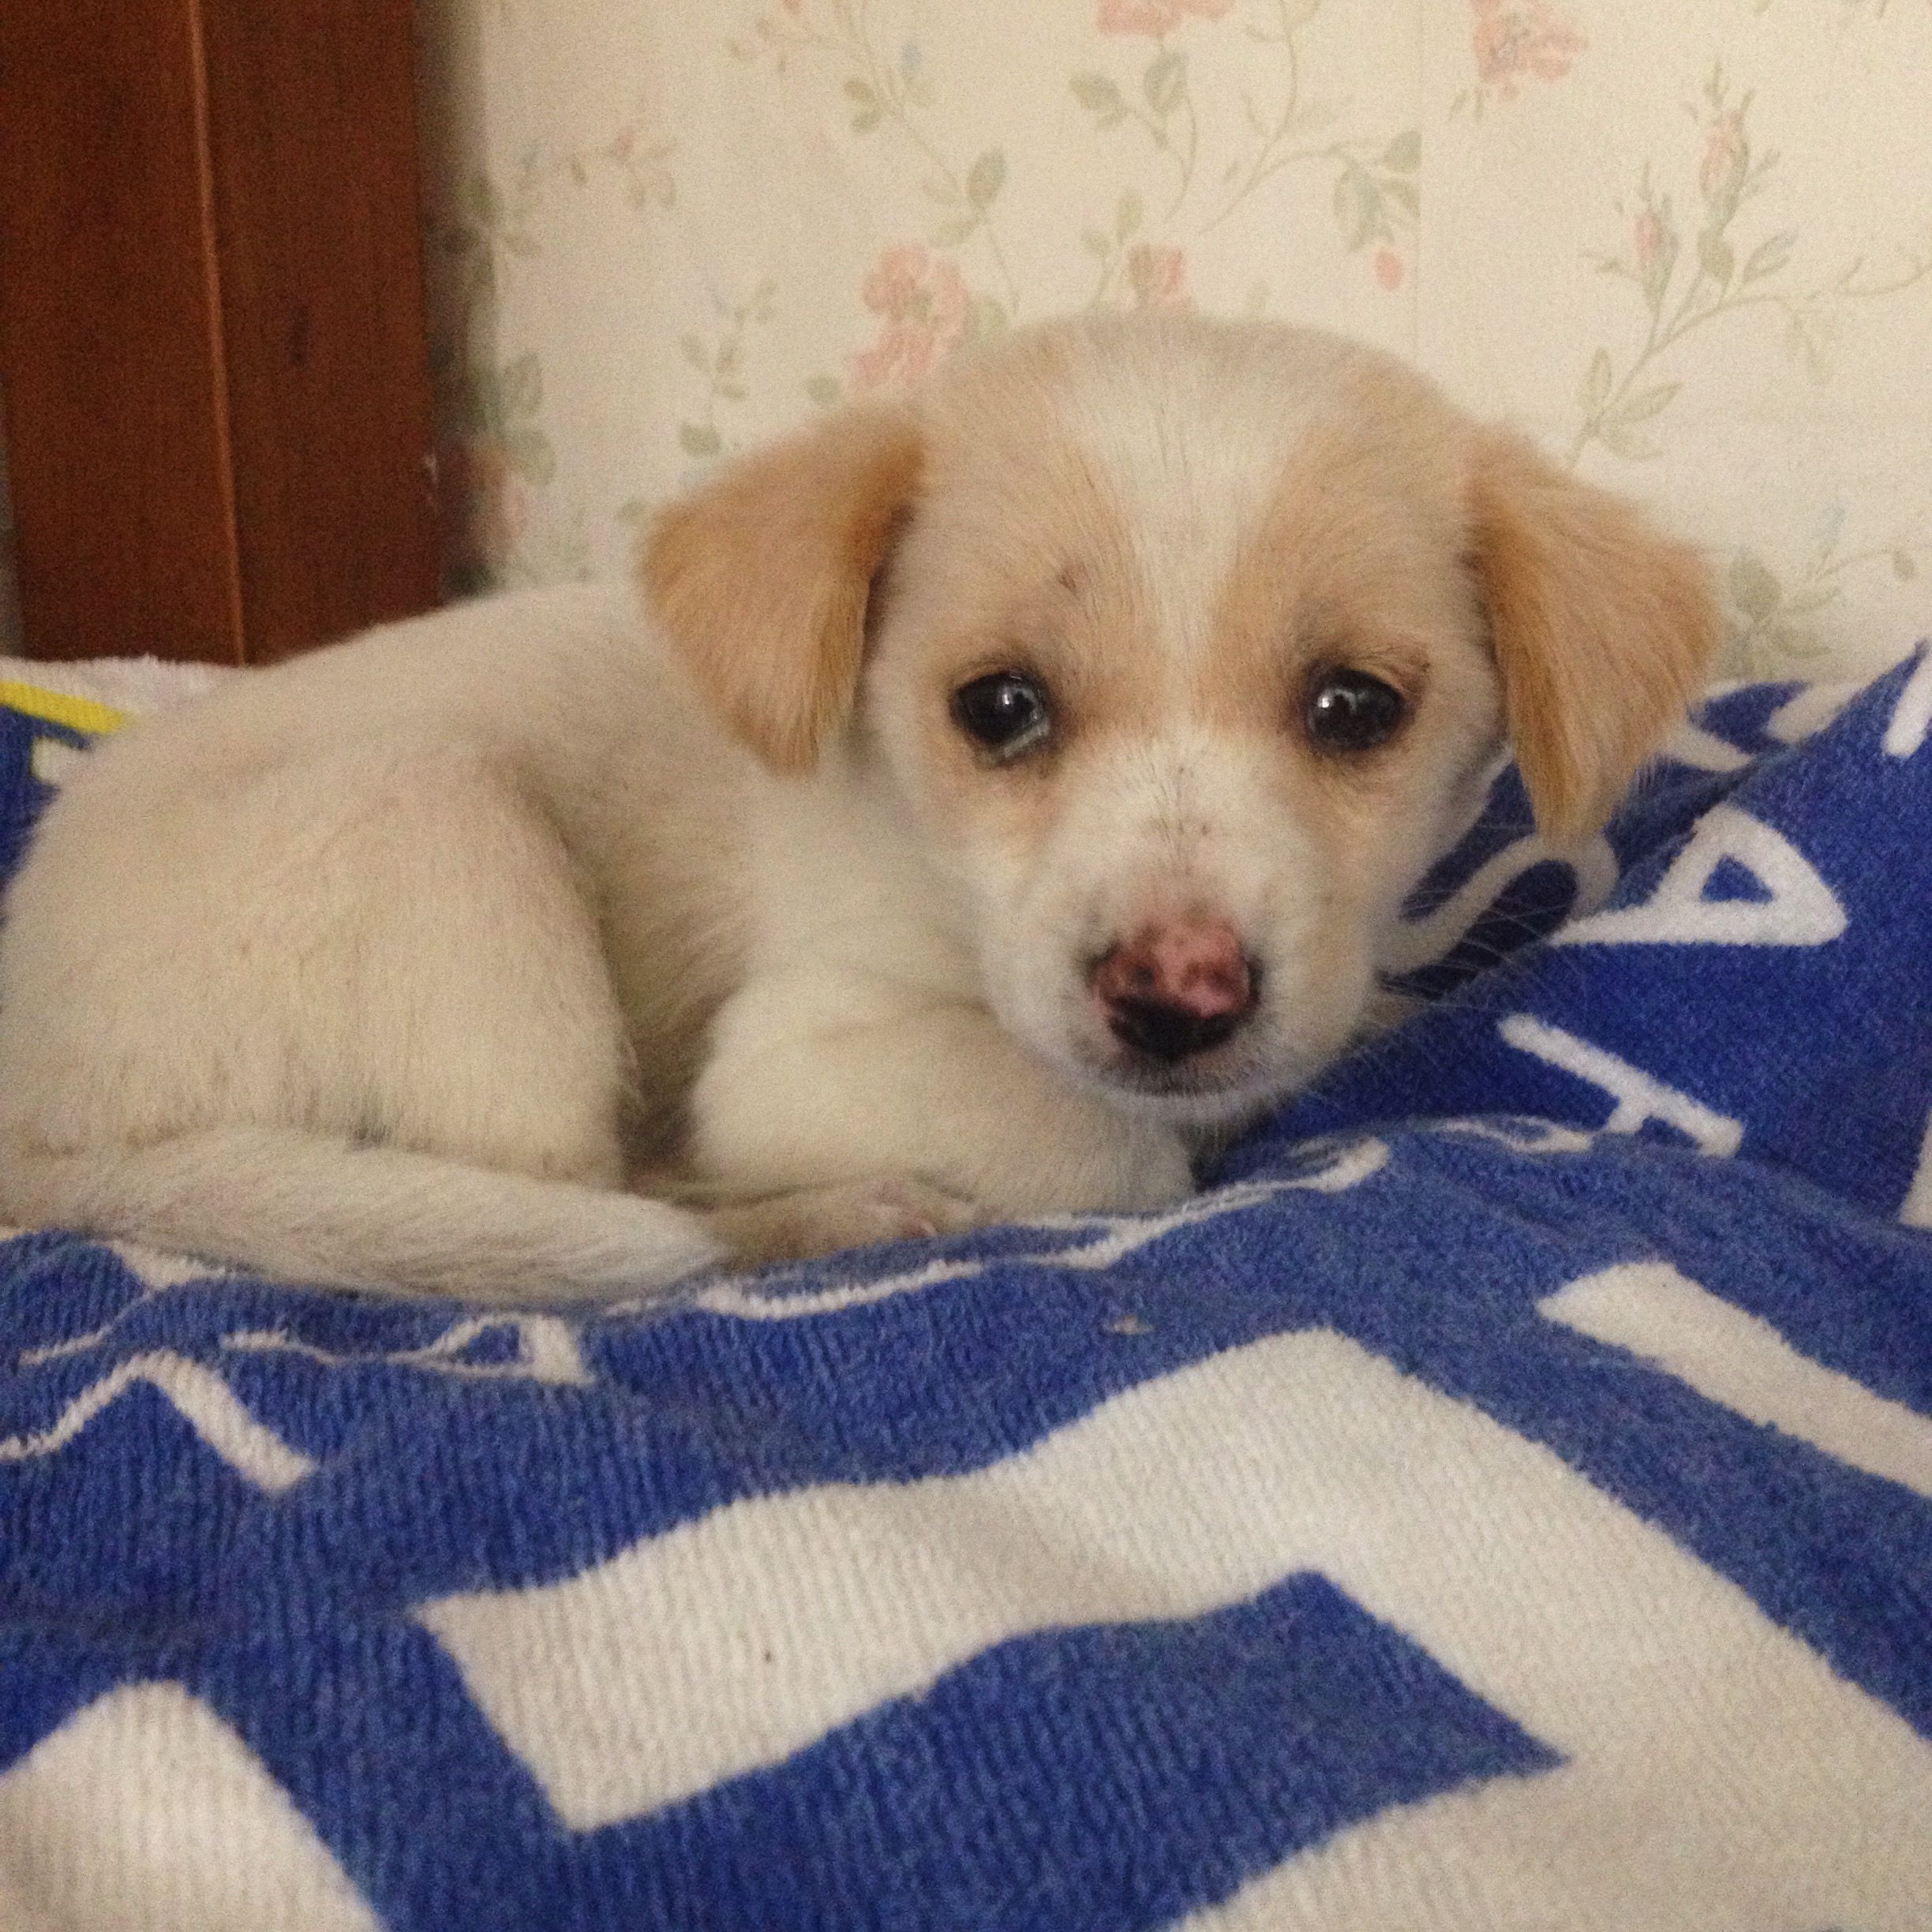
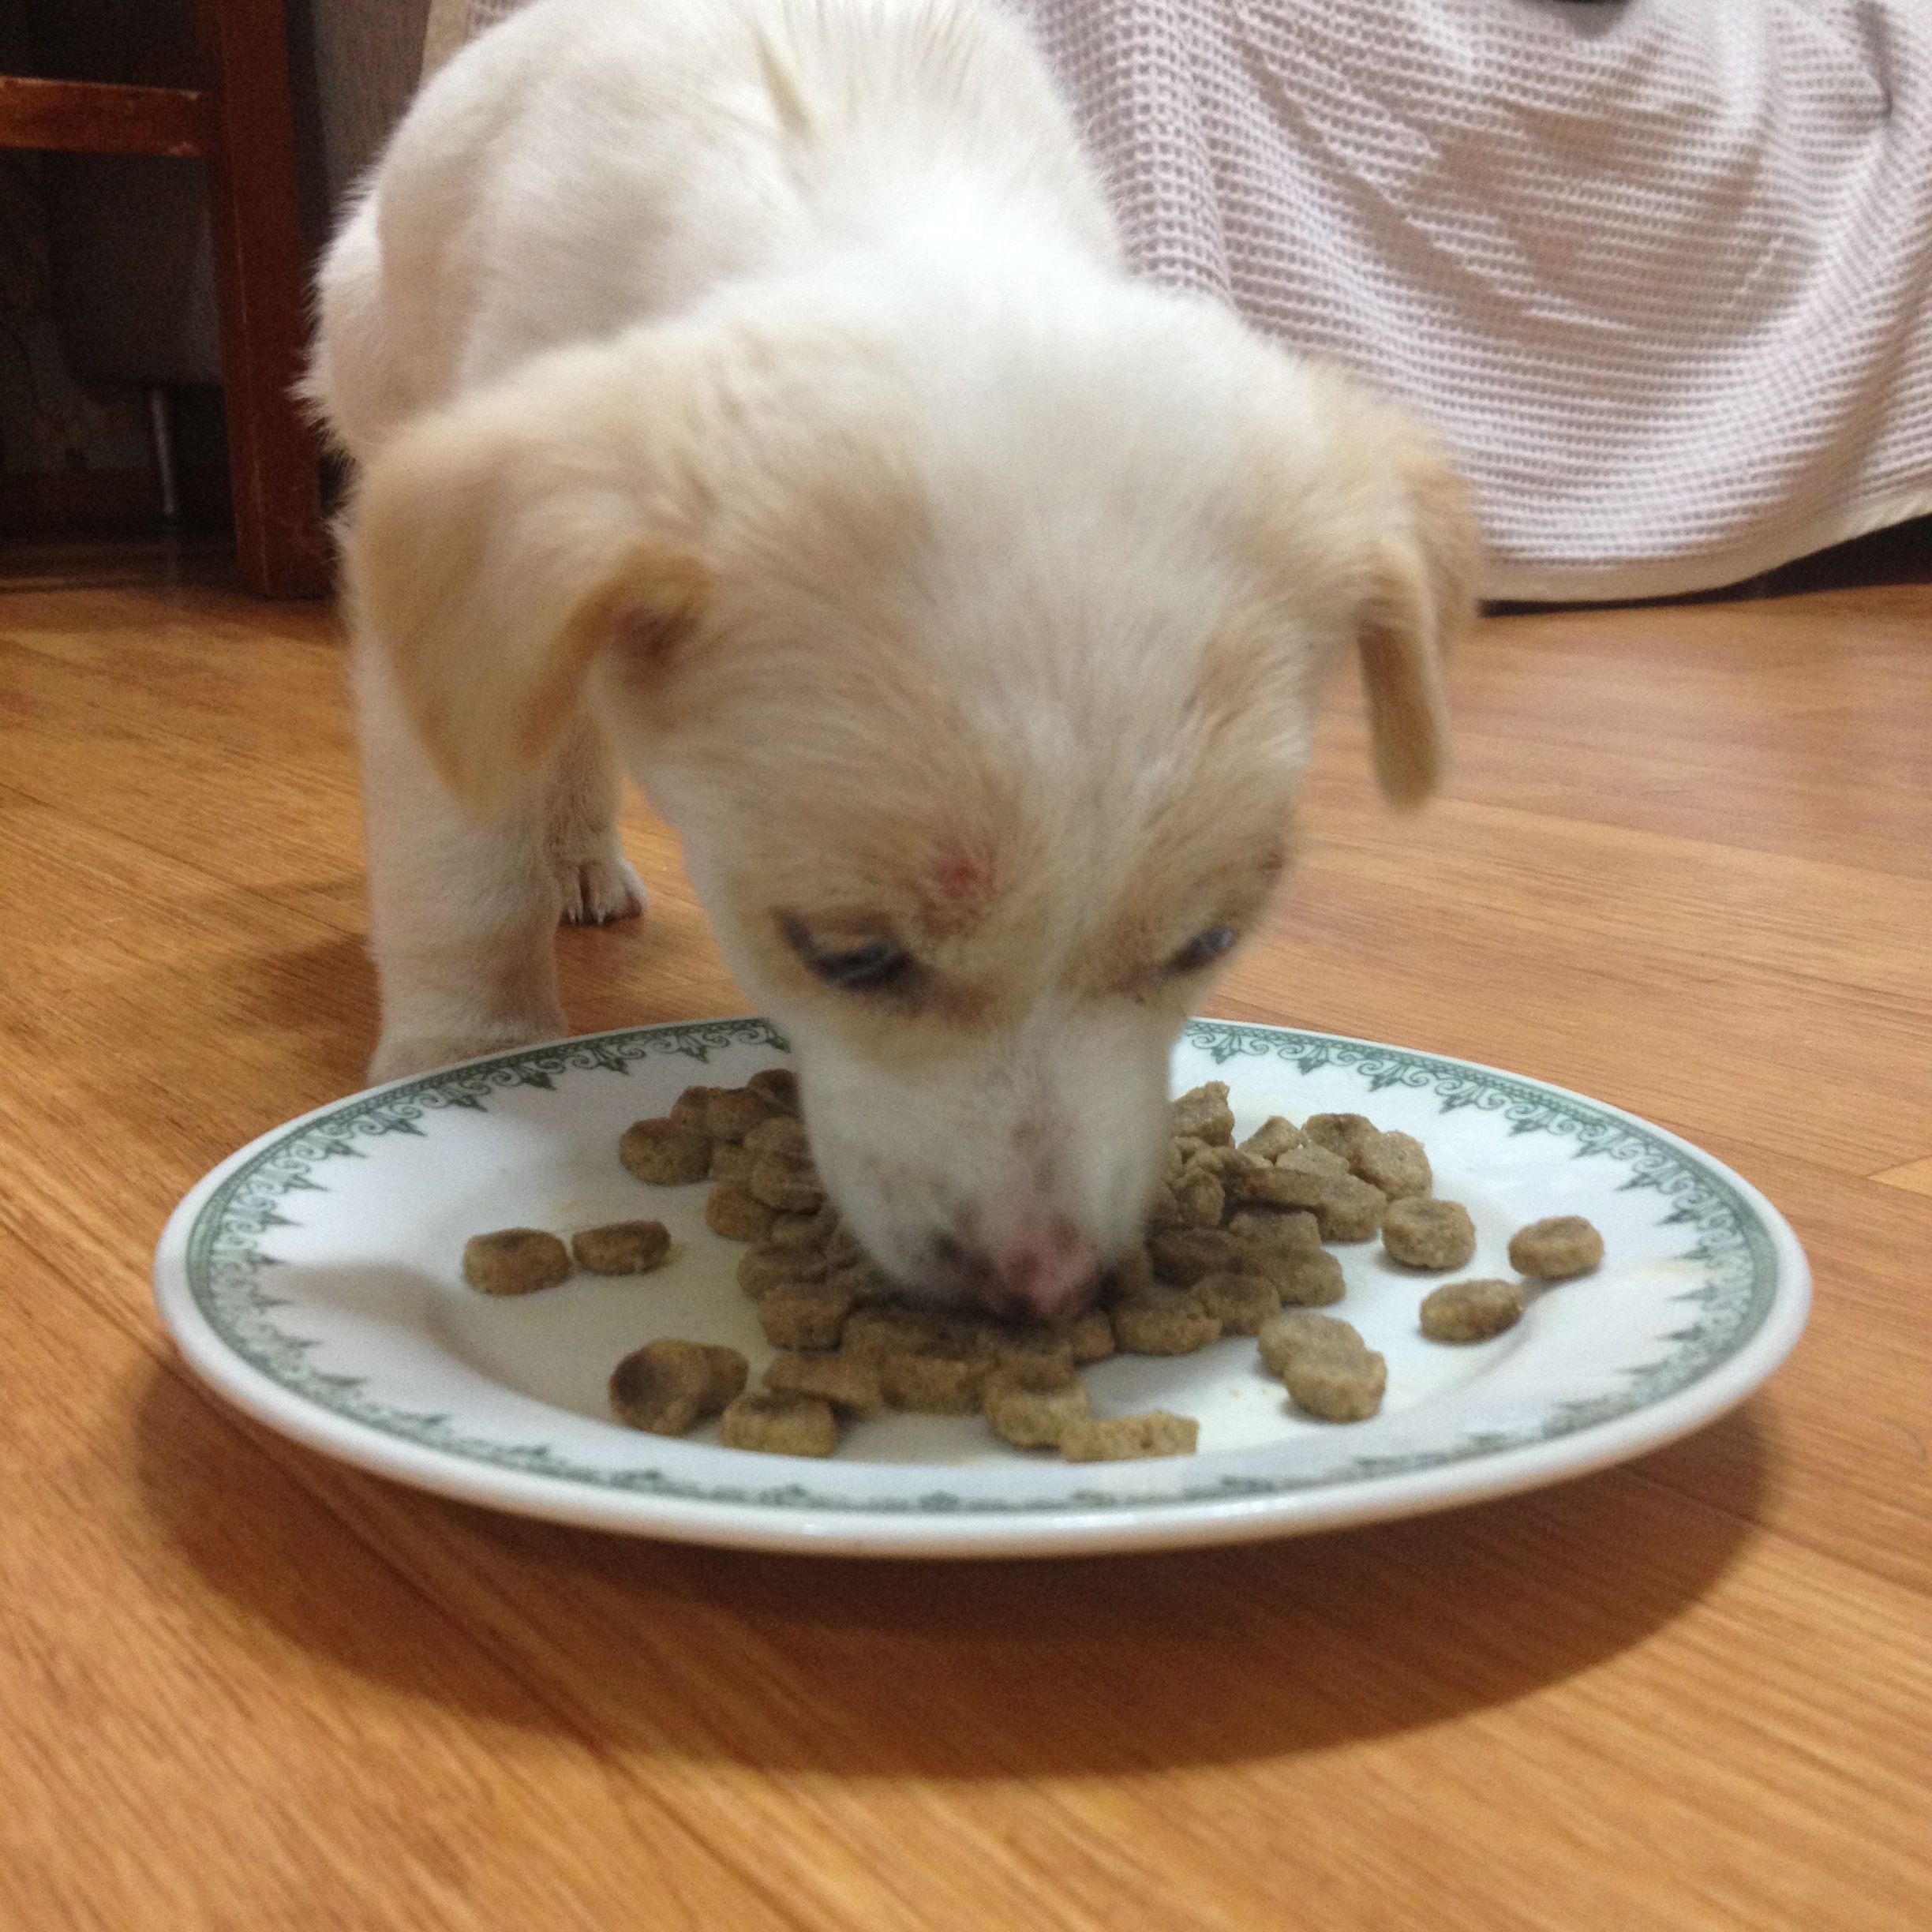
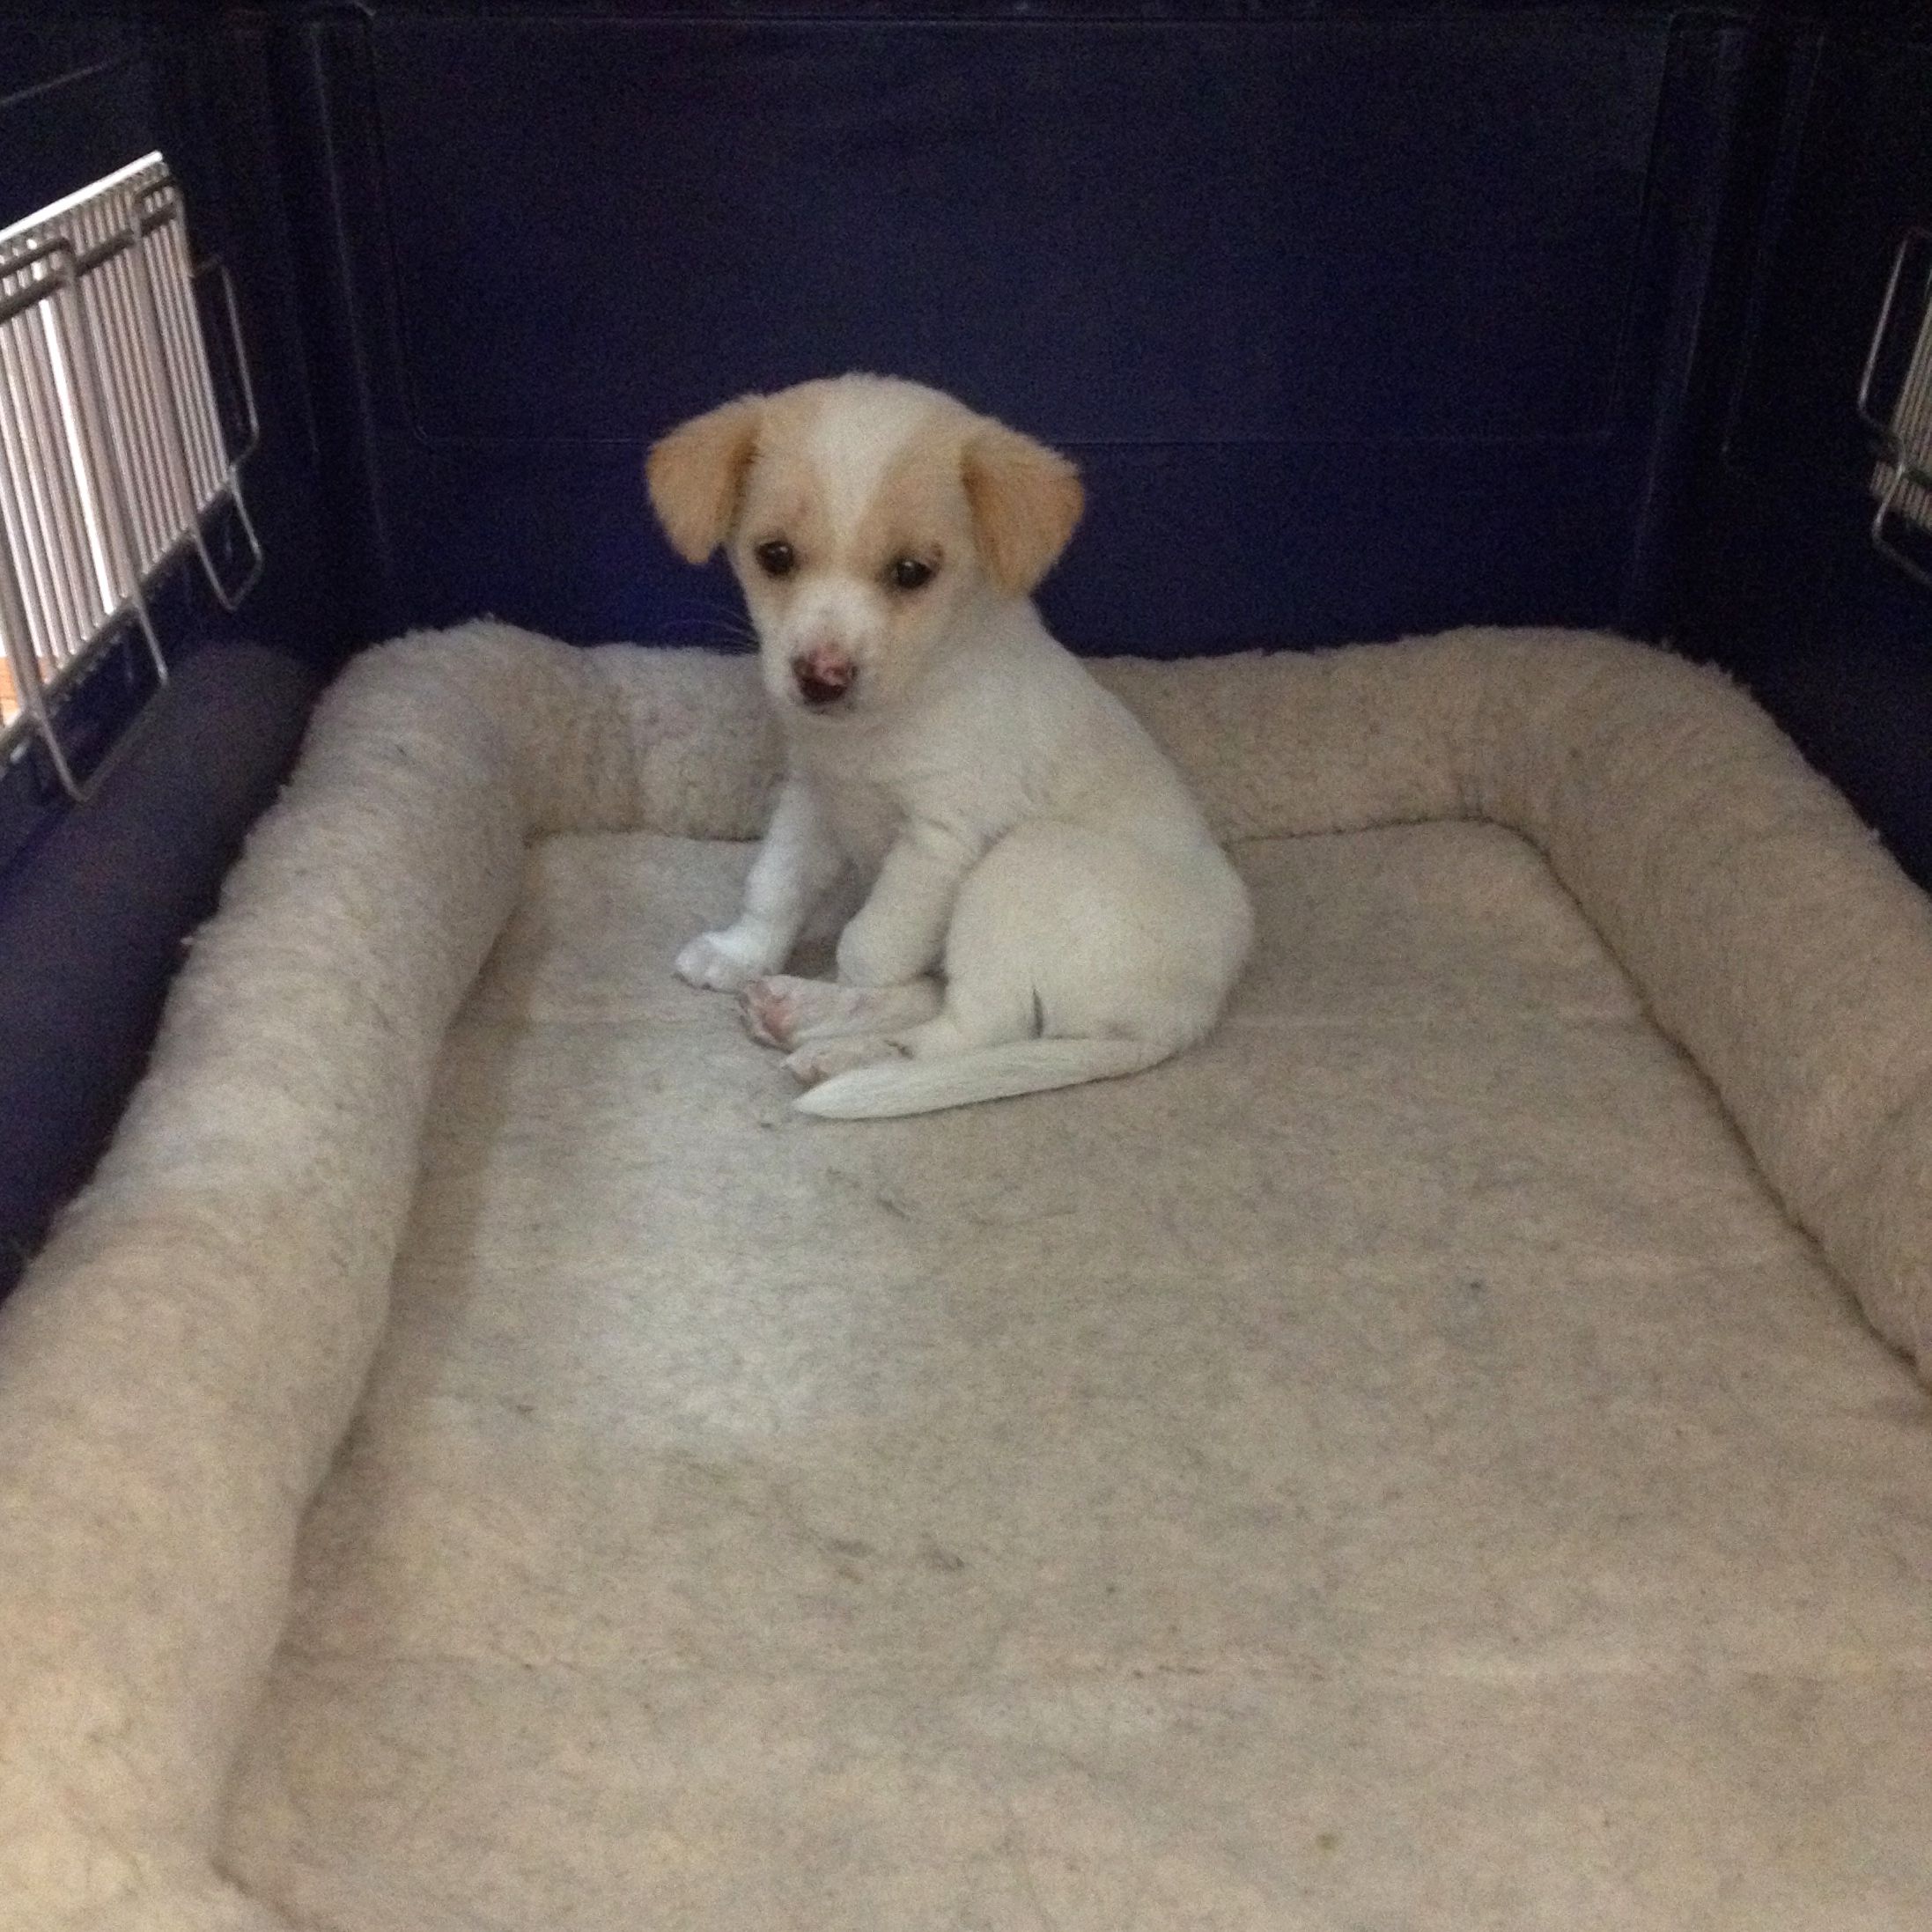
After much deliberation, Farmboy and I both decided we couldn't just leave her there to die and went back to get her. Knowing we couldn't keep her I jumped on Facebook in search of a foster/forever home for the shaking puppy. We took her straight to the vet and apart from a flea and mange infestation and a bacterial infection she is fighting fit and ready to live. 

Regardless of your view of social media, it does one thing better than anything else, and that is network and connect people. Within a few hours I had so many people offer to foster her and a number of people willing to take her permanently. Thanks to each and every person who shared my Facebook posts this little puppy has a loving home to go to next week. 

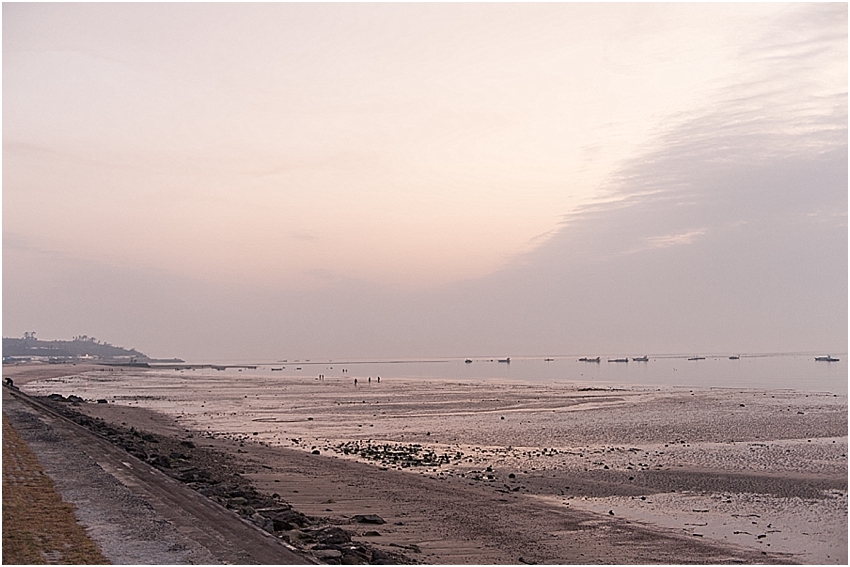
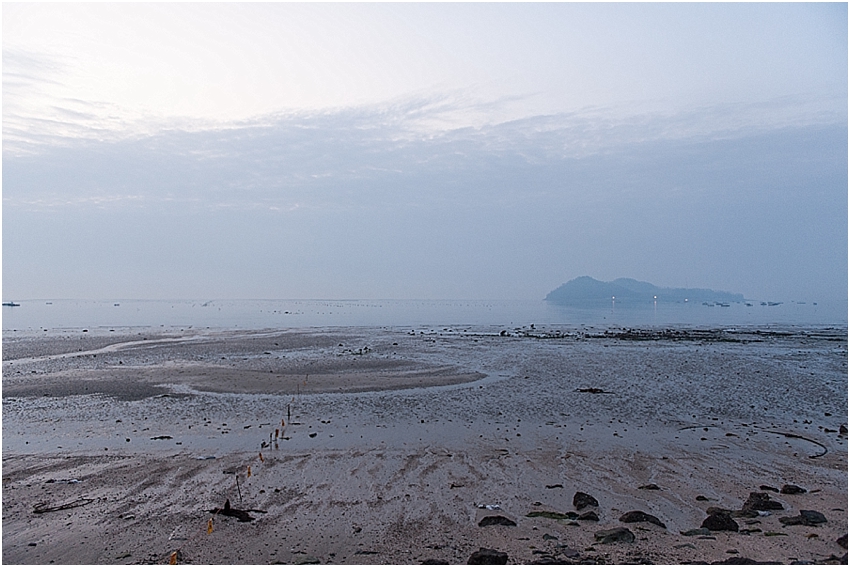
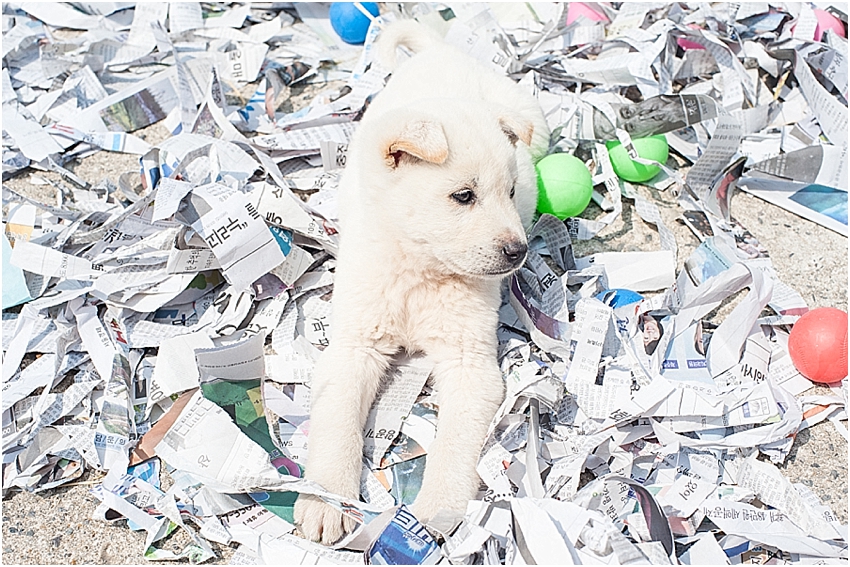
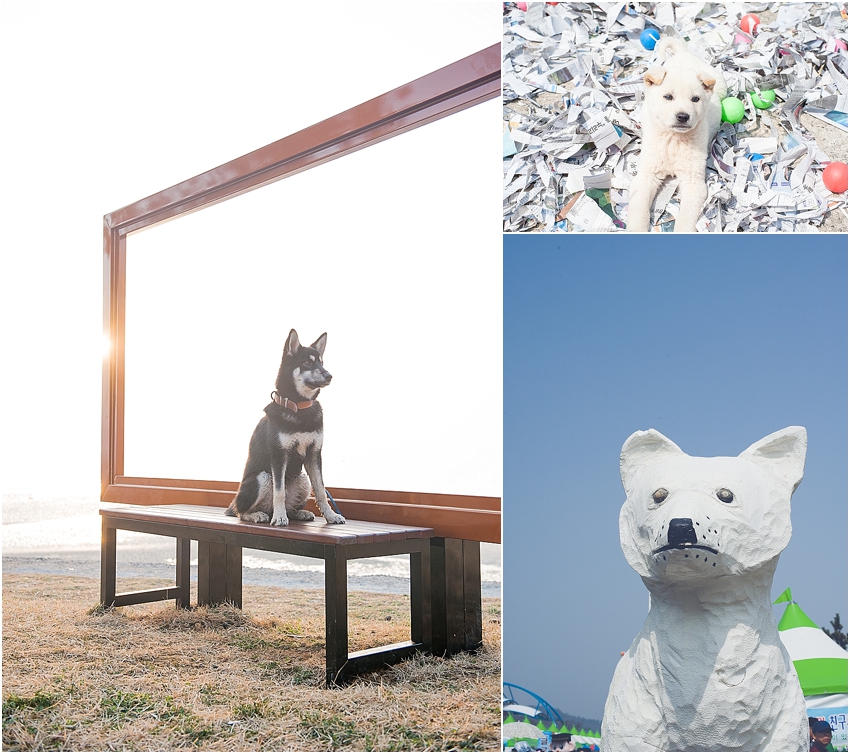
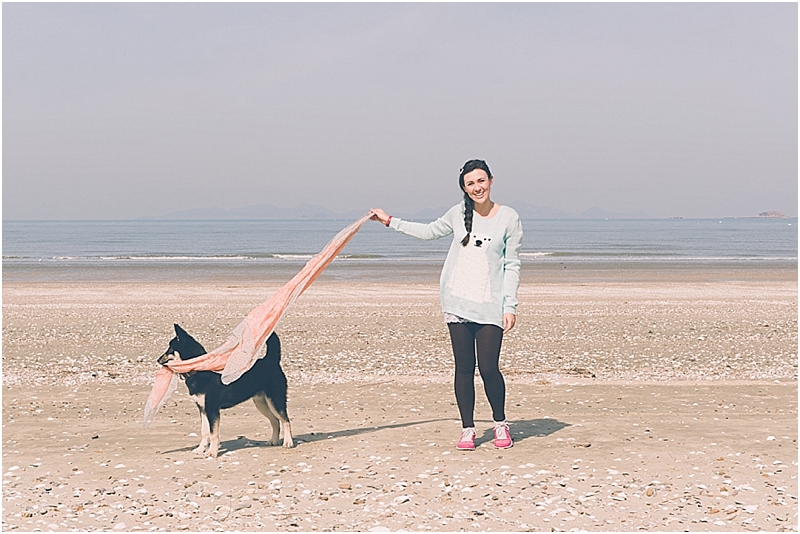
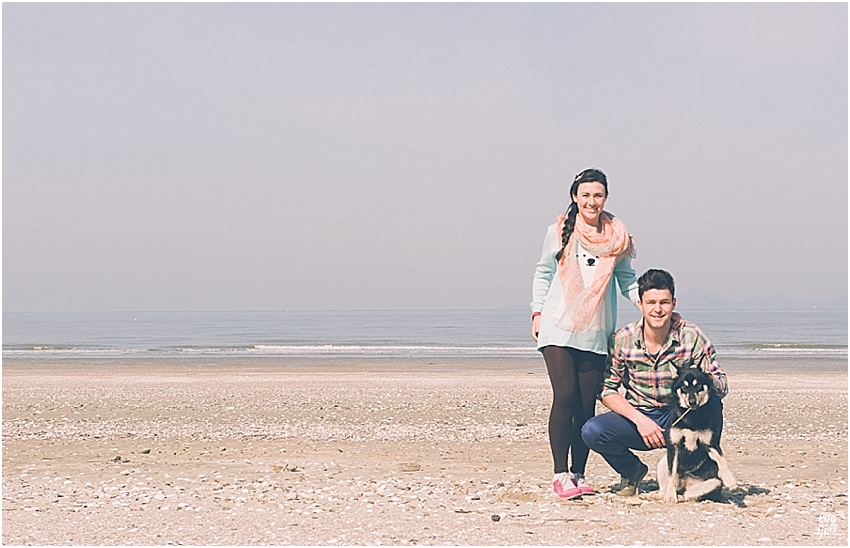
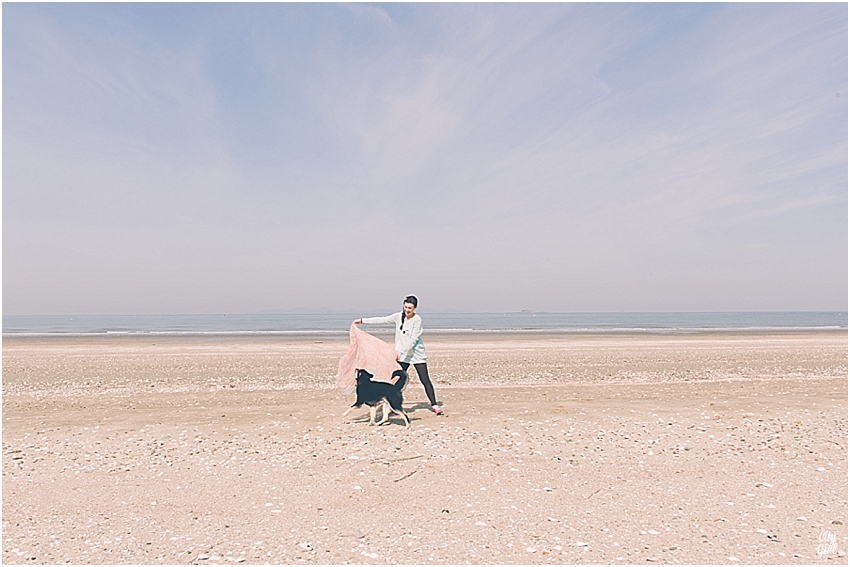
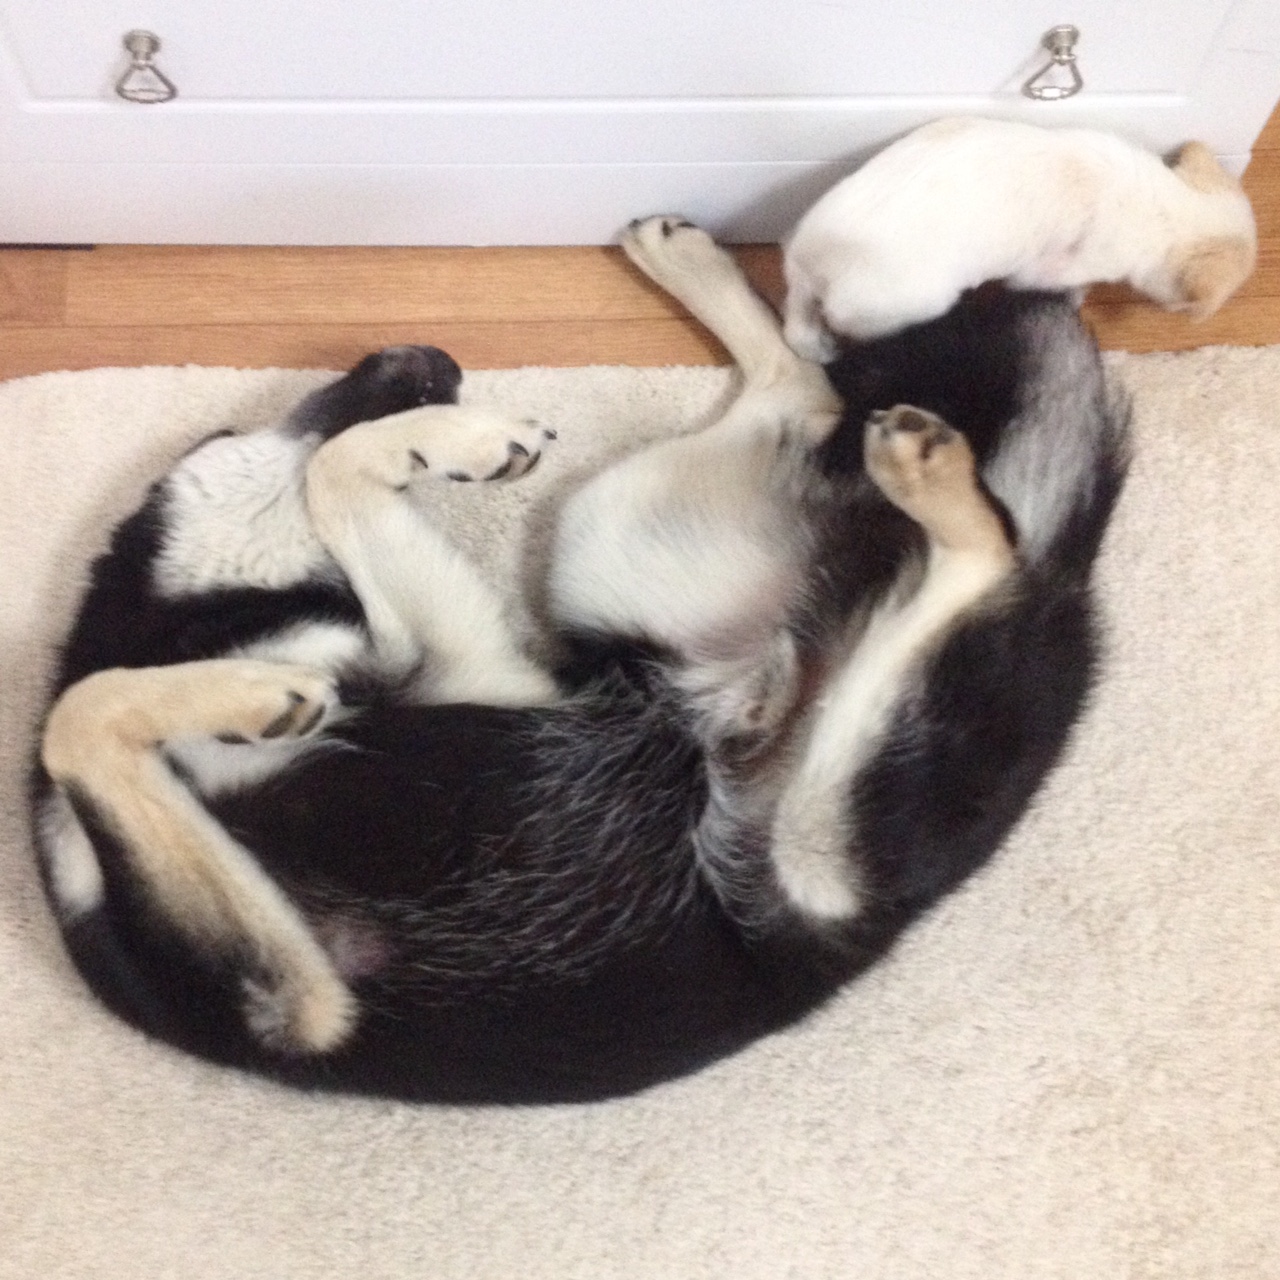
Here are a few photographs of where we found her, and what she looks like now, a couple of days after finding her. Shadow just adores her and he won't be the only one misses her when she's goes next week. 

As we have been through this whole process before, I have written a couple of blog posts on owning a dog here in Korea. If you have been thinking of it you might find these posts useful:

-OWNING A DOG IN KOREA {PART 1} WHAT YOU NEED TO KEEP YOU AND YOUR PUP HAPPY.

-OWNING A DOG IN KOREA {PART 2} HEALTH CHECK UPS & VACCINATIONS

From all my Facebook & Instagram posts it may seem like owning a dog in Korea is the easiest thing in the world. Please remember that I, just like most other people on social media, showcase the highlights. Owning a dog here in Korea is hard work, and you need to be prepared for not just the expenses of owning a dog (the vaccinations, neutering, dog food which is sooo much more expensive than back home & of the course the final cost of taking the dog back to your home country) but also what daily life with a dog is like here. We have a 'large' dog for Korean standards and deal with terrified neighbours and kids running away screaming on a daily basis. Koreans just aren't used to keeping dogs as pets, especially big dogs and are always horrified when they hear that Shadow lives in our apartment with us. Also, Korea isn't built for pets, so finding a place to exercise him is always an issue, finding a place for him to go to the bathroom without Koreans chasing us away from their beloved veggie patches is always a nightmare, finding places to stay that will accept dogs here in near impossible (we camp A LOT) and of course taking your dog around if you don't have a car is a huge challenge if they aren't small and able to fit in a little carrier. We wouldn't change our experience with Shadow for anything in the world, but I do wish we had known from the beginning exactly what we were in for when we found him. If you have any questions about owning a dog here, please feel free to email me or leave me a comment below. Also, there are sooooo many dogs and puppies needing homes here in Korea, if you have been wanting to get a dog please consider adopting rather than buying from the pet stores.

Below is a website that lists all the dogs (and cats & other animals!) available for adoption, as well as Facebook groups where animals that have been rescued are also posted. There is also a group called Everything Paws which is a fantastic resource for pet owners here in Korea. I've also included the links for buying and selling second hand pet items and information on traveling abroad ie. back to your home country with your pet. 

-Everything Paws: Tips & DIY Ideas for pet owners in South Korea  

-Rescue Korea adoption website

-Buy & Sell Pet Related Items in Korea

-Airborne Animals

Do you have a pet here in Korea? What has been your biggest challenge so far? I'd love to hear from you!

20% off My Stationery Store in Honour of National Stationery Week!

Today marks the start of National Stationery Week in the UK and to celebrate I'm offering 20% off all items in my stationery store! I'm mad about the gorgeous stationery items here in South Korea and I think you will be too once you see what lovely bits of paper goodies I have in stock. This special discount is only valid until Friday the 1st May. Below you'll find just a small selection of what I have in stock, simply click on each image to be directed to the store.

Simply use the following code to access your 20% discount:

happymail

Happy Shopping everyone!

I ship world wide. Shipping costs start from $2 and you should receive your package within 2 weeks. If you are based in South Africa shipping will take longer, please be patient. Please also note that for basic shipping there is no tracking number or insurance (as these make shipping very expensive). If you would like a tracking number or insurance please email me for rates).

Payment is securely done through Paypal (which you can make payments on without a Paypal account using your credit or debit card). If you have any further question please feel free to email me using the contact form above or by clicking here.

Happy Shopping!

Orange Chocolate Cheesecake Fat Bombs #BantingInKorea

OrangeChocolateCheesecakeFatBombsBantingRecipe

Welcome to my latest sweet treat recipe for those following the Banting eating lifestyle (click here to read more about this Low Carb High Fat lifestyle).

With Banting, your main source of energy should come from fat. I'm not talking about the bad kind, I'm talking about the good kind (What? You didn't know that certain fats are actually good for your body and will help you to loose weight while combating your cravings for all those sugary carbs?? Click the link above to read more about good fat). Good fats are things like butter, bacon & animal fat, olive oil, almonds, coconut oil, cream cheese, full cream milk & yogurt....the list goes on! But while your energy should come from fat, you need to remember that eating lots of vegetables is just as important to keep that body of yours lean and clean.

A lot of people, myself included, go through dips as soon as the afternoon arrives, when the craving for something sweet and sugary is often the hardest to resist. This is your body's way of saying it needs more energy, and for Banters, this means fat. A great way to quickly satisfy those cravings is with fat bombs. Fat bombs are just that, bombs of fat that fill you up fast, while delivering your body exactly what it wants when it wants it. There are loads of different fat bomb recipes, but this one is my absolute favourite so far. Chocolate and cheesecake, what's not to like? And another great thing about this recipe is that there is no oven required. As long as you have a fridge/freezer you are on your way to one happy tummy.

Happy eating!

x

BantingChocolateCheesecakeFatBombsREcipe

Ingredients

For the Chocolate

  • 6 TBSP Coconut Oil 
  • 6 TBSP Butter
  • 1/4 cup Cocoa Powder
  • 1/4 tsp sea salt
  • 1/4 tsp orange extract or use the juice of fresh orange
  • 1/2 -1 tsp sweetener of choice (I used Xylitol which you can buy in Korea here)

For the Cheesecake Centre

  • 1/4 Cup Butter, room temperature
  • 1/4 Cup Cream Cheese, room temperature
  • 1/2 tsp orange zest 
  • 1-2 TBSP juice from zested orange
  • dash sea salt
  • optional sweetener to taste (I used a small amount of sweetener as the slight sweetness of the orange juice was enough for me)
BantingChocolateCheesecakeFatBombsREcipe

Directions

  • Set up an ice tray or silicone candy mold/mini paper cups. 
  • Use a double boiler or a heavy bottomed saucepan to melt your coconut oil and butter for your chocolate.
  • Once melted remove from the heat and whisk in cocoa powder and sea salt. Add orange juice and sweetener to taste (you need to taste here to make sure you aren't going overboard with the sweetness).
  • In a separate bowl, use an electric mixer to whip together your cheesecake filling; butter, cream cheese, zest, orange juice and salt. Make it as fluffy as possible.
  • Pour a thin layer of your chocolate mix into the bottom of your ice tray/ silicone mould/paper cups. You can put the chocolate bottoms into the freezer to firm up so there is no chance of cheesecake peeking through or you could just start adding your dollops of cheesecake.
  • Add the cheesecake filling to shape and place on top of the chocolate.
  • Once done, pour the rest of the chocolate on top of your moulds.
  • Place your chocolates in the freezer and in 30-60 minutes they will be ready to munch! Place in a a reusable container for to store (if you have any left!).

This recipe filled a regular 12 cube ice tray.

BantingChocolateCheesecakeFatBombsREcipe

Adapted from Gratefully Nourished

Innisfree Face Designing Duo Contour & Highlighter {Review}

InnisfreeDuoFaceDesignPowder_0001.jpg

This duo highlighter and face contour powder is one of my current makeup favourites! You can see it in action in my 'Get Ready With Me Youtube Video'. 

Half of the compact is a highlighter, and the other half is a darker shade specifically for contouring. If any of you are wondering what exactly contouring is, it's basically using different shades of makeup to slightly change the appearance of your face structure. In other words, defining your cheekbones, slimming areas and giving you a more defined face. I have always been very put off by the huge number of steps involved in a lot of contouring tutorials. Most contouring involves the use of both a highlighter and a contour powder and so this powder helps me to take a lot of the guess work out of which powder should go where as it's already got both products in one. This powder works best with an angled makeup brush (pictured below) as an this type of brush really helps to define and contour without spreading product all over the place.

InnisfreeAngledFaceBrush
InnisfreeDuoFaceDesignPowder_0003.jpg

This particular product comes in three shades; #1 Cozy Afternoon Sunlight, #2 Calm Sunset and #3 Leafy Path. I have shade #2 which I found to be just right for my skin tone. The shade on the left hand side is the highlighter and contains shimmer pigments which really give your face a pretty glow. The darker shade on the right is the contouring shade. Both are highly pigmented and I found it lasts all day long! You can use each side separately for a definition, or use them like I do, together, for an easy and subtle highlighting and contouring effect.

InnisfreeFaceDesigningDuo
Image from InnisfreeWorld

Image from InnisfreeWorld

I bought mine at the Innisfree store in my town for W12 000. 

Have you ever tried this highlighter and contour powder? Do you have any other contouring or highlighting products that you love? Please share them below!

Alysha & The Blossoms....A Spring Styled Shoot

Korean Spring Blossoms Styled Photoshoot by Roxy Hutton of CGScreative-03-05.png

It's Spring here in Korea, and along with every other person here, I really wanted to make the most of the pretty blossoms. I teamed up with my new friend and fellow blogger, Alysha (who blogs over at The Wayfaring Heath...a stunning blog filled with recipes and DIY's to help you live a more wholesome and natural life). 

The problem with most of the blossom trees here is that the actual blossoms are all on the top branches, out of reach and even harder to manoeuvre around. We took these photos in and amongst the cherry and peach trees scattered around my school and had to do a whole lot of manoeuvring and jumping around to get these shots. Alysha, thank you for being so patient and so willing to stand in and amongst the bees. I really had a great time, thank you for being such fun to work with.

I've done a number of other styled shoots, including blueberries & temples, beaches and snow. Click here to see them.

All photographs taken with my Nikon D700 & 85mm 1.8 prime lens and gently edited in Lightroom. 

If you're a makeup artist, model, photographer, stylist or graphic designer or a fellow creative here in Korea and would like to work together on a styled shoot, please do get in touch with me! You don't have to be professional in any sense of the word, it's all about having fun! You can also see more of my work by clicking here.

How To Clean your DSLR camera lens

How To Clean Your Camera Lens

The last time I was editing my photographs I realised I had a few funny small blotches on parts of my photos. After wiping my computer screen I realised with horror that the marks must have been from my camera. I have since gone about finding the best way to clean my lenses at home, without having to send them in. Here are few tips I've picked up as well as a few basic things to keep your camera in tip top condition.

HowToCleanYourCameraLens

Use an air blower, like the one pictured above to remove loose dust particles. Simply press the bulb end and air will be forced out of the spout. This is the easiest and safest thing to try first with your lens.

When dust and/or smudges are on your lens glass, use a microfiber cloth designed for optical lenses to wipe it off. Make sure to use a clean microfiber cloth, as those cloths can hold dust, dirt and oil from your fingertips which can then be transferred to your lens. Be careful when cleaning the glass. If you do get something like sand on your lens and you rub it with a cloth, you may scratch your lens. Use a soft brush to brush off dirt or sand. Do not rub those away as they may cause scratches.

Change your lenses indoors (or in your car if you are out and about) if you can manage it. If you are outdoors, try and block the wind with your body as it can blow dust, dirt and other nasties into your camera and lenses.

Once you change lenses, quickly place the end cap on the removed lens, to prevent dirt and dust from setting into it. Also, quickly attach the new lens to the camera, to prevent dust and dirt getting into your camera sensor. And, while changing lenses, point them downward so dust and dirt don’t settle in.

HowToCleanYourCameraLens

Keep the lens cap on the front glass when you're not using your lens. Even better, place the lens in the protective cover that comes with it, or put it away in your camera bag.

Use a filter or lens hood to protect the lens glass from getting scratched or broken. 

Do you have any other tips for cleaning your lenses and keeping them in tip top condition?

Carb Free Banting Breakfast Muffins {#BantingInKorea}

CarbFreeBantingBreakfastMuffinsBantingInKorea

Are you looking for an easy alternative to fried eggs when following a Low Carb, High Fat diet? These breakfast muffins are simple to make and can be spiced up in so many ways. They are filling, while still being super easy to whip together. If you have been Banting and have been enjoying my Cream Cheese pancake recipe, these muffins will be another great addition to your breakfast menu. 

FullSizeRender-1.jpg

Ingredients

These ingredients made enough to fill one muffin tray (6 large muffins)

-4 large eggs

-dash of milk (this depends on the size of your eggs and how 'eggy' you like your muffins to be. I have made these muffins using milk and not using milk and they have tasted the best with just a dash of milk)

-Your choice of filling:

  • 1/3 cup chopped/grated cheese (I usually just chop my cheddar cheese into small blocks)
  • handful of chopped baby tomatoes/sun-dried tomatoes
  • handful of chopped raw zucchini 
  • dash of smoked paprika
  • pinch of salt & pepper
CarbFreeBantingBreakfastMuffinsBantingInKorea

Directions

1. Pre-heat your oven to 180C

2. Grease a muffin tin (I always use coconut oil)

3. Beat eggs and milk together, then adding your filling ingredients. Finish off with your seasoning of choice and pop in the oven for 15 minutes or until cooked through. Don't get be alarmed, your muffins will puff up while cooking but once removed from the oven they will sink, this is completely normal and doesn't mean you have flopped the recipe. They taste amazing either way.

4. Eat alone or with your choice of sugar free tomato sauce/pesto.

Yum!

    CarbFreeBantingBreakfastMuffinsBantingInKorea

    Jindo Island Sea Parting Festival

    Jindo Island Sea Parting Festival Korea

    Once a year in Korea, during the Spring and as a result of tidal activity (you're going to have to ask the physicists? botanists? scientists?) the sea parts for nearly 3 kilometres and an almost 40 meter wide road of ocean floor opens up between Jindo Island and Modo Island. This 'Miracle Sea Road' as it is called here in Korea, attracts people from all over to the world to witness the literal parting of the seas. This year the seas parted 3 times over one weekend and we had planned to be there for the first parting at 5h30 in the morning.

    I say planned because that was our intention, however as someone set their alarm for 3am and not 2am (I'm not mentioning any names here lol) and we live 2.5 hours away, even driving at break neck speed and getting everyone up and out the door in 15 minutes, we still managed to miss the spectacular Miracle Road by a full half an hour. We still made it in time for the sunrise and even had enough time to stand on a patch of mud and pose in front of Modo Island before the tide came in, so all was not lost. We may not have any photographs in thigh high red and yellow gum boots but there's always next year for that.

    Jindo Island is also the home of the famous Korean Jindo dog. Our little #ShadowTheJindo, being a Jindo (or at least a mix of Jindo and something else we can't pin down) was of course brought along on this trip to meet his brothers and sisters and pay homage to his roots. Shadow is a Black & Tan Jindo, one of the rarest (or in Korea, the most undesirable of coat colours) with white and brown being by far the most popular. The Jindo Sea Parting Festival offers a number of Jindo Dog Shows over the weekend and the one we watched was quite enjoyable. Jindo's are not known for being show performers, rather known for their very wilful nature and so it was quite funny to watch the dogs stubbornly refusing to listen to their handlers instructions to paint and take items to and from a refrigerator, unless it suited them. Yes, this quite sums up our Shadow. 

    As with all Korean festivals there were loads of food stalls and lots to see and do. We were there from 6am until early afternoon, managing a few naps on the beach in between trips to the food stalls. Also, if it takes your fancy, you can pick and gather any and all bits of sea life you find along your walk through the sea. This isn't exactly environmentally friendly, but if you do want some fresh sea snails in your ramen soup then by all means go ahead, everyone else will be doing it. 

    Jindo is an island just off Mokpo on the South West Coast. There are signs posted all along the way once you get to Jindo (if you are driving).

    If you are taking a bus here are some directions from the Jindo Bus Terminal:

    From Jindo Bus Terminal, take the Gagye-Hoedong (가계, 회동) or Songgun-Hoedong (송군, 회동) bus 
    -Get off at Hoedong (회동).
    -Go 40m along the sea to reach the festival venue.

    There are two areas to the festival, the one with all the food stalls that is right by the main parking lot. And then the other section that hosts a lot of the shows and has the main stage is near the actual sea parting. To get to that section you will be asked to pay a few (it was W5 000 and included vouchers of that value to use to purchase food at drinks at some of the stalls).

    Have you ever been to to the Jindo Sea Parting Festival before? Did you enjoy the experience? I'd love to hear from you in the comments below.

    Weekly Wishes {14}

    Hello and welcome to my Weekly Wishes series where I talk about my goals and wishes for the week ahead. Popping them here on the blog  helps me to stay on track with the things I want to do or get done. These posts are part of a link up by The Nectar Collective where Melissa has a wonderful community of women who link up their weekly wishes and are there to support and encourage one another. It's also a great way to make new friends and find new blogs to follow, why don't you join me?

    ShadowTheJindo

    WEEKLY WISHES

    1. My main focus this week is on growing #ShadowTheJindo's Facebook page. Yes, that means my dog now has a Facebook page. I'm sure many, many, many of my friends are rolling their eyes right now but I'm okay with that. I want to use the page to help create awareness of the Jindo breed and hopefully help more abandoned pups find their 'fur'ever homes. I know that there are so many dogs needing homes all over the world, but as I'm currently in Korea, this is where my focus will be. If you'd like to find out more and follow Shadows adventures then please click here

    SpringBlossomStyledShoot

    2. I did a semi-styled shoot with a new friend Alysha this weekend and I want to finish editing the photographs and start posting them. It's cherry blossom season here in Korea and so we took full advantage of the gorgeous blooms and had a wonderful time together. Alysha blogs over at The Wayfaring Heath, a blog aimed at wholesome & natural living where she posts wonderful recipes as well as easy to do DIY's for the home. Here latest post is all about how to freeze fresh herbs, something I'm constantly having to do here in Korea as herbs are so hard to come by! I'm looking forward to sharing the rest of these photographs with you!

    MalaysiaTravelGuide

    3. Lastly Farmboy and I are busy planning our summer holiday trip to Borneo! As excited as I am about the trip, it's becoming a bit of a logistical nightmare and AirAsia is being such a pain with their credit card security systems. They do have an amazing app which offers really awesome discounts when using it, but it just won't take my money! This is one of the downsides of living in a country where you can't speak the local language, trying to communicate with my bank here to ask how to solve the above issues is nearly impossible. Anyway, I'm hoping to have it sorted out this week before the price of flights go up! In the mean time I'm looking at my photographs of our trip to the Perhentian Islands in Malaysia to help me stay sane while AirAsia gives me grey hairs.

    That's all I have for this week. Do you have anything you really need to get done this week? Drop me a comment below, I'd love to hear from you.

    Have a wonderful week everyone <3

    Banting Low Carb Cheese Cake Recipe #BantingInKorea

    BantingLowCarbCheesecakeRecipe

    I've been on the hunt for a cheesecake recipe that I can eat while still following the Banting lifestyle (click here for more info on Banting which is a form of Low Carb High Fat diet). When I came across this Low Carb Chocolate Chip Cookie Cheesecake Bars recipe by All Day I Dream about Food I though there had to be a way to adapt it to some kind of cheesecake recipe. I am super happy to report that it worked! Be warned though, this cheesecake won't last very long at all, because if you're anything like me you'll eat it all in just a few days!

    Just a note, after taking it out of the oven I was very upset by how 'uncooked' it looked. I was rather disappointed and felt totally despondent, shoved it in the fridge and forgot about it until the next morning. I'm not sure what kind of magic happens to this cheesecake when it's in the fridge, but the next day it was amazing. So much better than the day I made it. So if you're also disappointed with how yours turns out, have no fear and pop it in the fridge over night.

    If you've never baked anything Banting before, you need to keep in mind that you aren't baking traditional sweet treats. As you're not using regular wheat flour and processed sugar, what you make isn't going to taste like what you are used to. I've gotten used to the taste of Banting baked goods and have been just happy to be able to eat treats while still maintaining my figure. I just wanted to mention that as some people get all antsy about Banting baked good because they don't taste like the real thing. Of course they don't silly, but they also have none of the carbs that regular baked goods have and they still taste great and will satisfy your cravings! What's not to like?!

    Also, I added some white baking chocolate & dried cranberries to my cheesecake. These are not Banting friendly, so you might want to omit them if you are being very strict with your Banting (go you!).

    BantingCheesecakeRecipe

    Ingredients

    Crust:

    • 2 cups almond flour
    • 1 cup shredded coconut
    • 1 1/2 tsp baking powder
    • 1/4 tsp salt
    • 1/2 cup butter/coconut oil
    • 1/2 cup Xylitol sweetener 
    • 1 large egg, room temperature
    • 3/4 tsp vanilla extract
    • Optional extras (1/3 cup of cranberries & 1/3 cup baking chocolate)

    Cheesecake Filling:

    • 2 tubs cream cheese (I used the standard 220g round tubs of Philadelphia)
    • Optional & depending on your tastebuds: 1/4 cup powdered Xylitol (you can make it powdered by blitzing it in a blender)
    • 1 large egg
    • 1/2 tsp vanilla extract

    This recipe made an awful lot of cookie crust as per the original recipe which was formulated for a base and a layer of cookie dough crumbled over the cheesecake layer. I liked how thick this base was, but you might prefer a thinner base so you could try halving the crust layer ingredients above or use half of your mixture to create a cream cheesecake sandwich by grating the dough on top after your cheesecake layer.

    BantingCheeseCakeRecipe

    Directions

    Crust:

    • Preheat oven to 180C and grease your dish/pan well.
    • In a medium bowl, whisk together almond flour, shredded coconut, baking powder and salt.
    • In a large bowl, beat coconut oil/butter with Xylitol until well-combined and fluffy. Beat in egg and vanilla extract.
    • Beat together almond flour mixture & butter mixture until the dough comes together, then stir in chocolate and cranberries if using. Press the dough into the bottom of the prepared pan. Bake 10 to 12 minutes, then remove from oven and let cool (it will not be fully baked at this point).

    Filling:

    • In a large bowl, beat cream cheese with sweetener until combined. Beat in egg and vanilla extract until smooth and creamy.
    • Pour filling over the cooled crust.
    • Bake 25 minutes or until crust is golden and filling is just a little jiggly in the centre.
    • Remove from oven and let cool, then refrigerate until set, ideally over night

    And there you go.

    Remember that your cheese cake WILL taste better the next day, the wait will be worth it, I promise. Please let me know if you do give this a try as I would love to know how it works out for you. Happy baking!

    x

    Adapted from LowCarb Chocolate Chip Cookie Cheesecake Bars by All Day I Dream About Food

    You might also like these:

    5 Quick Blog Makeover Tips

    Blog Makeover Tips for the perfect blog by citygirlsearching

    Is your blog feeling a little stale? Are you in need of a bit of a refresh when it comes to your blog design and layout? Here are 5 quick tips to help you breathe new life into your blog, quickly and easily without the need to hire a graphic designer. I found making these quick changes with my own blog really helped me to feel inspired again and I'm sure would do the same for you.

    1. Change your Social Media Icons.

    This could be something as simple as changing the colour of your social media icons or could even extend to changing the design of them completely. There are so many wonderful blogs offering free icons for download that you don't have to be stuck with boring icons ever again. Here is a quick list of some of my favourite ones. Just click on the images below to be redirected to the website:


    2. Change your Blog Sidebar Labels.

    A similar move to the tip above, but changing the design of your category/page labels can really give your blog a lift. Think about changing the font, the size of the font, the background colour, adding a photo as the background or going minimalist and just using a font. 

    You can make new sidebar labels yourself using the following free online programs; Canva and PicMonkey.  When you do make your own labels just keep in mind the sizing of each one. Try and keep the size (and the design) the same to create uniformity on your blog. 

    For me, I changed my image based labels to graphic based labels as I thought the images were distracting from the main content of my blog. I still like the image based labels on the left, but felt like I needed a bit of a change. Remember, it's your blog and if you make changes you don't like, you can easily go back and change them again:

    3. Change your profile picture.

    Update your profile picture every once in a while to keep your blog fresh. Or if you don't have one, add one! Your readers want to know who it is they are connecting with when they read your blog. Try to keep your colours in the same palette as your design theme to avoid distracting from your blog too much. I styled a few new photographs recently using items that show what it is I blog about. Be creative and most of all be you!

    BlogTips

    4. Remove the clutter.

    Take some time to really look at your blog. Are there pages, widgets, buttons and other things in your side bar or header that you don't really need? Remove them and just keep the essentials. A great tip to implement is to include a search bar somewhere obvious on your blog. That way if people get a little lost (or if they are looking for something specific they can quickly search your blog instead of spending time getting frustrated and then ultimately leaving). Make your blog a pleasant and easy to navigate place for your readers.

    5. Add a Landing page

    A landing page (or home page) is the first thing people see when they get to you blog.  You may have multiple pages on your website (for example an About Page, Store Page, Contact Page, Press Page) or you might also have your blog set up as a separate page too as is the case with my blog. This can be very confusing for people who stumble across your website as they may have no idea what it is that you blog about. To make it easy for them to navigate, add a 'Home' page to your site. If you click on my logo at the top of my blog, or if you click on my actual 'Home' page you will be directed to a space that is clean and free of clutter. Your Home or Landing page needs to be very clear in stating what your webiste or blog is all about, as well as providing easy to see and use links to the different parts of your site.

    BlogTips

    As you can see my Home page has links to my About page, my Stationery Store, my Photography portfolio and my Contact page while also providing a sign up form for people to subscribe to my blog. Another thing to remember to include is your social media links so people can connect with you on all the platforms you use.

    My site is run on SquareSpace and so setting up a landing page (or cover page as SquareSpace calls it) was super easy to do. If you blog using Wordpress or Blogger you can set up a new 'Static Page' which can act as your landing page. 

    Remember at the end of the day you want your site to be easy to navigate and easy for people to find what they are looking for. You don't want people to get frustrated and end up leaving your site because they found another one that is better to navigate. People are also very visual, so try to include high quality photographs on your home page that add to the overall branding and aesthetic that you want to convey to your readers. 

    Do you have any other tips for a blog makeover that you'd like to share? I'd love to hear from you in the comments below!

    You might like these posts too:

    Innisfree Eco Beauty Angled Makeup Brush & Powder Brush

    InnisfreeEcoBeautyMakeupBrush

    On a recent splurge at Innifree I spent some time browsing through their range of makeup  brushes. They have quite a large range and I was rather intrigued especially when I saw their Eco Beauty range which has wooden handles (the ones pictured in this post are part of the Eco Beauty range). They reminded me of my favourite Eco Tools Brush set which I was able to buy online through Iherb (click here) and have delivered here to South Korea.

    At the time I was buying my favorite Face Designing Duo  highlighter and contour powder (review coming soon) and so was on the look out for a brush to apply it. Angled makeup brushes work really well for applying blush or highlighters as you have a lot more control over where you want the product to go. I bought the Eco Beauty Powder Brush and the Angled makeup brush. Keep reading for a more detailed review of both brushes.

    As Innisfree is a one of the more natural orientated skincare brands here in Korea (they use less nasty chemicals in their products) all of their brushes are synthetic and animal lover approved, at least by me that is!

    Eco Beauty Powder Brush W12 000

    I love this powder brush. The bristles are super soft and very gentle on your skin. I use it to apply my setting powder over foundation and it works really well. I am a little sad that the bristles are white, as it's hard to keep them looking clean and new. This is also one of the reasons why I only use it to apply my setting powder and not as a blusher or bronzer brush.

    The wooden handle is one of the many things I really like about this brush as it gives it a very professional and clean appearance. The synthetic bristles are not itchy on the skin like a lot of other cheaper skin care brands and I really like the little cover that comes with the brush to help keep it's shape and to help keep it clean.

    Eco Beauty Angled Brush W8 000

    I have a bit of a love/hate relationship with this angled brush. I love it because it works really well to apply my bronzer and highlighter, but I hate it because of the fall out (fall our refers to the actual bristles of a brush coming loose and falling out). Even though I have been using it for a few months, I am still experiencing fall out of the bristles, and it gets really annoying having to constantly worry about bristles going into my eye. It could just be that I got a bit of a dysfunctional brush, but I was very disappointed. As my Korean is rather limited, going back to the store and asking for a refund is more trouble that it's worth to me, trying to explain a dysfunctional brush and then hoping they refund me or give me a new one. 

    But even with the annoyance of fall out, the bristles are soft enough whilst still being course enough in picking up a good amount of product for application. The bristle are not as soft as the powder brush though, and might irritate very sensitive skin. I will continue to use this brush until the day there are no bristles left in it, or until I find a nicer looking one. I really like the wooden handles of these brushes and I especially like how they match my EcoTools brushes. It's the small things in life right? 

    I wasn't too mad as I had picked up both of these brushes during one of Innisfree's 30 - 50% off sales and so didn't pay full price for either of them. But if I was paying full price I would give the angled brush a skip but I would repurchase the powder brush for sure.

    Have you given any of Innisfree's Eco Tool makeup brushes a try? Any others that you would recommend? I'd love to hear from you in the comments below!

    You might also like these:

    How To Make Garam Masala Spice for curries

    HowToMakeGaramMasalaSpice

    Garam Masala is a blend of ground spices used to add flavor to Indian curries. I made a delicious butter curry recently, and the main ingredient was Garam Masala. Living here in South Korea means limited access to foreign food stores, so I had to make my own version of the spice using what I had on hand in my grocery cupboard. All I can say is the aromas given off from this mixture is heavenly and will make your home smell incredible. 

    There are many varaiations of this spice, but this is my version using what I had on hand in my grocery cupboard.

    HowToMakeGaramMasalaSpice_0006.jpg

    Ingredients:

    1/2 cup whole coriander seeds

    1/4 cup whole cumin seeds

    5 cloves

    2 star anissed

    4 bay leaves

    8 green cardamom pods

    2 sticks of cinnamon

    2 dried red chiles (use more if you prefer more of a kick)

    HowToMakeGaramMasalaSpice

    Method

    1. Dry roast the larger seeds separately to the smaller ingredients to avoid burning.

    2. Once cooled combine in grinder until a fine powder is formed.

    3. Store in an airtight container (click here to see how to make this gold animal glass jars)

    HowToMakeGaramMasalaSpice

    And now you have your very own Garam Masala to add to curries. I will be posting a delicious recipe for Butter Chicken Curry soon.

    Happy cooking!

    Jeju Island Travel Guide

    Jeju Island Travel Guide

    Farmboy and I visited Jeju Island over the Chuseok holiday here in Korea (September 2014). This was our second trip to Jeju (click here for info on our first trip) and we enjoyed it just as much as the first time. The first time we travelled by public transport, waiting for buses and taking taxis, and this time we decided to hire a car and camp for the 3 nights we were there. We went with two friends which really brought the costs of the car hire down and it worked out to be incredibly cheap.

    You may be thinking of heading there soon (or sometime in the future) so to help you plan your trip, I have put together a rough budget, as well as some tips from our stay. 

    Read More

    Weekly Wishes {13}

    WeeklyWishes

    Hello and welcome to my Weekly Wishes series where I talk about my goals and wishes for the week ahead. Popping them here on the blog  helps me to stay on track with the things I want to do or get done. These posts are part of a link up by The Nectar Collective where Melissa has a wonderful community of women who link up their weekly wishes and are there to support and encourage one another. It's also a great way to make new friends and find new blogs to follow, why don't you join me?

    Spring is finally here in South Korea and I couldn't be happier! The blossoms here are of my favourite things about living here, even though they don't last very long. So every chance I get I have been outside with my camera trying to find new ways to capture them. Do you get blossoms where you are in the world? Back home in South Africa we do get pretty blossoms, but nothing like the fruit trees here in Korea. Spring will be one of the things I miss most when we do decide to head back home, that's for sure. A change in seasons (much the same as Monday, the start of a new week) is always a good time to set some new goals and I'd love to hear yours too!

    Weekly Wishes

    1. Continue with the lead training my husband and I have been doing for our pup. Yesterday was the first time I have tried using hotdogs and boy oh boy was he a good pup. I'm hoping the sausages work, and that I am able to wean him off them too so he learns to walk just as nicely without the treats as with them! 

    2. Film a new Youtube video. I was recently tagged in a Youtube Challenge by Amy from the VDBees and I have been terrible at making it happen. I did film another video last week (yes, that is me sitting in a pink bathtub!) and so this week I want to film my challenge video.

    3. It's also strawberry season here in Korea and I need to find some good recipes of things to make with them. I tried making strawberry fruit roll ups yesterday (they were a complete disaster!) and next up I have ideas for a cheesecake (Banting friendly of course!) so we shall see if that materializes. If you follow me on Instagram (@roxyhutton) you would have seen that I did make an incredible Banting cheesecake last week, so I am hoping to use the same recipe with my strawberries. I will post it here on the blog if it is a success!  Do you have any other ideas for what I can make with hundreds of strawberries???

    4. SEE MORE BLOSSOMS! Rain is forcast for the entire week starting tomorow, so I hope it lets off for a few hours one afternoons so I can capture some of the cherry blossoms in my area.

    That's all I have for this week. Do you have anything you really need to get done this week? Drop me a comment below, I'd love to hear from you.

    Have a wonderful week everyone <3

    South West Coast Beaches in South Korea

    A few weekends ago Farmboy, #ShadowTheJindo and I road tripped down to the South West coast of Korea in celebration of the first warm day the year. The beaches here in Korea are a little different from what you typically see in the rest of South East Asia (click here to see a little more of Wido Island which we visited this time last year, also here in Korea). Even though it was far from tropical, it was a great day out and our pup had a ball chasing my scarf.

    This beach was located on the coast between Gochang and Yeongwang.

    Have you visited any beautiful beaches here in Korea? Please drop me a comment below, I'm always on the look out for new places to explore.

    Elisha Coy 3D Spin Cleaner {Review & Video}

    I have been wanting to try out this face cleansing tool ever since I first spotted it on WishTrend. Then when I saw it was on special for only $48 instead of the usual $120, I ordered it right away and haven't looked back since. This little beauty has been an amazing addition to my skin care routine, giving me smoother, brighter and softer skin than ever before.

    WishTrend currently has the face cleaner as part of an ElishaCoy Cleansing kit which includes the cleaner, 2 brush heads and the ElishaCoy Vita Capsule Cleanser all for $48 instead of the usual $120. 

    The one brush is a large white, soft bristled brush designed for everyday use. It's very gentle on your skin and my skin (which is often very sensitive to new products) has had no bad reaction to either the brush or the Vita Capsule Cleanser. I was a little worried that my skin would be red and agitated after use, but that hasn't been the case at all. The whole experience of using this brush incredibly relaxing. After filming the video below, even my husband wanted to give it a try. The first thing he told me was how surprised he was at the how relaxing he felt using it. If you are still worried about your skin having a reaction, then try using it twice a week until your skin feels used to it. I use the brush every other day, in total about 4 times a week. It is gentle enough to use everyday, so see how you skin feels after the first use.

    The bristles are incredibly soft and feel like silk on your skin. The smaller brush is designed to target blackheads and works in the same way as the larger brush head but as it is smaller is able to really get into the corners around you nose to deep clean your pores.

    Both the brush head rotate 360 degrees allowing the bristles to thoroughly cleanse your pores and scrub deep down removing dirt and other impurities. The cleaner runs on 2 AA sized batteries which are inserted into the bottom and covered with a waterproof piece of plastic to make sure you don't electrocute yourself in the bathtub. The Cleansing kit from Wishtrend includes 2 batteries so you can get scrubbing right away.

    I've used a lot of face scrubs before (my favourite being this one from SkinFood and this one from Klairs) but even these don't clean my skin like this little machine does. What's great about it is you can use it with your regular face cleanser for a much deeper clean. Just squeeze a dollop of your face wash onto the bristles, dip the brush head into water, place on your face and press the on button. Slowly move the brush over your face, being careful not to get any product in your eyes and then after a few minutes, rinse off with warm water. Your skin will feel softer, cleaner and ready for the rest of your skincare routine. The brush has two settings, fast and slow, so you can adjust accordingly to your skin. I started off the slowest setting, and now only use the fast setting.

    The biggest thing I have noticed with my skin after using this cleaner is how much better the rest of my skin care products respond to my skin. Everything I put on after cleansing literally melts into my skin. I no longer have to stand around rubbing my face for ages to wait for creams to absorb and as a result, my foundation goes on better. What this means for your skin is your pores are squeaky clean and able to absorb so much more of the active ingredients in your creams, lotions and serums. I hadn't expected to feel such a difference in the rest of my skin care routine, but I have pleasantly surprised.

    ElishaCoy Vita Capsule Cleanser

    This foam cleanser works wonderfully with the 3D Spin Cleaner. It leaves my skin feeling squeaky clean without over drying and leaves me with brighter skin after every use. This cleanser is formulated for all skin types and a contains a blend of 10 different vitamin capsules. Although formulated as a thick and rich cream, once mixed with water it becomes a fluffy and light foam. 

    The tube contains 80ml of product, and as you only need a little to get a rich foam, it's going to last you a good long time. I love the scent of the cleanser too, it's light and refreshing and leaves me feeling thoroughly pampered like I've just been to the spa. 

    Here is a quick little video of me giving you a quick preview of this cleansing brush. As you can see, I'm all about the pink...

    Have you ever used a face brush or cleansing tool like this one? Do you want to try one? I'd love to hear from you in the comments below!

    Spring Blossoms in Korea

    It's officially the start of Spring here in Korea and I couldn't be happier. Not just because of the warmer weather, but more so because I get to photograph pretty blossoms like the ones below. From these photographs you'd think that the whole of Korea is covered in gorgeous blossoms, but that just isn't so. I had to really work hard to manoeuvre myself in all kinds of ways to make sure I didn't get the ugly buildings, street lights and apartment blocks in the background of these photographs. These are just the first few signs of Spring, I hope to bring many more blossoms here soon!

    In the mean time, enjoy!

    x

    Dominique & the Snow

    Snow Inspired Styled Photoshoot in South Korea by Roxy Hutton of CGScreative-05.png

    During the last snowfall we had here in Korea, my stylist friend and I decided to do one last styled shoot before she left Korea to return home to South Africa. It was a freezing cold afternoon in Jeungeup, a small town in the South West part of Korea, and we broke up the shoot into two parts; one filled with snow and the other a more tropical styled shoot. These are the photographs from the first half of our shoot.

    I've done a number of other styled shoots, including blueberries & temples, beaches and flowers. Click here to see them.

    To Dominique our model, thank you for being so patient and for being so dam easy to photograph. Thank you for braving the old in the outfits we chose for you, and for being such so amenable to the poses we put you in. From these photographs it's impossible to guess that you you've never modelled before, you really photograph beautifully.

    To Aimee our makeup artist, thank you for bringing our ideas together with our brushes and your makeup. You really are so good at what you do and I hope we can work together again soon.

    And finally to Storm, your creativity and enthusiasm is limitless my friend. Cape Town is lucky to have you back.

    If you're a makeup artist, model, photographer, stylist or graphic designer here in Korea and would like to work together on a styled shoot, please do get in touch with me! You don't have to be professional in any sense of the word, it's all about having fun! You can also see more of my work by clicking here.